Introduction
This article will demonstrate how to configure both Azure and RouterOS to publish the data using the HTTPS protocol. RouterOS, in this scenario, is going to act as a gateway and publish the data that is broadcasted by the BLEtag to the cloud (Azure).
Before we proceed with the settings, you need to create an account in the Azure system. You can find more information on how to do that following this link.
Azure has many different options and services that they provide and many of those options/services have a pricelist. You can find more information about pricing following the link.
Azure configuration
Once you have a subscription setup (Azure Portal>All Services>Subscriptions), you will need to configure a resource group, an IoT hub, a device and generate a SAS token.
Resource Group
Go to All Services>Resource groups and create one.
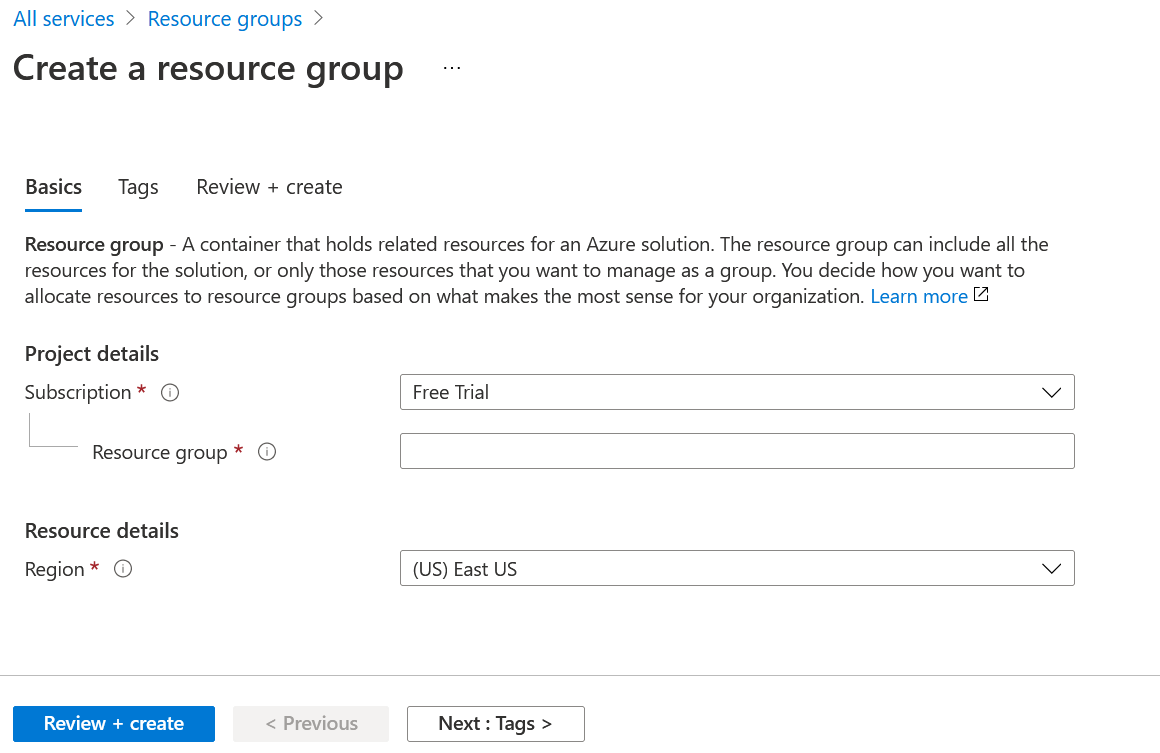
You can find a more detailed guide following the link.
After successfully configuring a resource group, you will need to create an IoT hub.
IoT Hub
Navigate to All services>IoT Hub and create one.
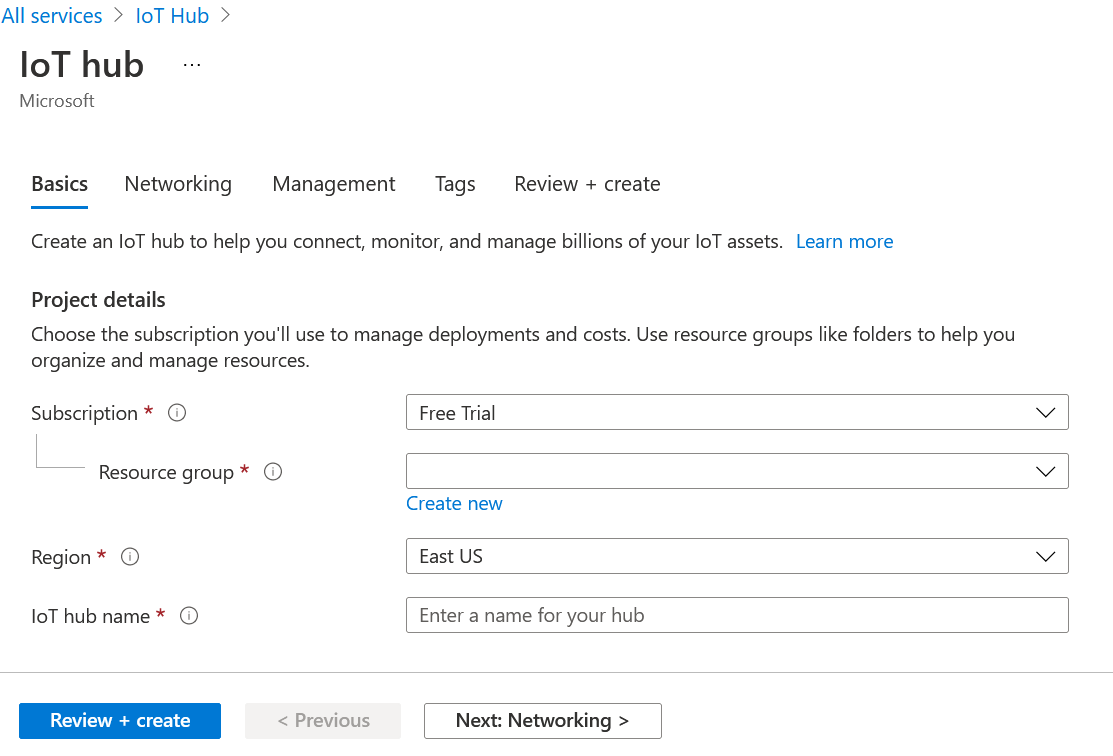
Link your IoT Hub to the previously created resource group. Do not forget to check/set up "Networking" (Network connectivity) and Management (a subscription tier) tabs.
You can find more information over here.
Devices
Navigate to your IoT Hub>IoT Devices and add a new device:
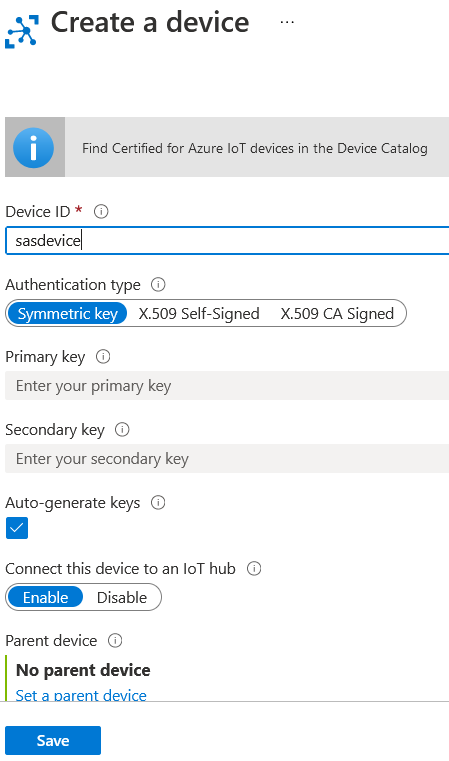
Chose Authentication type=Symmetric Key and save the setting.
SAS Token
In our example, we will be using the Visual Studio Code program to generate the SAS token.
Simply, download the program and connect it to your IoT Hub.
When it is done and the previously configured device name shows up in your IoT HUB - right-click on the device name and generate the token as shown in the screenshot below:
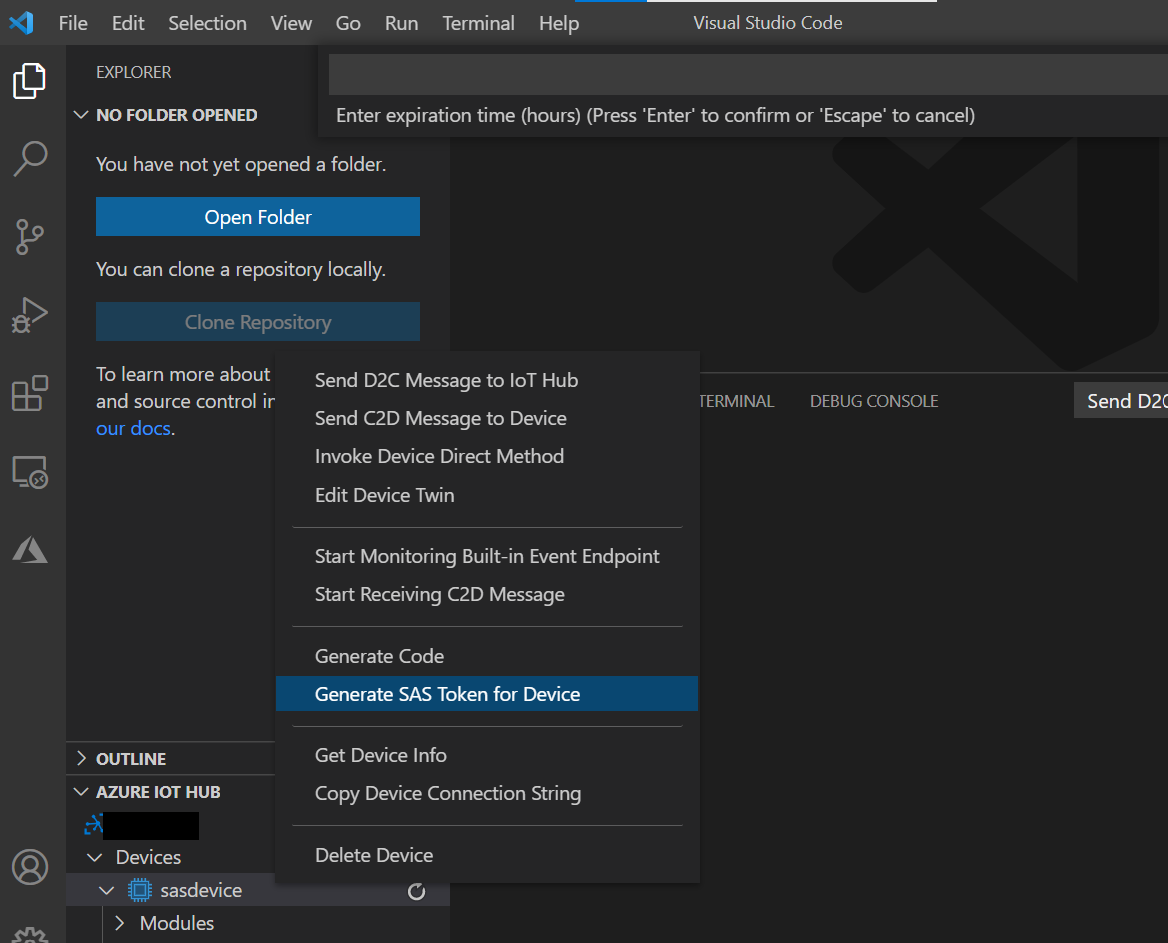
You will be asked to enter the expiration time (in hours) for the token and to press "enter" to confirm the setting.
After this step, the token should be generated in the "OUTPUT" field:
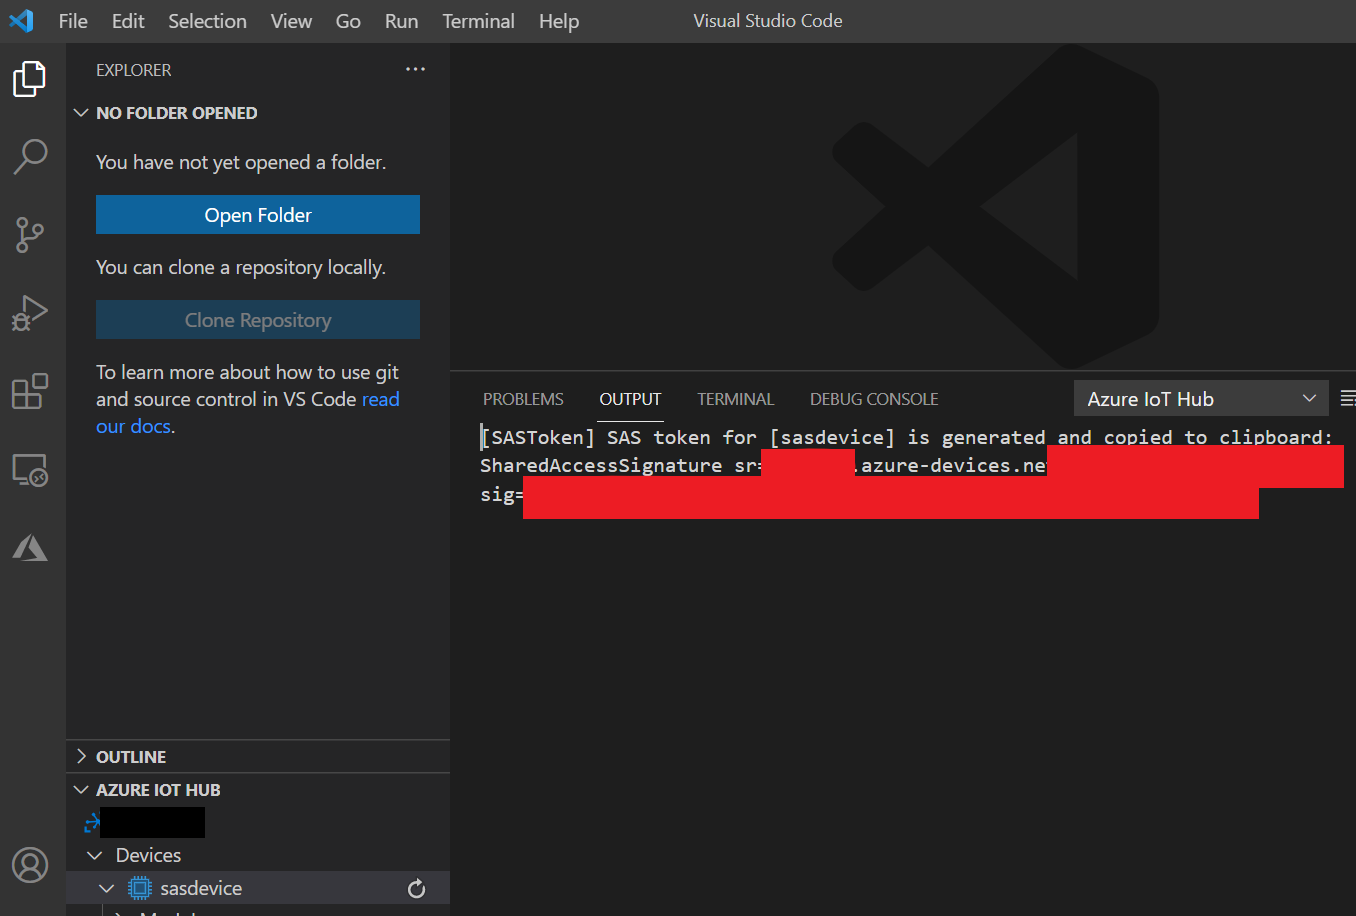
Copy the token, as it is going to be used later in our HTTPS post script.
With this, the Azure part of the configuration is complete.
RouterOS configuration
In this guide, we are using KNOT as a gateway and a script (created specifically for the KNOT) to publish the data. In your specific application scenario, you can use any RouterOS device to post any data that you need.
HTTPS post with a script
HTTPS post can be achieved using the fetch tool. In order to post the data from the Bluetooth tag (in our example, TG-BT5-XX) to Azure, we will be using the script. Script example is shown below and can be downloaded using this link.
Every line that begins with a symbol "#" is instructional and it describes the parameter that is going to be configured below the line. Change the parameters within quotation marks "" that would apply to your specific case.
################################ Configuration ################################
# Interface whose MAC should be used as 'Locator ID'
:local locatorIface "ether1"# POSIX regex for filtering advertisement Bluetooth addresses. E.g. "^BC:33:AC"
# would only include addresses which start with those 3 octets.
# To disable this filter, set it to ""
:local addressRegex ""# POSIX regex for filtering Bluetooth advertisements based on their data. Same
# usage as with 'addressRegex'.
:local advertisingDataRegex ""# Signal strength filter. E.g. -40 would only include Bluetooth advertisements
# whose signal strength is stronger than -40dBm.
# To disable this filter, set it to ""
:local rssiThreshold "-40"#################################### System ###################################
:put ("[*] Gathering system info...")
:local ifaceMac [/interface get [/interface find name=$locatorIface] mac-address]
:local cpuLoad [/system resource get cpu-load]
:local freeMemory [/system resource get free-memory]
:local usedMemory ([/system resource get total-memory] - $freeMemory)
:local rosVersion [/system package get value-name=version \
[/system package find where name ~ "^routeros"]]
:local model [/system routerboard get value-name=model]
:local serialNumber [/system routerboard get value-name=serial-number]
# Health is a bit iffy since '/system health' does not have 'find' in ROS6
:local health [/system health print as-value]
:local supplyVoltage 0
:local boardTemp 0
:foreach entry in=$health do={
:if ($entry->"name" = "voltage") do={:set $supplyVoltage ($entry->"value")}
:if ($entry->"name" = "board-temperature1") do={:set $boardTemp ($entry->"value")}
}################################## Bluetooth ##################################
:put ("[*] Gathering Bluetooth info...")
:global btOldestAdvertisementTimestamp
:if ([:typeof $btOldestAdvertisementTimestamp] = "nothing") do={
# First time this script has been run since booting, need to initialize
# persistent variables
:set $btOldestAdvertisementTimestamp 0
}
:local btProcessingStart [/system clock get time]
:local advertisements [/iot bluetooth scanners advertisements print detail \
as-value where \
epoch > $btOldestAdvertisementTimestamp and \
address ~ $addressRegex and \
data ~ $advertisingDataRegex and \
rssi > $rssiThreshold
]
:local advJson ""
:local advCount 0
:local advSeparator ""
:local lastAdvTimestamp 0
# Remove semicolons from MAC/Bluetooth addresses
:local minimizeMac do={
:local minimized
:local lastIdx ([:len $address] - 1)
:for idx from=0 to=$lastIdx step=1 do={
:local char [:pick $address $idx]
:if ($char != ":") do={
:set $minimized "$minimized$char"
}
}
:return $minimized
}:foreach adv in=$advertisements do={
:local address ($adv->"address")
:local ts ($adv->"epoch")
:local rssi ($adv->"rssi")
:local ad ($adv->"data")
:local obj "\
{\
\"id\":\"$[$minimizeMac address=$address]\",\
\"ts\":$ts,\
\"rssi\":$rssi,\
\"ed\":{\
\"ad\":\"$ad\"\
}\
}"
:set $advCount ($advCount + 1)
:set $lastAdvTimestamp $ts
# Ensure that the last object is not terminated by a comma
:set $advJson "$advJson$advSeparator$obj"
:if ($advSeparator = "") do={
:set $advSeparator ","
}
}:if ($advCount > 0) do={
:set $btOldestAdvertisementTimestamp $lastAdvTimestamp
}
:put ("[*] Found $advCount new advertisements \
(processing time: $[([/system clock get time] - $btProcessingStart)])")#################################### message #####################################
:local message \
"{\
\"t\":0,\
\"v\":1,\
\"OldestAdvertisementTimestamp\":$btOldestAdvertisementTimestamp,\
\"locs\":[{\
\"id\":\"$[$minimizeMac address=$ifaceMac]\",\
\"tags\":[$advJson],\
\"ed\":{\
\"model\":\"$model\",\
\"sn\":\"$serialNumber\",\
\"ros\":\"$rosVersion\",\
\"cpu\":$cpuLoad,\
\"umem\":$usedMemory,\
\"fmem\":$freeMemory,\
\"psu\":$supplyVoltage,\
\"temp\":$boardTemp\
}\
}]\
}"
:log info "$message";
:put ("[*] Total message size: $[:len $message] bytes")
/tool fetch http-method=post output=user http-header-field="authorization:{sas_token}" http-data=$message url="https://{iot_hub_name}.azure-devices.net/devices/{device_id}/messages/events\?api-version=2020-03-13":put ("[*] Done")
1 script line should be taken into account:
/tool fetch http-method=post output=user http-header-field="authorization:{sas_token}" http-data=$message url="https://{iot_hub_name}.azure-devices.net/devices/{device_id}/messages/events\?api-version=2020-03-13"
Change the "{sas_token}" in the HTTP header to the token that was generated in the SAS Token section.
Change the {iot_hub_name} and {device_id} in the URL to the actual IoT Hub name and Device ID that were configured on the Azure portal.
The rest of the script configuration depends on the overall requirements. The script explains which exact parameters are configured to be published.
Navigate to System>Scripts, add a new script there, and paste the script that is shown above (name it, for example, script1).
To run the script, you can use the command line:
/system script run script1
Verification
There are many different ways to view the received/published message on the Azure portal. Please check Azure tutorials on the options you have.
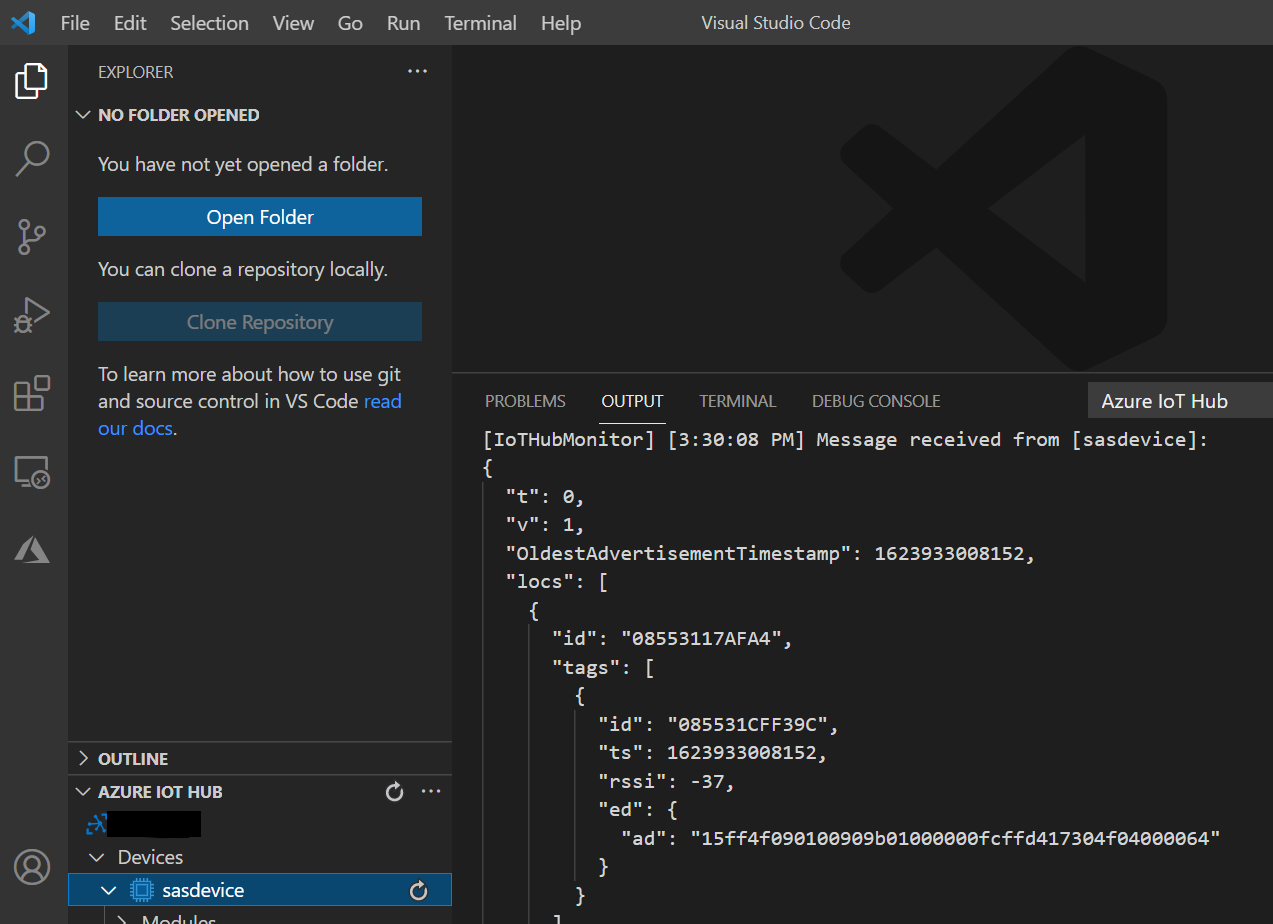
We will be using the Visual Studio Code program to verify the results.
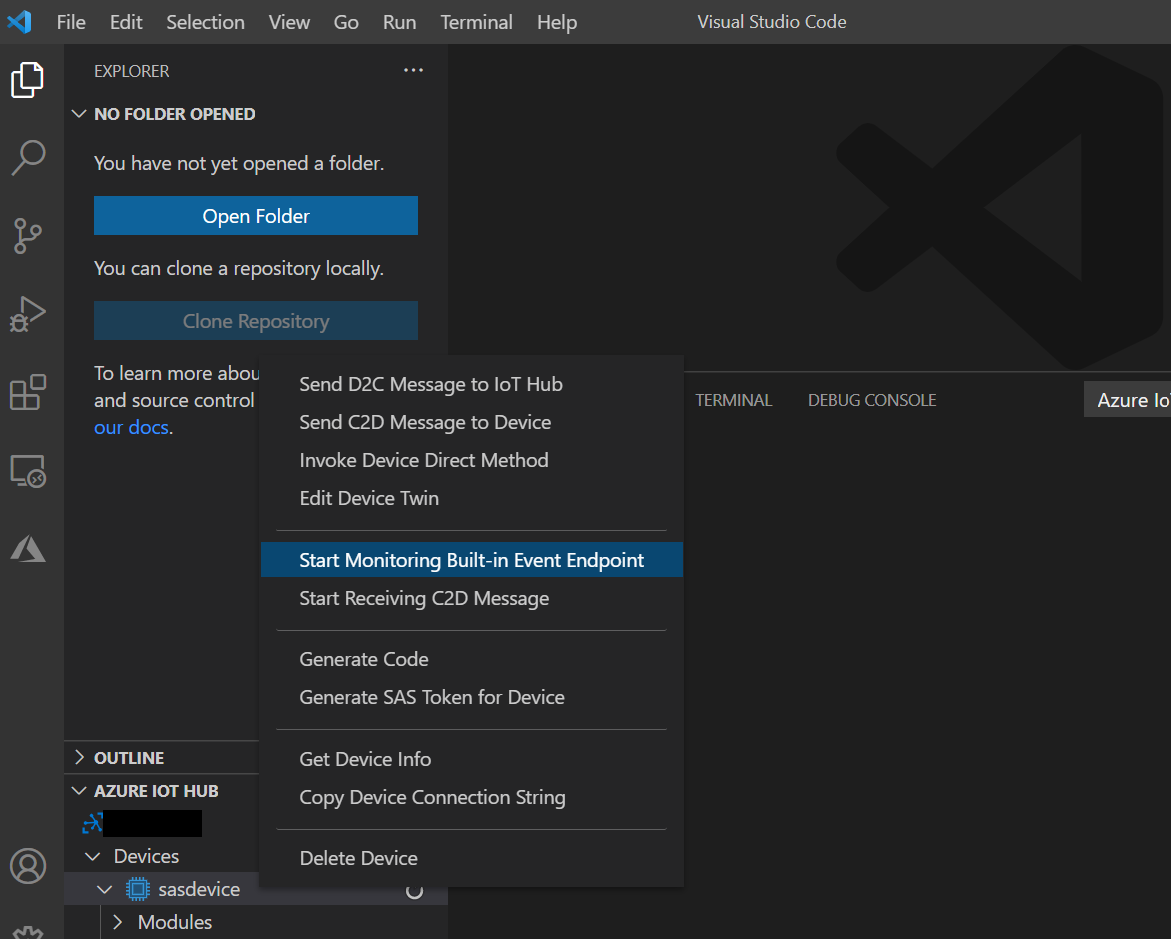
Open your IoT Hub and start monitoring the endpoint (the device):
You can view published messages in the "OUTPUT" section as shown in the screenshot below. Just run the script and check the received message: