...
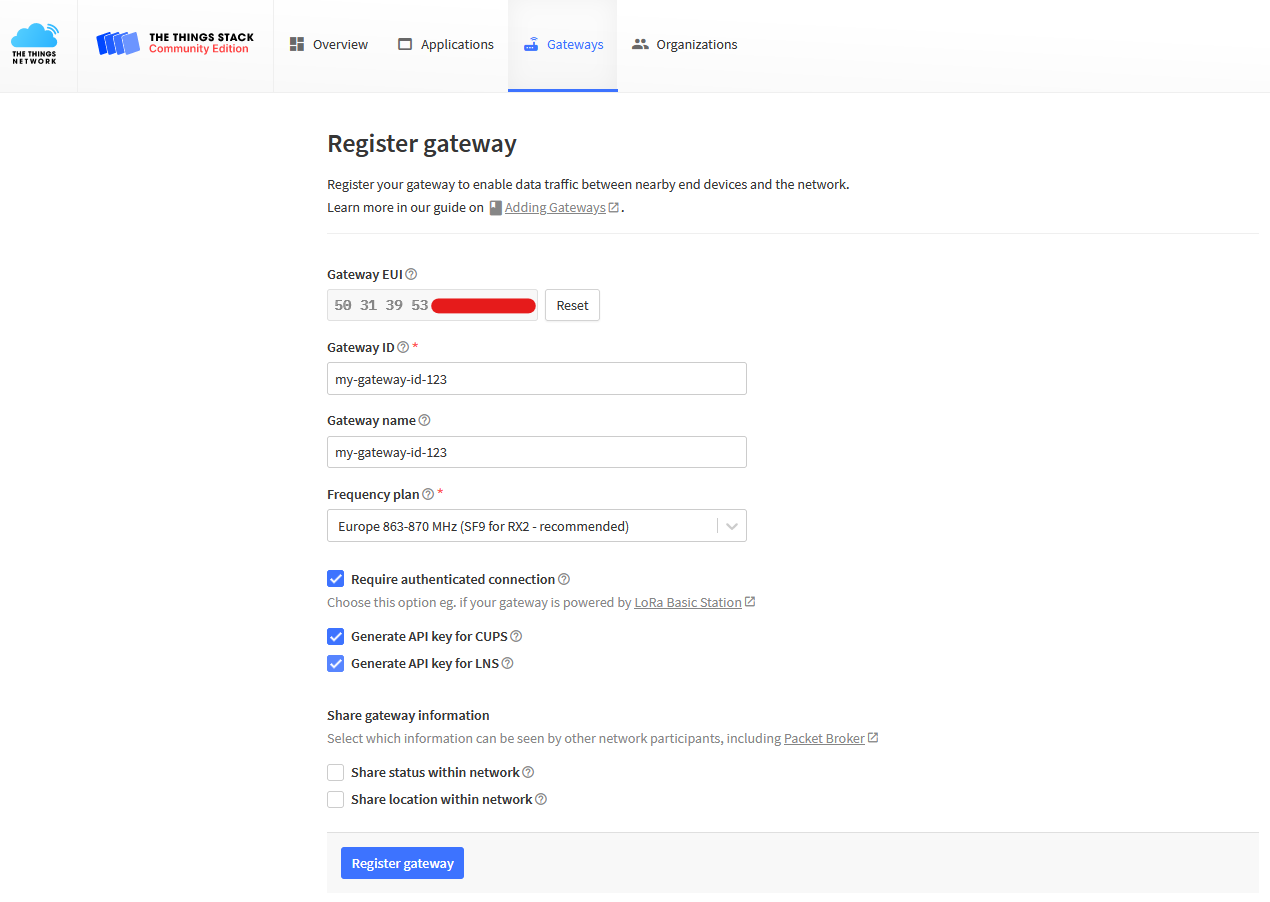
Fill in the blank spaces. Input Gateway EUI(in RouterOS, this value can be found under "IoT>LoRa>Devices>Gateway ID"). Make . Make sure to select a correct frequency plan.Do Do not enable "Require authenticated connection" option (it is used for LNS and CUPS)!

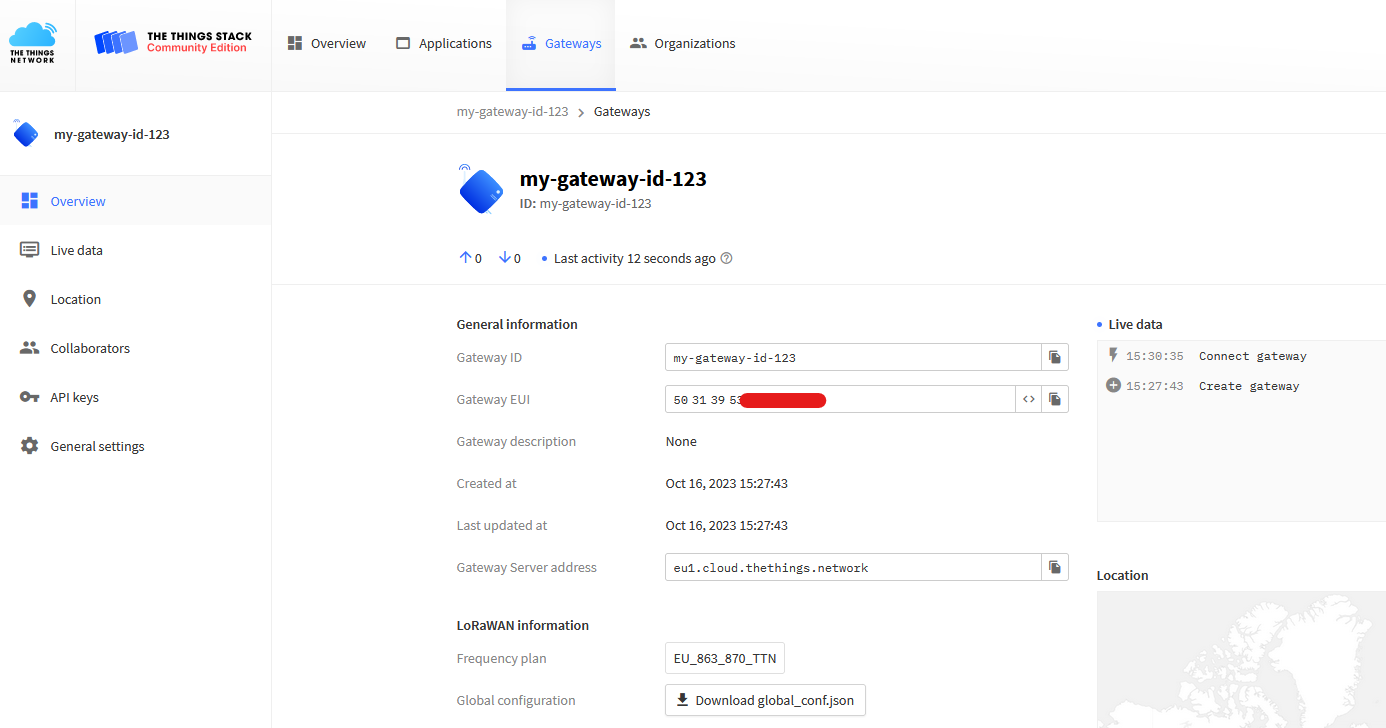
If everything is filled in correctly, right after you enable the LoRa interface in RouterOS (uner "IoT>LoRa>Devices>Enable"), you should see the gateway connection "Live data" update:

In RouterOS, Gateway EUI value can be found under "IoT>LoRa>Devices>Gateway ID"):

For additional information check their their documentation page.
UDP scenario RouterOS settings
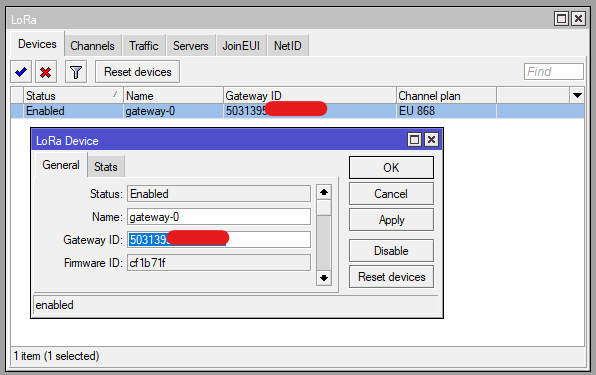
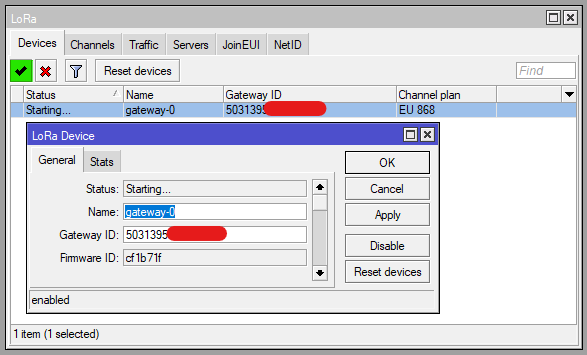
Double-check that the correct Gateway EUI is used:
...
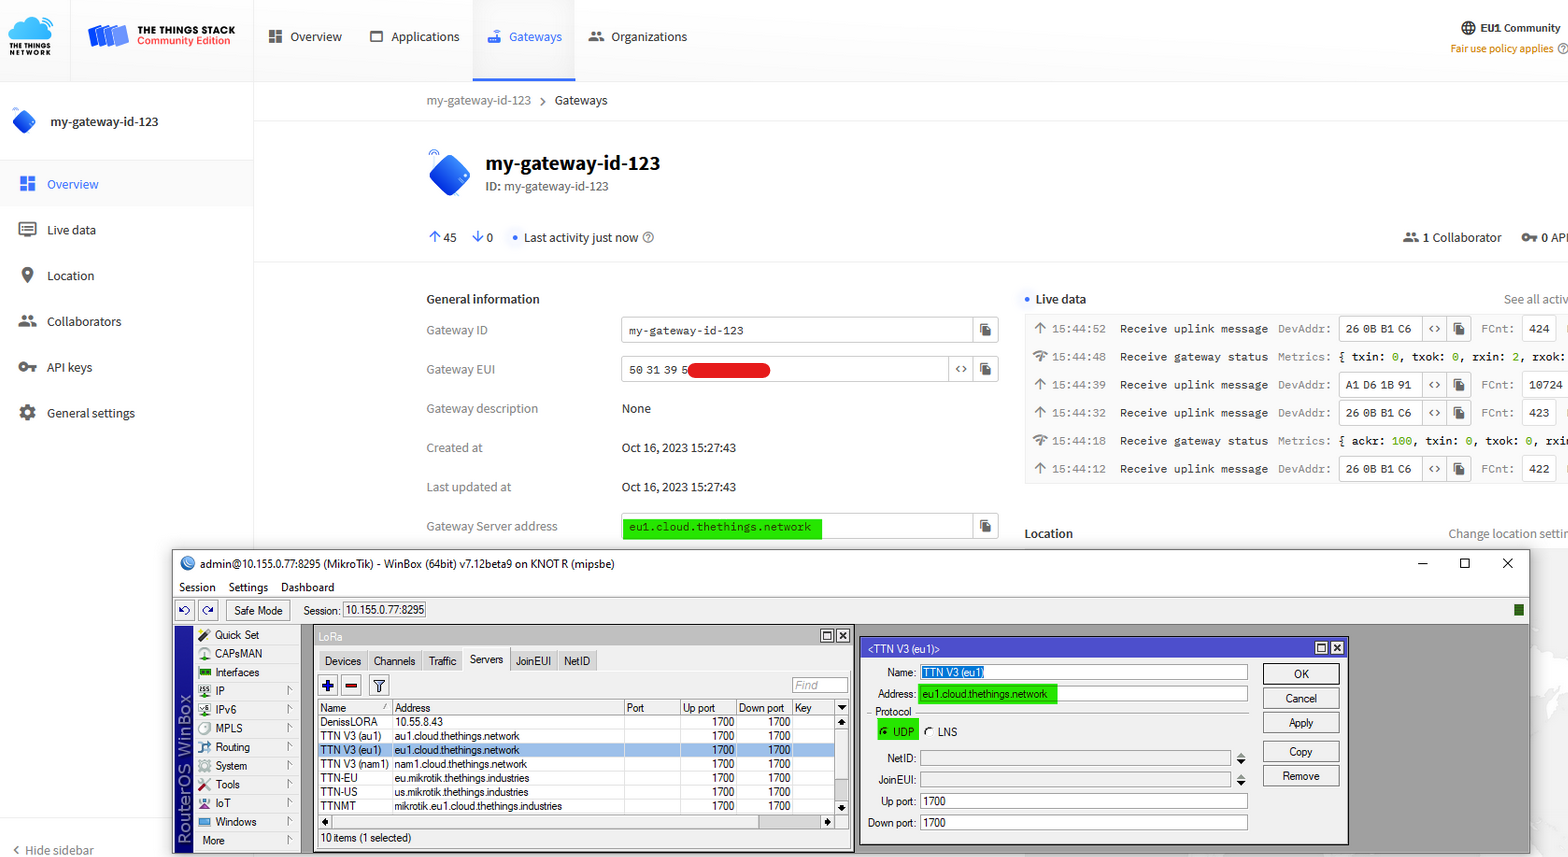
Double-check that the correct TTN server is selected by the LoRa device (in RouterOS) and that the server setting uses "UDP" protocol:

LNS and CUPS protocol gateway registration
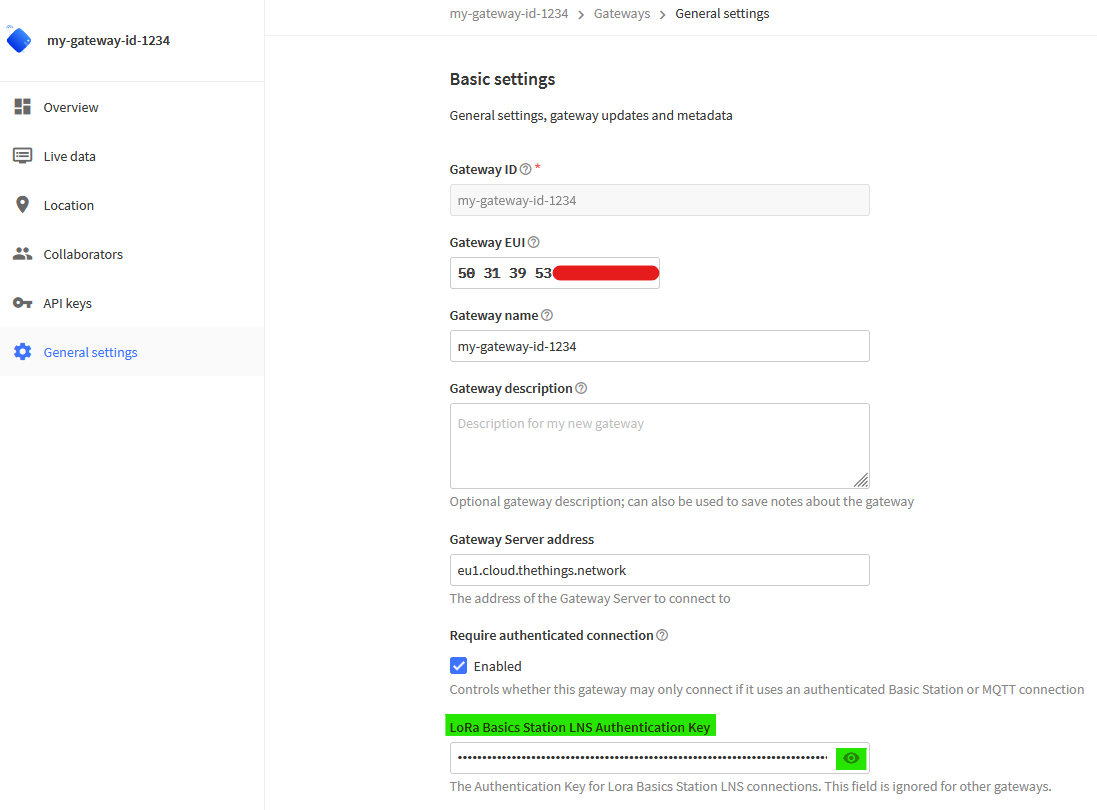
Fill in the blank spaces. Input Gateway EUI(in RouterOS, this value can be found under "IoT>LoRa>Devices>Gateway ID"). Make sure to select a correct frequency plan.Enable Enable "Require authenticated connection" and the follow-up (for LNS) "Generate API key for LNS" and (for CUPS) "Generate API key for CUPS" options:

Download LNS key:

In RouterOS, Gateway EUI value can be found under "IoT>LoRa>Devices>Gateway ID":
After clicking on "Register gateway" button, you should be prompted to download the keys. Download them.
To view LNS and CUPS keys, inspect download files. LNS key should also be visible You should be able to view the key under gateway's "General settings" menu, under the"LoRa Basics Station LNS authentication Key" field:

If everything is filled in correctly, right after you enable the LoRa interface in RouterOS (uner "IoT>LoRa>Devices>Enable"), you should see the gateway connection "Live data" update:

For additional information check their their documentation page.
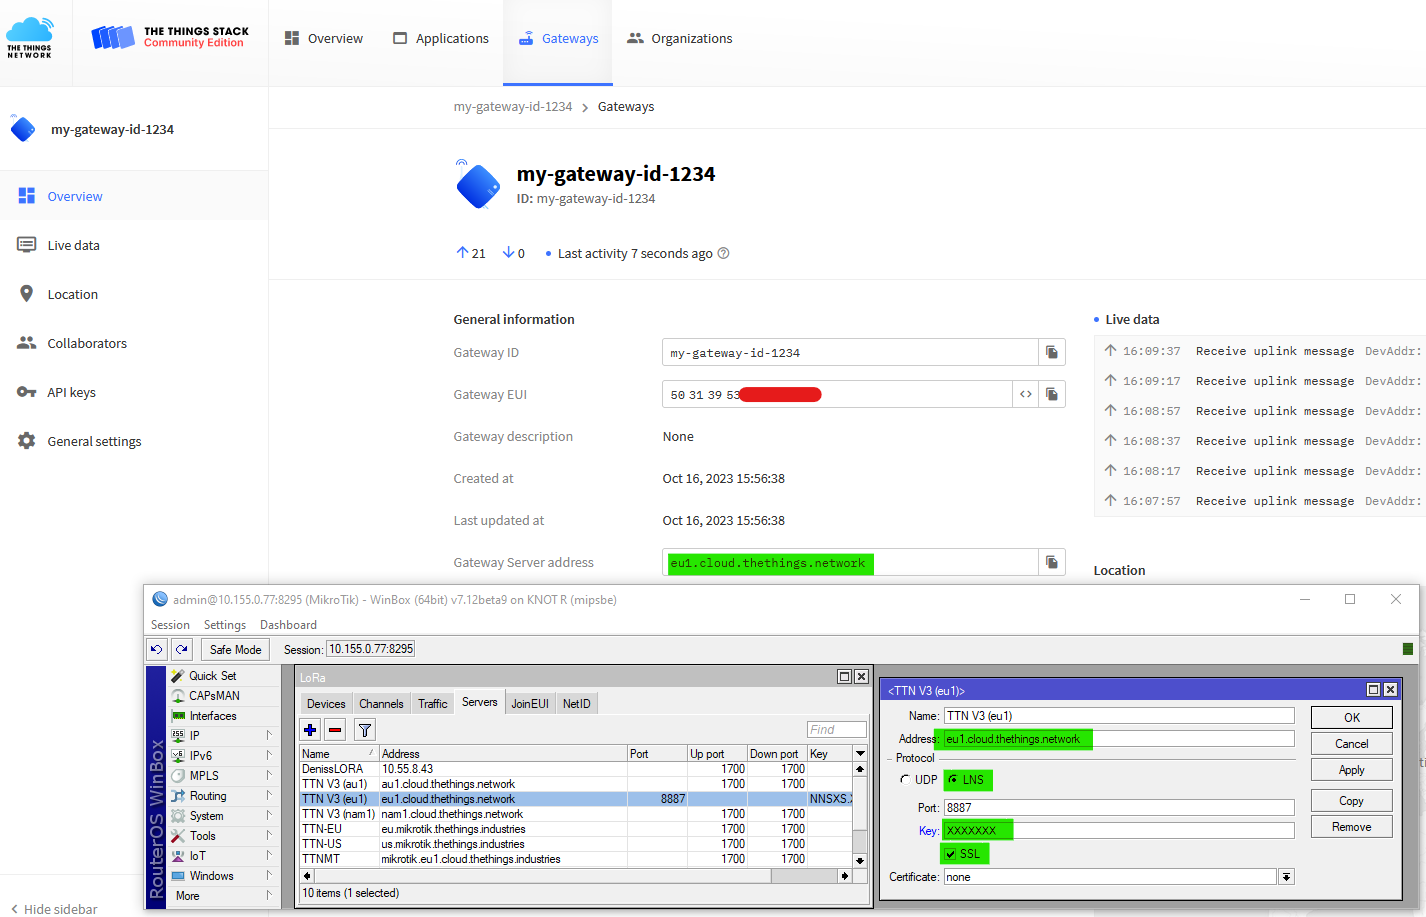
LNS scenario RouterOS settings
Double-check Make sure that the correct Gateway EUI is used:

Double-check TTN server is selected, that the correct TTN server is selectedport is configured (TTN expects LNS over 8887), that LNS protocol is usedchosen, that the LNS key (from the "LoRa Basics Station LNS authentication Key" field) is input and that "SSL" checkbox is enabled:

The last step is to download and import Root Certificates. The page has links to the required file.
After the certificate file was downloaded, drag and drop it into the RouterOS file menu and import the certificate list:
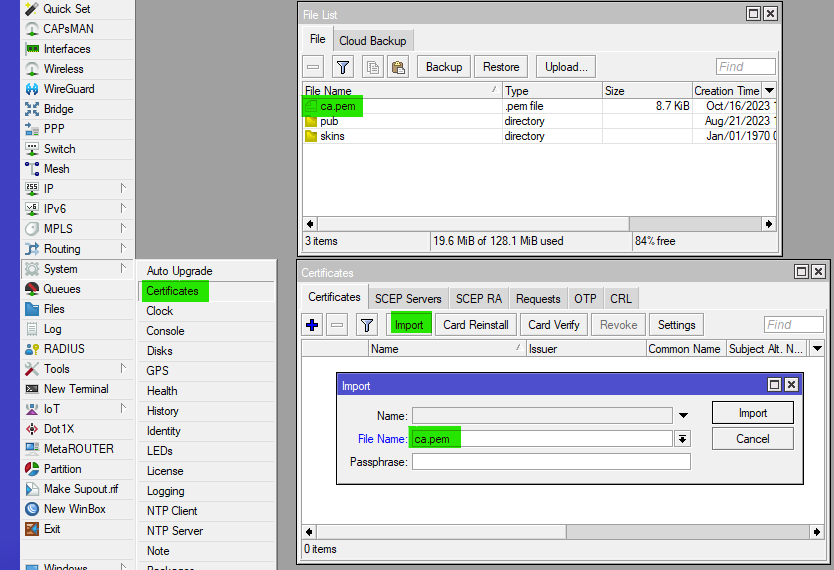
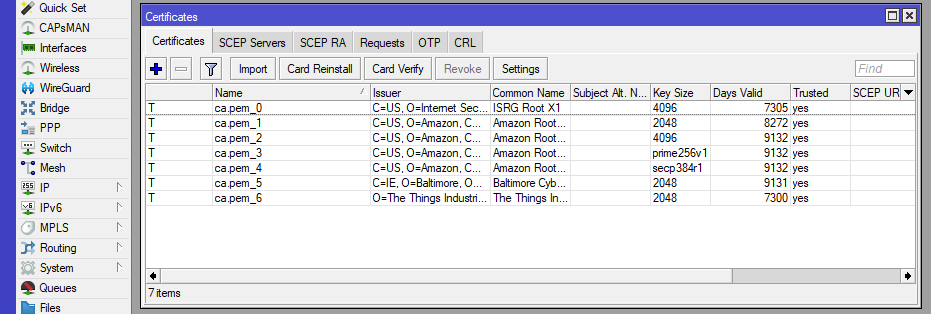
This should make the certificate list trusted:
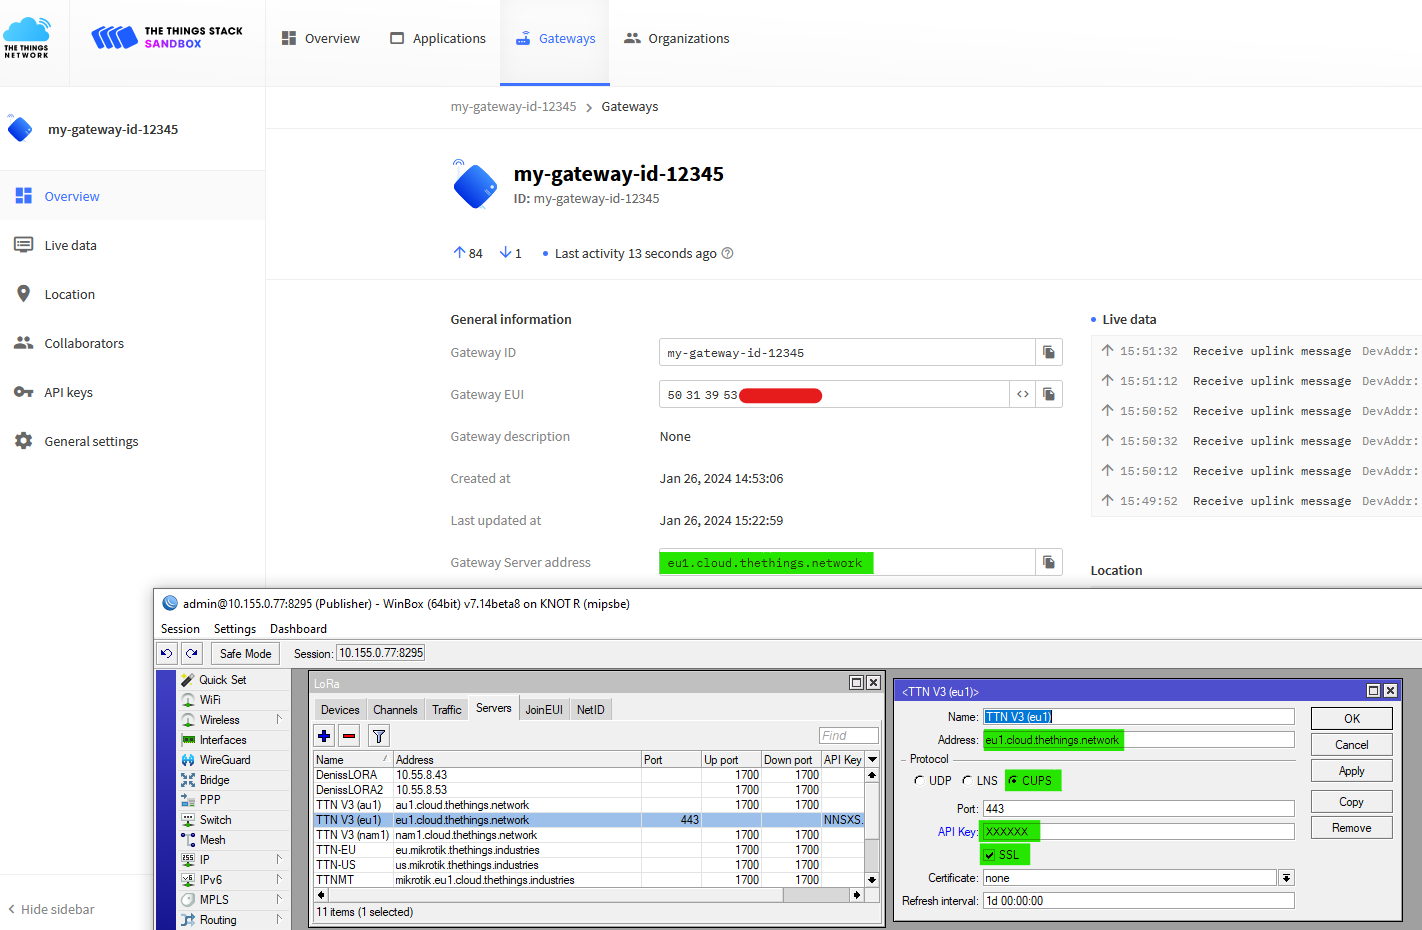
CUPS scenario RouterOS settings
Make sure that the correct TTN server is selected, that the correct port is configured (TTN expects CUPS over 443), that CUPS protocol is chosen, that the CUPS key is input and that "SSL" checkbox is enabled:
The last step is to download and import Root Certificates. The page has links where to download the required certificatesfile.
After the certificate file was downloaded, drag and drop it into the RouterOS file menu and import the certificate list:
...
This should make the certificate list trusted:
Verification
If everything is configured in correctly, right after you enable the LoRa interface in RouterOS ("IoT>LoRa>Devices>Enable"):
You should see the gateway connection "Live data" update: