...
If TAG 1 and TAG 2 (pallets) arrive in the "arrival" zone A, KNOT A will report to the server that both assets are within its Bluetooth range. If TAG 3 gets moved to zone C, the server will indicate it is within the KNOT C range. If TAG 1 and TAG 2 move toward the B zone, and stay on the edges between A and B zones, the server will show that it is in the overlapped area (at the same time within KNOT-A and KNOT-B ranges). If the tags move to the middle of the warehouse, the server will indicate that they are in all 3 zones at once, in the overlapping area.
Configuration
In this example, we will showcase a basic topology, when two KNOTs are used and we just want to know whether the tag is located in one part of the building or the other one (whether it is inside zone A or zone B).
ThingsBoard preparation
Check the guide over here to understand how the ThingsBoard and the RouterOS can be set up to utilize MQTT communication.
...
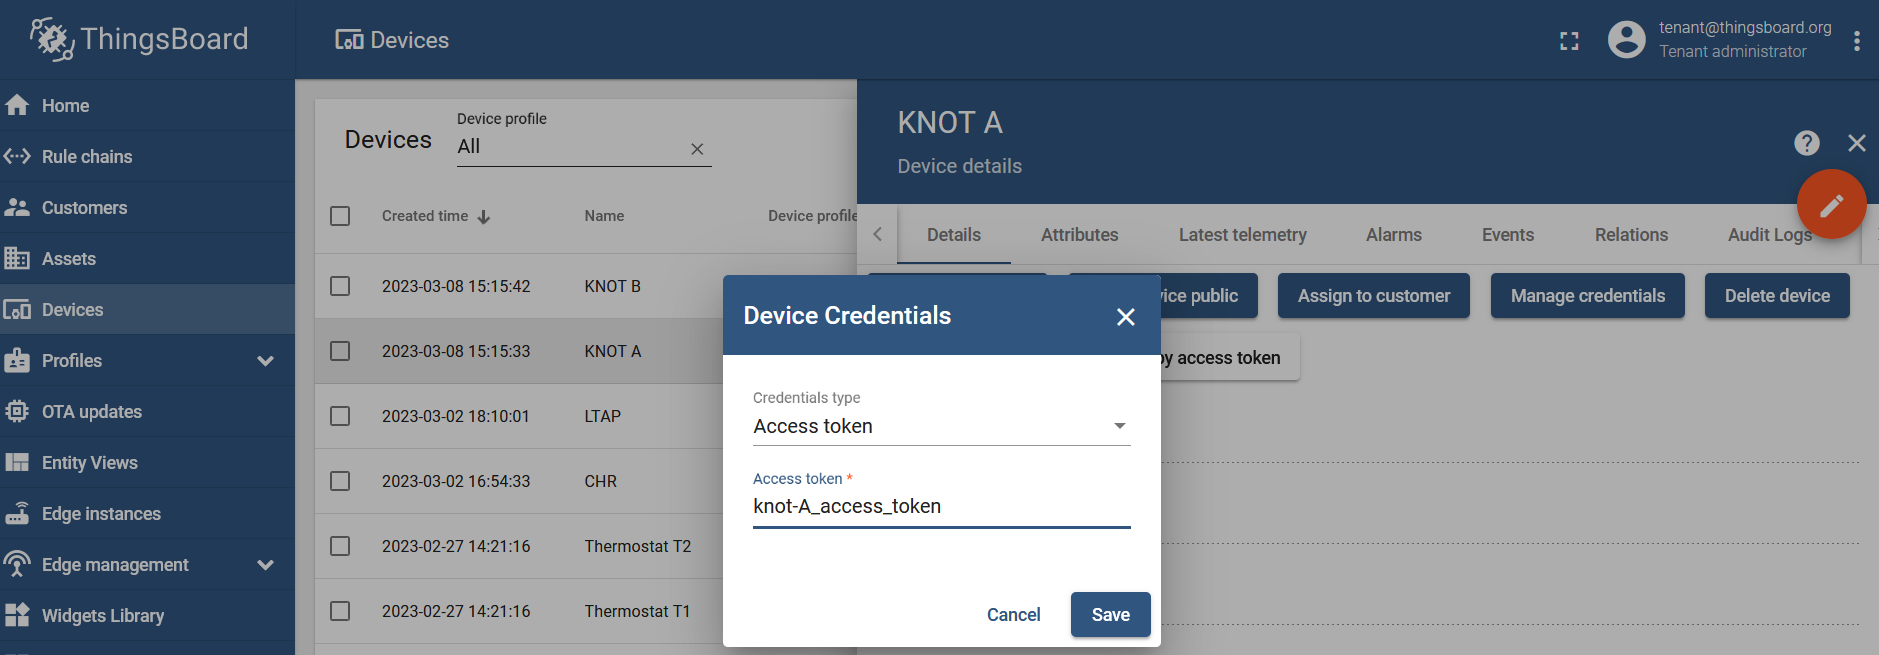
Set up a unique access token (unique credentials) for each KNOT under the device you've just created, under the "Manage credentials" tab:
RouterOS configuration
Preparation
Before we proceed, we need to confirm that our Bluetooth tag actually appears in the KNOT's Bluetooth range and that the KNOT detects them. To do that, you can issue the command "/iot bluetooth scanners advertisements print":
...
This is also the step, where you can see how the tag's RSSI changes based on the distance from the KNOT.
MQTT broker
On each KNOT setup MQTT broker.
...
For KNOT B → Do the same step. Just change username to the respective access token that was generated for the KNOT B device (gateway).
Script
Import the script shown below to each KNOT. To do that, just copy the below shown "code" and paste it into a new terminal window and press "ENTER":
...
| Code Block | ||
|---|---|---|
| ||
/system script run tracking |
Scheduler
Apply a scheduler to the script, so that RouterOS periodically initiates the script by itself:
...
The JSON message structured using the script has a "ts" value (timestamp) assigned for each payload received. Meaning that when the script is run, for example, every minute, 1 tag is used and the tag broadcasts 1 payload every 10 seconds (that is 6 payloads per minute) → ThingsBoard data (GUI) will be updated every minute, and every minute, 6 new entries will appear (each entry will indicate that it was received 10 seconds after the previous one). And if you send the message every 15 minutes when using 1 tag that is broadcasting a payload every 10 seconds (that is 6*15=90 payloads per 15 minutes) → ThingsBoard data (GUI) will be updated every 15 minutes but 90 entries will appear.
ThingsBoard data visualization and result verification
After you run the script with /system script run tracking or via a scheduler and refresh the GUI portal → all MAC addresses (tags) that are found in the JSON message, will be made into new devices under the ThingsBoard GUI:
...