Introduction
WebFig is a web-based RouterOS utility that allows you to monitor, configure and troubleshoot the router. It is designed as an alternative of WinBox, both have similar layouts and both have access to almost any feature of RouterOS.
As Webfig is platform-independent, it can be used to configure a router directly from various devices without the need for software developed for specific platforms. In other words, there is no need to install additional software.
WebFig allows performing three basic actions:
- Configuration - view and edit current configuration;
- Monitoring - display the current status of the router, routing information, interface stats, logs, etc;
- Troubleshooting - RouterOS has built-in many troubleshooting tools (like ping, traceroute, packet sniffers, traffic generators, etc) and all of them can be used with WebFig
Connecting to a Router
As we already know from the First Time Configuration section, the device by default has username admin and no password configured. Simply open a Web browser and in the search bar type device IP address which by default is 192.168.88.1. Be sure your device has IP address from the same network, for example, 192.168.88.2 otherwise Layer3 communication will not work.
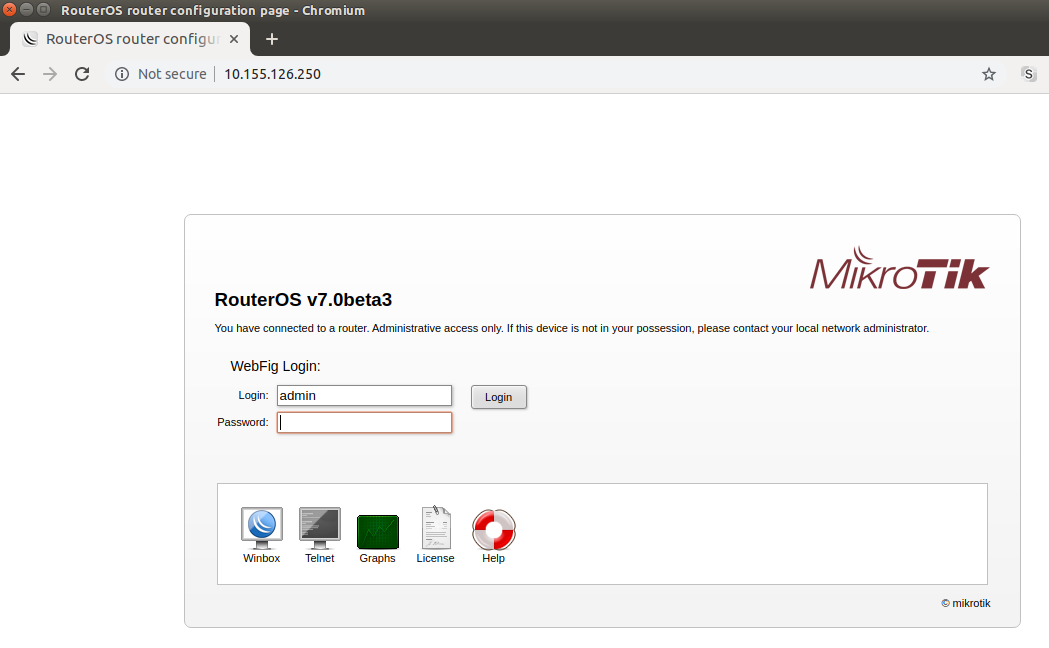 In our example, we will use IP address 10.155.126.250 to connect to the device via WebFig.
Enable HTTPS
For HTTPS to work properly, you need to specify a valid certificate that WebFig can use. You can use a certificate that is issued by a trusted Certificate Authority (CA) or you can create your own root CA and generate self-signed certificates.
WebFig supports wildcard certificates. You can generate such a certificate by specifying a wildcard in the common-name property, for example, common-name=*.mikrotik.com.
To generate your own certificates and enable HTTPS access, you must configure the following:
Create your own root CA on your router and sign it
[admin@MikroTik] > certificate add name=local-cert common-name=local-cert key-usage=key-cert-sign,crl-sign
[admin@MikroTik] > certificate sign local-cert
  progress: done
In case you already have set up your own CA or you are using a service that signs certificates for you, then you need to create and sign the certificate remotely and import the certificate on the router later. In case you are importing a certificate, then make sure you mark the certificate as trusted.
Create a new certificate for WebFig (non-root certificate)
[admin@MikroTik] > certificate add name=webfig common-name=192.168.88.1
[admin@MikroTik] > certificate sign webfig
  progress: done
[admin@MikroTik] > certificate print
Flags: K - private-key; A - authority; T - trusted
Columns:NAME        COMMON-NAME     FINGERPRINT
0  KAT  local-cert  local-cert      9b6363d033c4b2e6893c340675cfb8d1e330977526dba347a440fabffd983c5d
1  KAT  webfig      192.168.88.1    9f84ac2979bea65dccd02652056e5559bcdf866f8da5f924139d99453402bd02
Enable www-ssl and specify to use the newly created certificate for WebFig
[admin@MikroTik] > ip service
set www-ssl certificate=webfig disabled=no
You can now visit https://192.168.88.1 and securely configure your router.
By default, browsers will not trust self-signed certificates, you will need to add the certificate as trusted on the first time you visit the page in your browser. Another approach is to export the root CA certificate and import it as a trusted root certificate on your computer, this way all certificates signed by this router will be considered as valid and will make it easier to manage certificates in your network.
Most Internet browsers have their own certificate trust chain and work independently of the operating system's certificate trust chain, this means that you may have to add your own root CA's certificate as a trusted certificate in your browser settings since trusting the certificate in your operating system's settings might not have any effect when using your Internet browser.
Skins
WebFig Design Skin is a handy tool to make the interface more user-friendly. It is not a security tool. If the user has sufficient rights it is possible to access hidden features by other means.
Designing skins
If the user has sufficient permissions (the group has the policy to edit permissions) Design Skin button becomes available. Pressing that toggle button will open interface editing options.
To prevent the user from accessing the Design Skin menu, disable Policy "policy" under the user group configuration.
Possible operations are:
- Hide menu - this will hide all items from the menu and its submenus;
- Hide submenu - only certain submenu will be hidden;
- Hide tabs - if submenu details have several tabs, it is possible to hide them this way;
- Rename menus and items - make certain features more obvious or translate them into your language;
- Add a note to the item (in detail view) - to add comments on the field;
- Make item read-only (in detail view) - for user safety very sensitive fields can be made read only;
- Hide flags (in detail view) - while it is only possible to hide a flag in detail view, this flag will not be visible in list view and in detailed view;
- Add limits for the field - (in detail view) where it is the list of times that are comma or newline separated list of allowed values:
- number interval '..' example: 1..10 will allow values from 1 to 10 for fields with numbers, for example, MTU size.
- field prefix (Text fields, MAC address, set fields, combo-boxes). If it is required to limit prefix length $ should be added to the end. For example, limiting the wireless interface to "station" only, "Add limit" will contain "station$"

- Add Tab - will add a gray ribbon with an editable label that will separate the fields. Ribbon will be added before the field it is added to;
- Add Separator - will add a low height horizontal separator before the field it is added to.
Note: Number interval cannot be set to extend limitations set by RouterOS for that field
Note: Set fields are arguments that consist of a set of check-boxes, for example, setting up policies for user groups, RADIUS "Service"
Note: Limitations set for combo-boxes will also limit the values selectable from the dropdown
Skin design examples
If you need to limit the user for some services
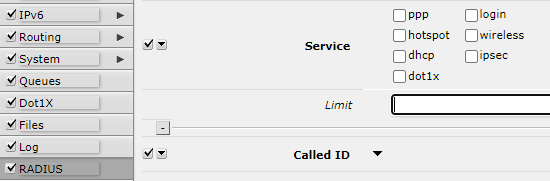
Add a limit to the RADIUS Service.
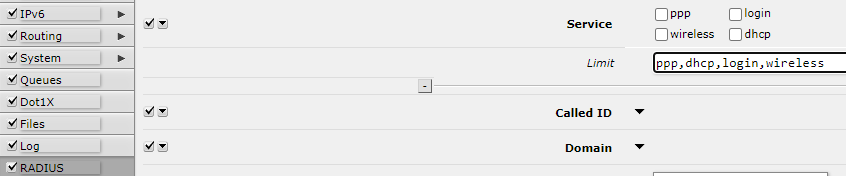
The result will be only those services, that are pointed in the "Limit" field.
Using skins
To use skins you have to assign the skin to the group. When that is done, users of that group will automatically use the selected skin as their default when logging into WebFig or WinBox.
/user/group/set your_group_name skin=your_skin
If it is required to use created skin on another router you can copy files to the skins folder on the other router. On the new router, it is required to add copied skin to the user group to use it.