| Table of Contents |
|---|
Overview
MikroTik Beacon Manager application is designed for Bluetooth tag (TG-BT5-XX) configuration. Since the tags are Bluetooth-based devices, you have to enable Bluetooth on the phone before proceeding with the configuration.
...
If the list is empty, it means that all the nearby tags are in factory-sleep mode. Once the tag is in advertising or configuration mode, it will show up on the list. To wake up the tag from the factory sleep mode, put the magnet over the tag (activate the reed-switch) for 3-10 seconds.
| Info | ||
|---|---|---|
| ||
If the list does not capture any tags even though you are certain there is a tag in the phone's range → try turning on "Location=ON" in the phone's GPS settings. |
In the right upper corner of the screen there are 3 buttons:
...
Configuration can be altered in the "Settings" tab:
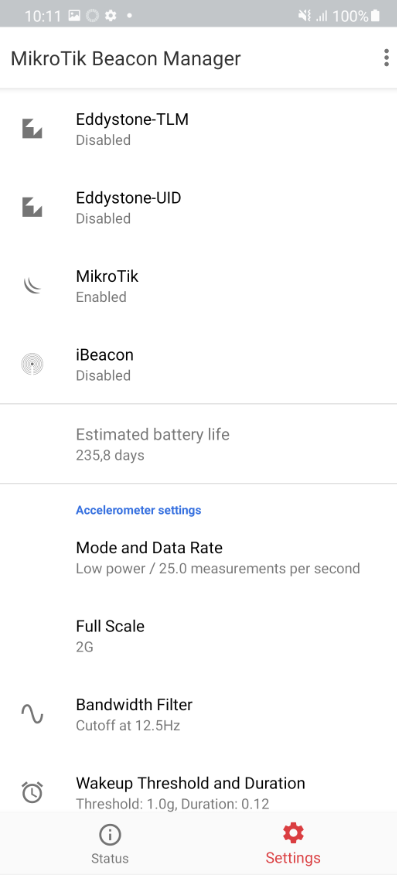
Beacon settings
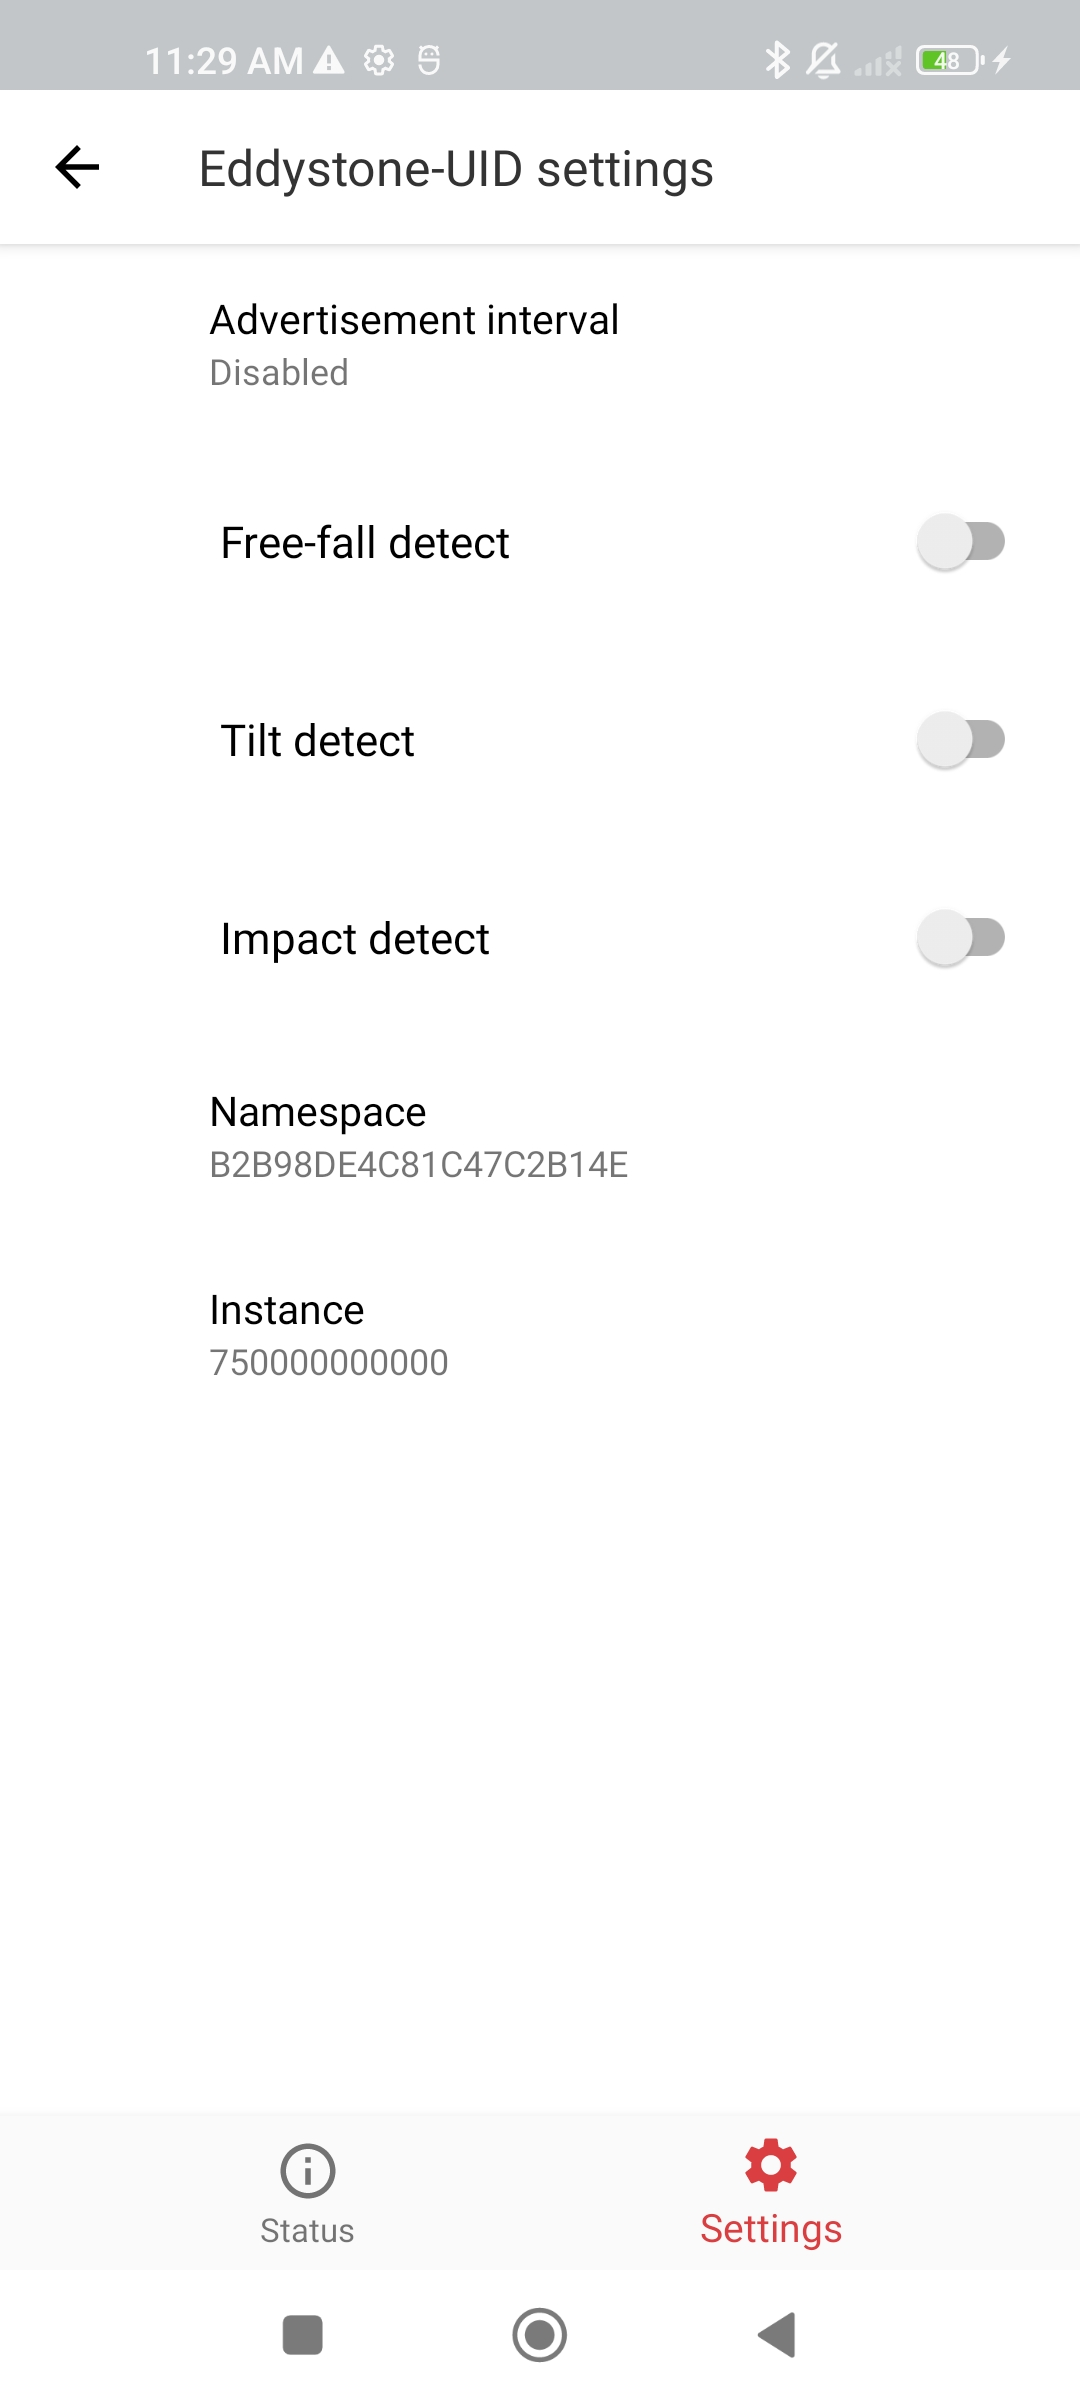
In advertising mode, the tag broadcasts information about itself in Bluetooth advertising packets. Information depends on the advertising packet type (the type can be changed in the settings).
At the moment, these are all the supported types:
Eddystone-TLM, Eddystone-UID, MikroTik, and iBeacon.
Eddystone-TLM, Eddystone-UID and iBeacon formats have an option to configure 4 parameters. MikroTik format has an option to configure an additional parameter called "encrypt":
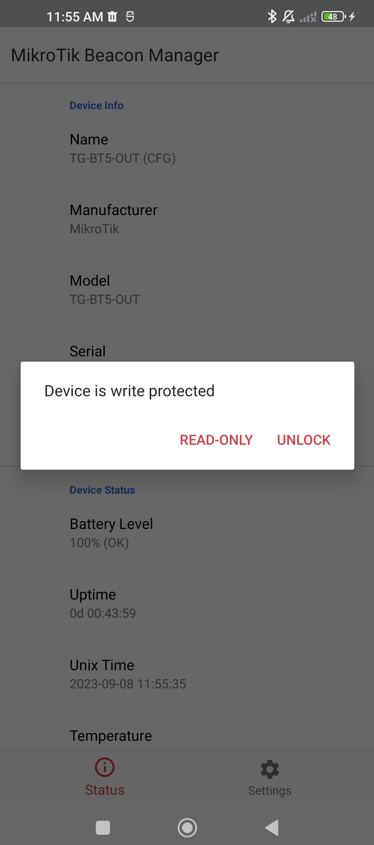
Write Protection
This menu allows you to lock the settings of the tag with a 6-symbol long password:
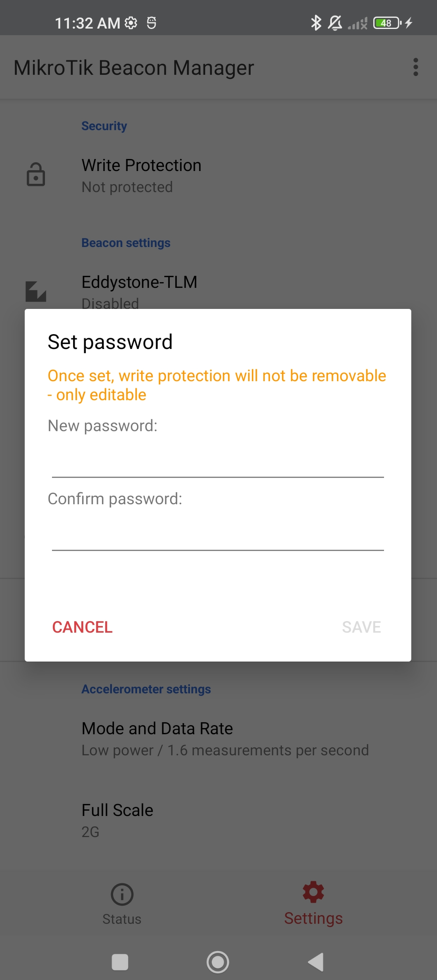
Once the password is set, there is no way to remove password protection (you can only edit it).
The next time you try to configure the tag, you will be notified that it is "write protected" and you can choose either to stay in the "READ-ONLY" mode (which allows you to browse/read through the settings and restricts making configuration changes) or to "UNLOCK" the settings by inputting the configured password:
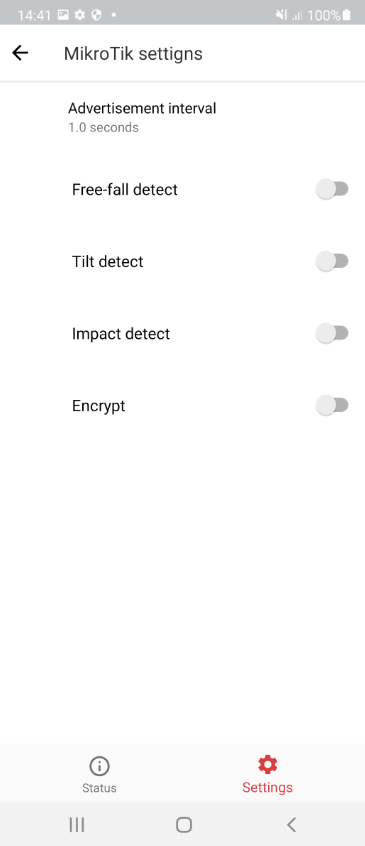
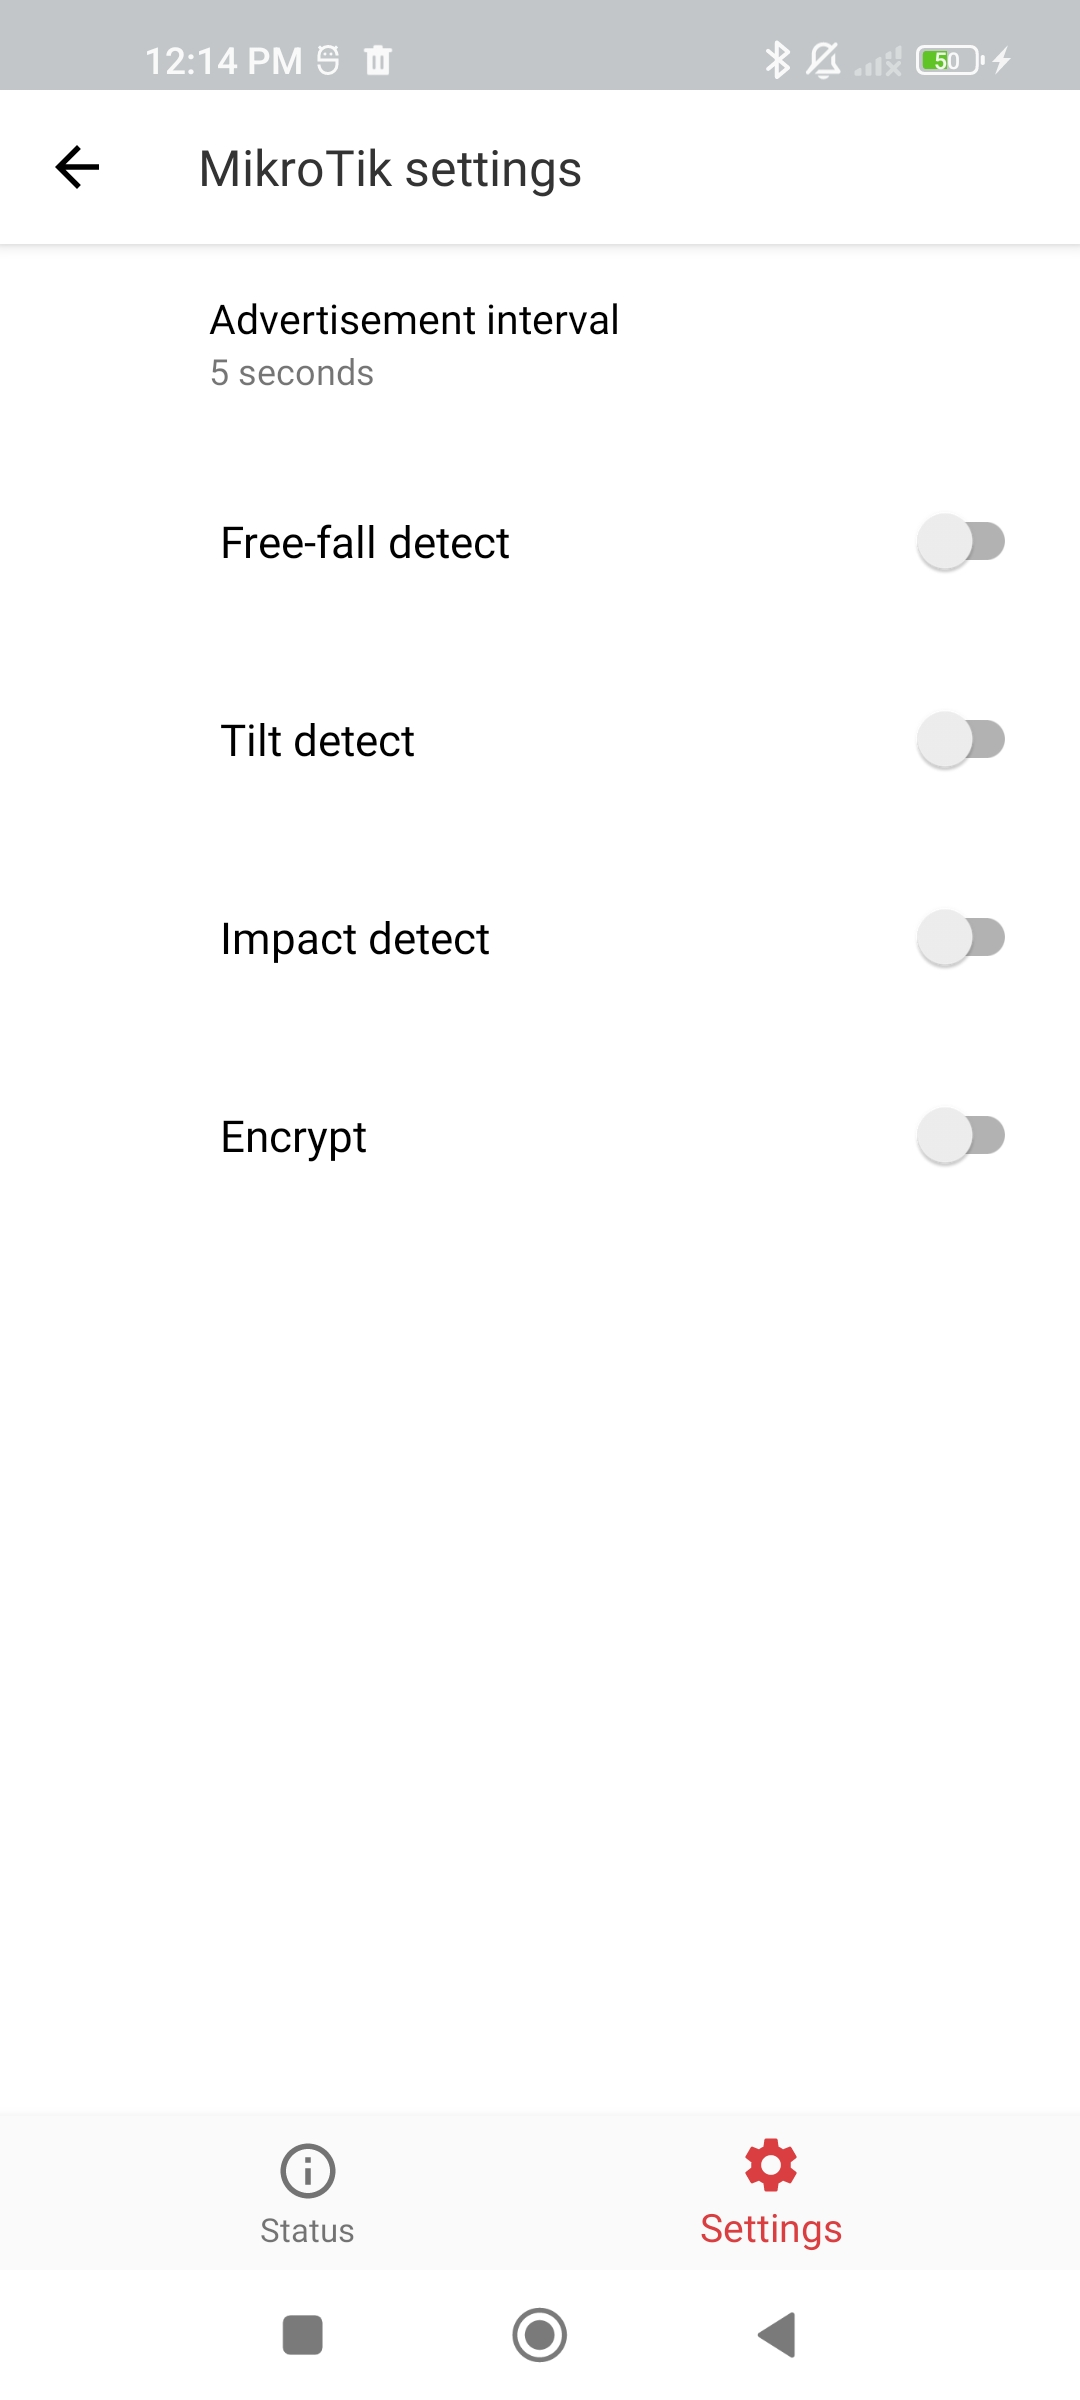
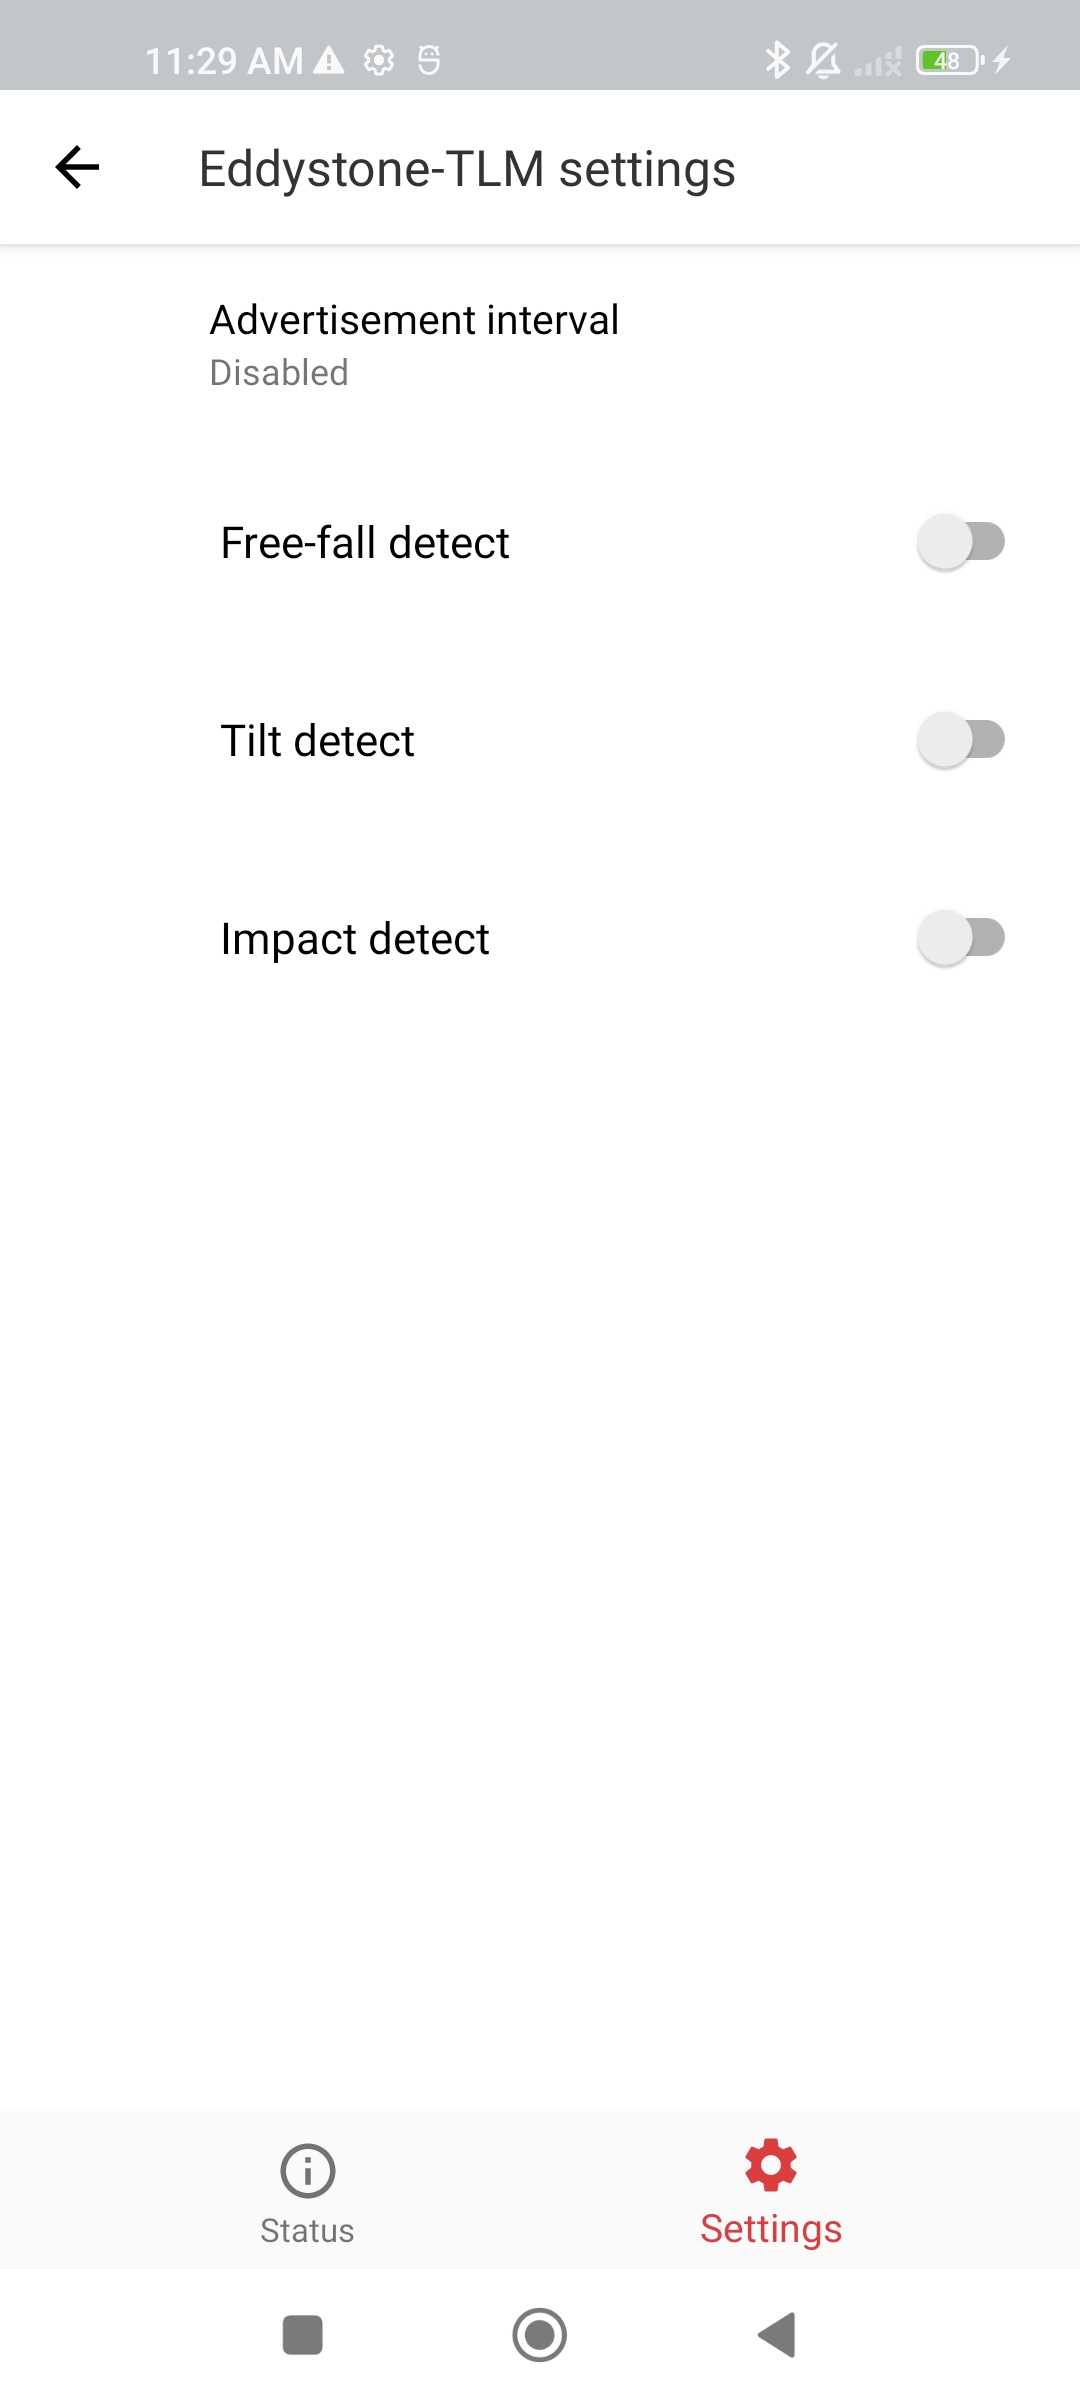
Beacon settings
In advertising mode, the tag broadcasts information about itself in Bluetooth advertising packets. Information depends on the advertising packet type (the type can be changed in the settings).
At the moment, these are all the supported types:
MikroTik, Eddystone-TLM, Eddystone-UID and iBeacon.

| Property | Description |
|---|---|
| Advertisement interval (20ms...10s or disable) | The interval in milliseconds after which an advertisement packet will be broadcasted by the tag. |
whether to send an advertisement when the accelerometer (the tag) detects a tilt trigger
Encrypt (on/off)
note: only available for MikroTik format
When you have only advertisement interval configured without any triggers enabled |
...
→ advertisement packets |
...
are broadcasted based on the interval time set ( |
...
each x seconds). |
...
| Freefall detect (on/off) | Whether to send an advertisement packet when the tag detects a freefall trigger |
...
. When the |
...
freefall trigger is enabled and the |
...
freefalling state is detected → the packet is sent |
...
. |
...
You can decipher the trigger/conditions in the hex dump of the advertisement packet. You can find more information on how to do that following the link.
Estimated battery life
This section displays the estimated battery life:

Estimated battery life is heavily dependant on the number of advertising packets sent (configured to be sent). The app calculates how many packets are estimated to be broadcasted daily, for how long the tag will be active, and the estimate for the average daily power consumption.
Accelerometer settings
This section allows you to change the parameters shown in the screenshot below:
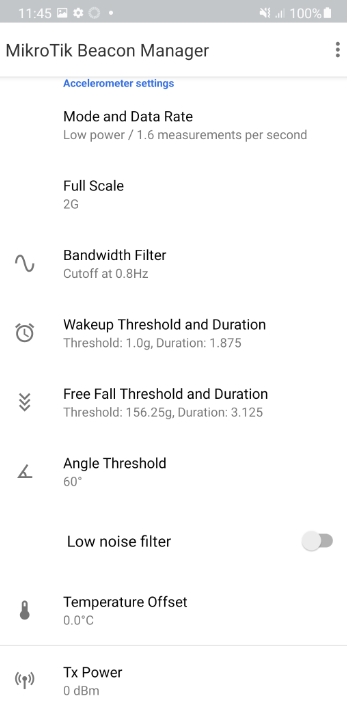
Mode and Data Rate
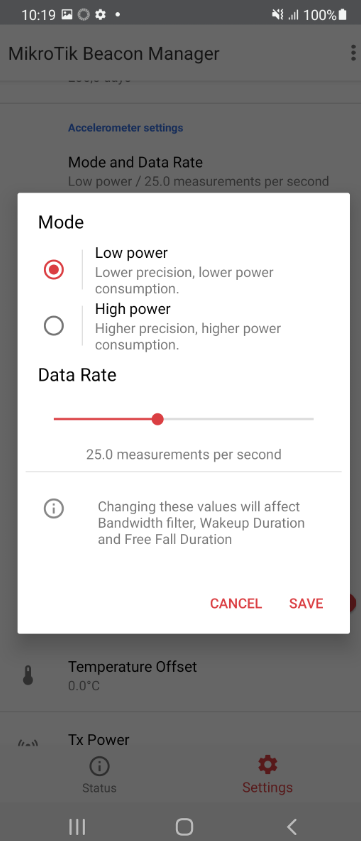
This menu allows you to choose between 2 modes: "Low power" and "High power". In "Low power" mode, you will get lower precision but also lower power consumption. In "High power" mode, you will get higher precision but also higher power consumption.
You can also change "Data Rate" settings which dictates how often the tag is going to broadcast advertising packets (per second). The fewer packets per second are sent → the lower the power consumption is.
Full Scale
Can vary between (2g...16g). It is the measurement range that is used to calculate the wake-up threshold. Full scale defines the range of acceleration, that the accelerometer is capable of measuring (the bigger the range, the lower the accuracy of the measured acceleration).
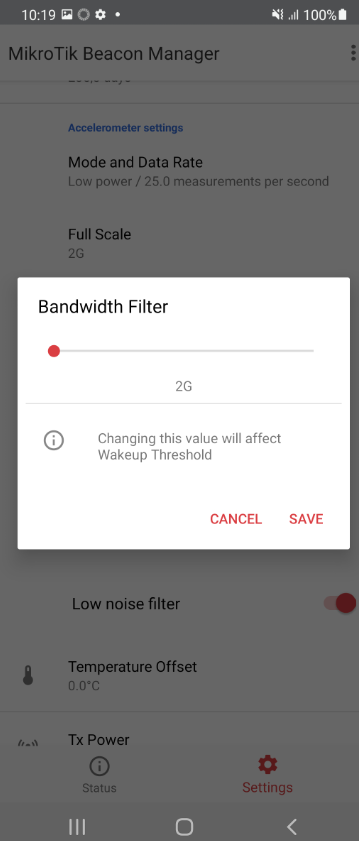
Bandwith Filter
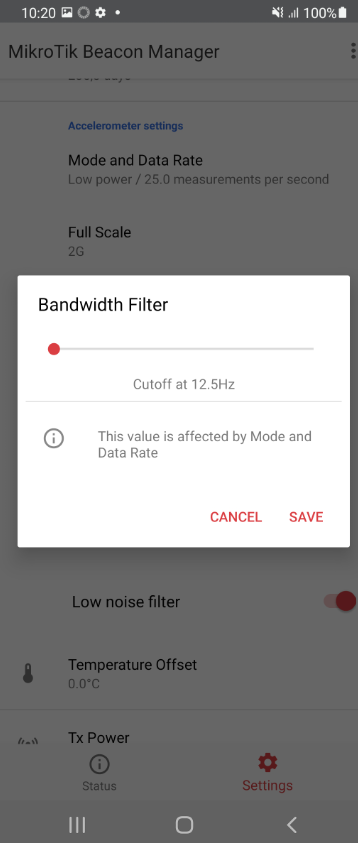
Is a digital filtering cutoff (a high pass filter bandwidth).
If the bandwidth = "x" Hz, then the tag will filter out changes to acceleration that happen less frequently than "x" times a second.
For example, if the device is laying on the table, the acceleration will show 0g (instead of 1g), even though the earth's gravity is present → (because the earth's gravity is constant - its frequency of change is 0 Hz, which is < "x" Hz) it gets filtered out.
Wakeup Threshold and Duration
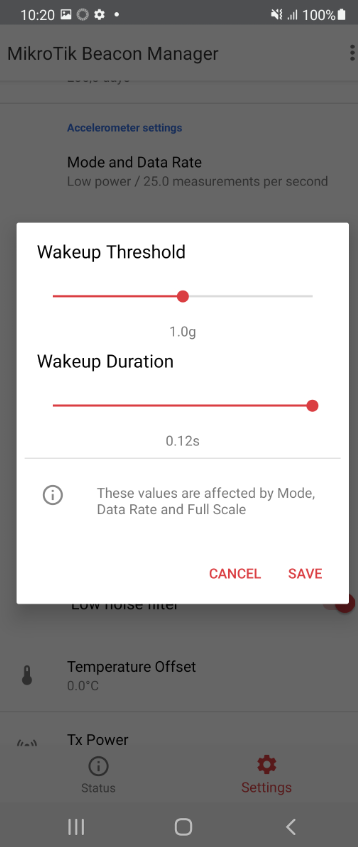
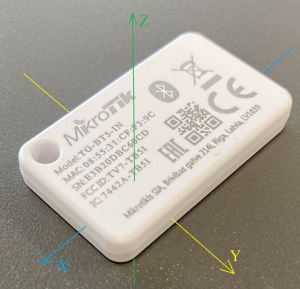
The "Wakeup Threshold" defines a wakeup zone/acceleration range. The "Wakeup Duration" defines the time during which the acceleration is over the configured wakeup threshold. A wakeup event will be generated (a wakeup condition will be triggered) when the acceleration on any axis (X, Y, or Z) exceeds a threshold for the configured wakeup duration. To better understand what is meant by "acceleration on any axis (X, Y, or Z)", imagine a 3-D Cartesian coordinate system and in the origin point (common point) the tag's accelerometer or the tag itself:
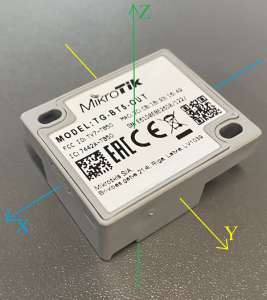
For example, the wakeup threshold is set to 1.0g (it means that any acceleration between -1.0g to +1.0g falls under the configured threshold/acceleration range) and the wakeup duration is set to 0.12s. As a result, as soon as the device is pushed/thrown against any of the axis (the device begins moving in any direction) with the acceleration exceeding the configured threshold (acceleration> +1.0g or acceleration< -1.0g) for longer than 0.12s → wakeup condition is triggered.
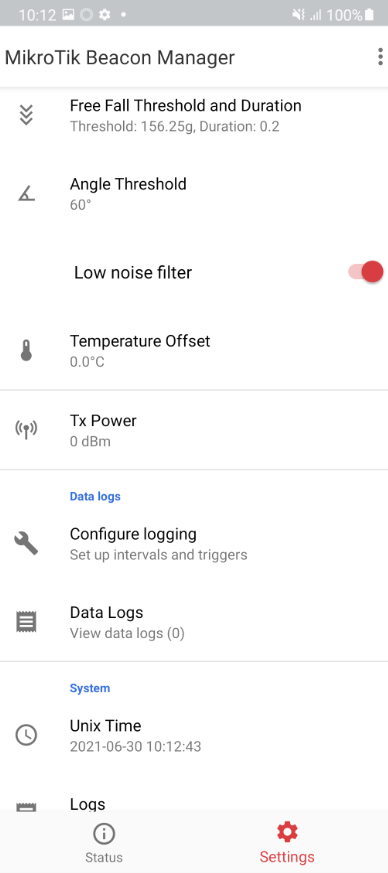
Free Fall Threshold and Duration
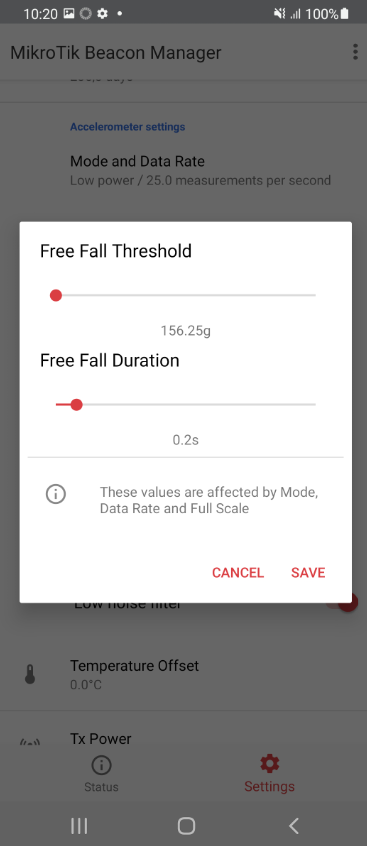
The "Free Fall Threshold" defines a free-fall zone/acceleration range. The "Free Fall Duration" defines the time during which the acceleration is going to be within the configured free-fall threshold. The free-fall event will be generated (free-falling condition will be triggered) when the acceleration on all 3 axes (X, Y, and Z) is within the free-fall zone/threshold for the configured free-fall duration. To better understand what is meant by "acceleration on all axis (X, Y, and Z)", check the device photoes above in the "Wakeup Threshold and Duration" section.
For example, the freefall threshold is set to 156.25g (it means that any acceleration between -156.25g to +156.25g falls under the configured threshold/acceleration range) and the freefall duration is set to 0.2s. As a result, as soon as the device is in a freefalling state with acceleration on all axis within the configured threshold (-156.25g<acceleration<+156.25g) for longer than 0.2s → a freefalling condition is triggered.
Angle Threshold
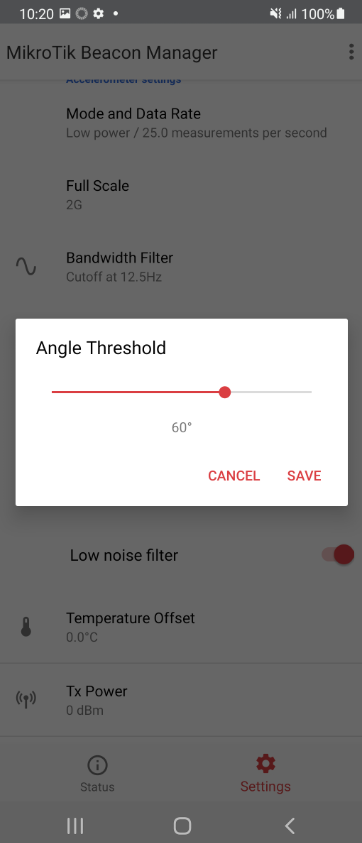
Can vary between 50°...80°. It is the threshold for a tilt function. When the threshold is set to, for example, 60° and the device is tilted by that degree - the tilt action is triggered and the advertisement packet is sent.
Low noise filter

An option to enable or disable a low noise filter. A low noise filter is used to reduce noise density in the measurements. Enabling this feature will slightly increase power consumption.
Temperature Offset
note: TG-BT5-IN model does not have a temperature sensor
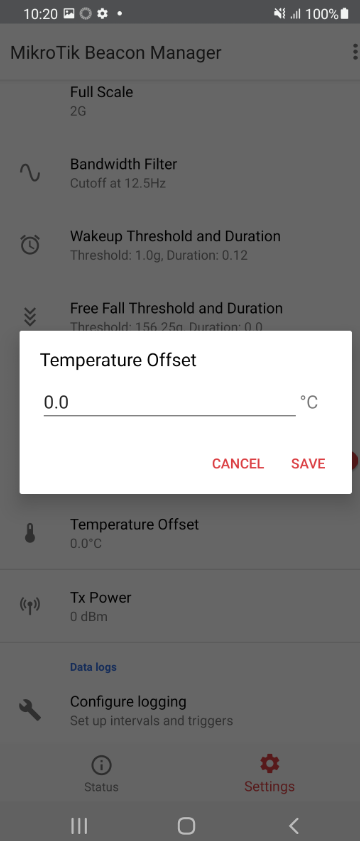
Can vary between -10°C...+10°C. Offset in centicelsius to apply to raw temperature measurements.
Tx Power
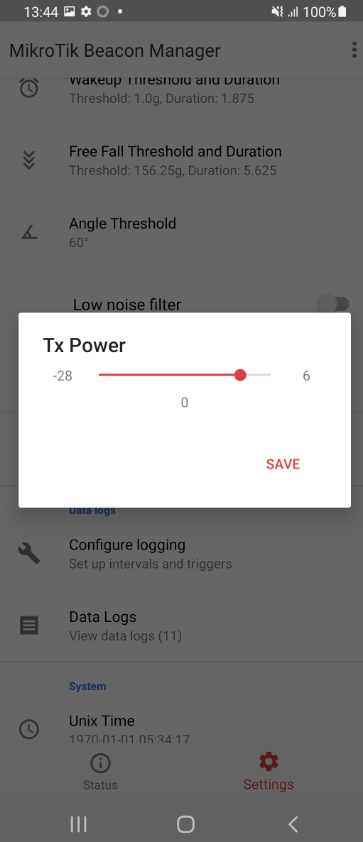
The transmit power level in decibel-milliwatts. Can vary between -28dBm...6dBm. Tx Power is simply used to increase/decrease transmit power of the tag.
Data logs
note: this section is available only for the TG-BT5-OUT model
This section allows you to configure/view logs (that are only accessible using the app):
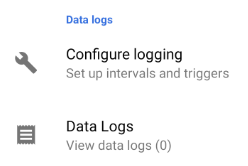
Configure logging
In the "Configure logging" menu, you can set up logging settings:
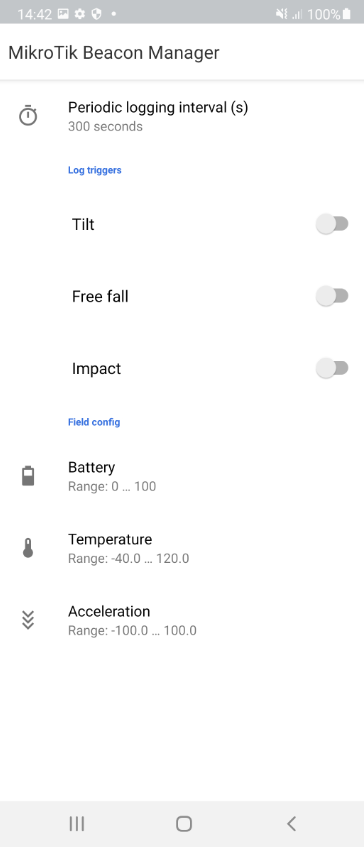
You have an option to set up "Periodic logging interval (s)" (or you can disable it). When enabled, the data logs will automatically get saved every "x" seconds:
Another option is to enable "Log Triggers" (periodic logging and trigger logging can be used together). When log triggers are used - logs will be saved whenever the tilt, free fall, and/or impact action is detected.
For example, when a tilt trigger is enabled and is detected by the tag - the message is logged.
You can set up which parameters are going to be logged in the "Field config" section:
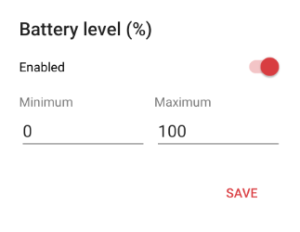

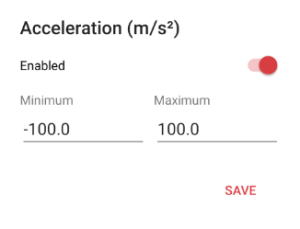
You have an option to log 3 parameters: 1) Battery level; 2) Temperature; 3) Acceleration.
You can disable each parameter if you are not interested in it and you can also set up the thresholds for them.
If you are not interested in logging battery level unless it is less than 40%, you can set up a threshold from minimum=0% to maximum=40%, and, as a result, the battery level (battery level percentage) is going to be displayed in the log only when it is in-between the configured range. The same principle applies to the other 2 parameters.
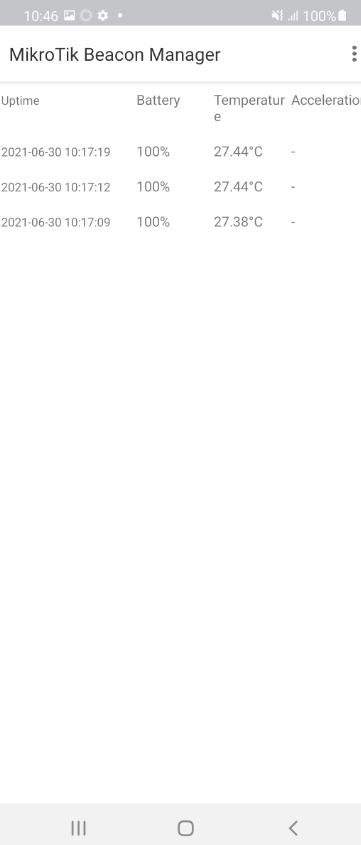
Data Logs
The logged messages will be displayed in the "Data Logs" tab:
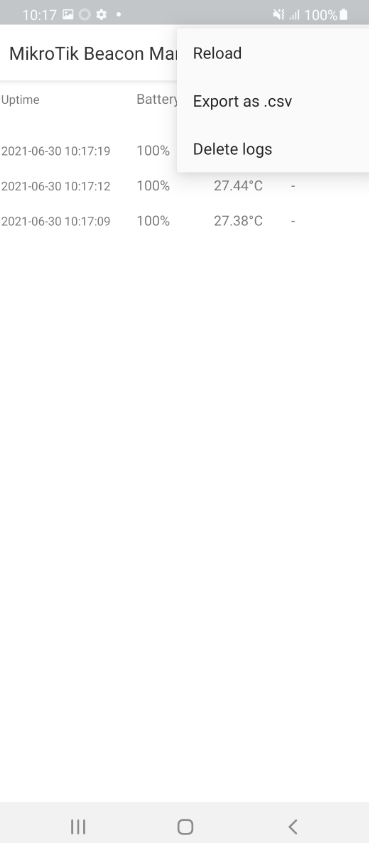
You can export the log as a .csv file via "Export as .csv" button:
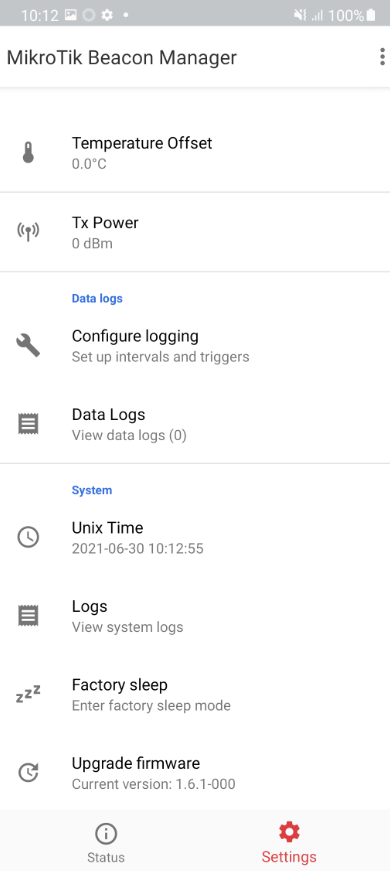
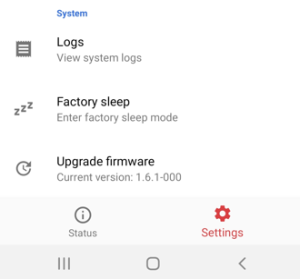
System
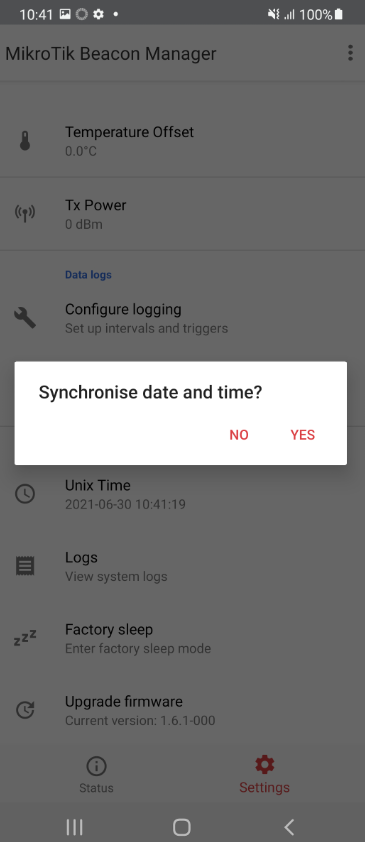
In the "System" tab you synchronize the time, view the system log, put the tag into a factory sleep mode, and upgrade the firmware:
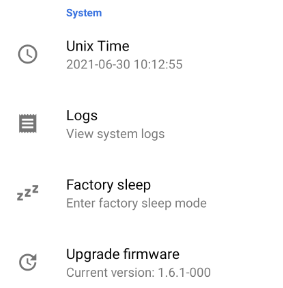
Unix Time
Using this setting, you can synchronize the current time and date for the tag:
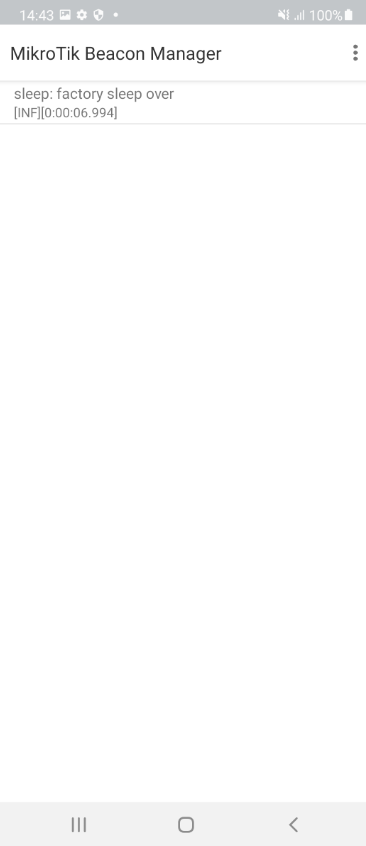
Logs
Menu, where you can view system log:
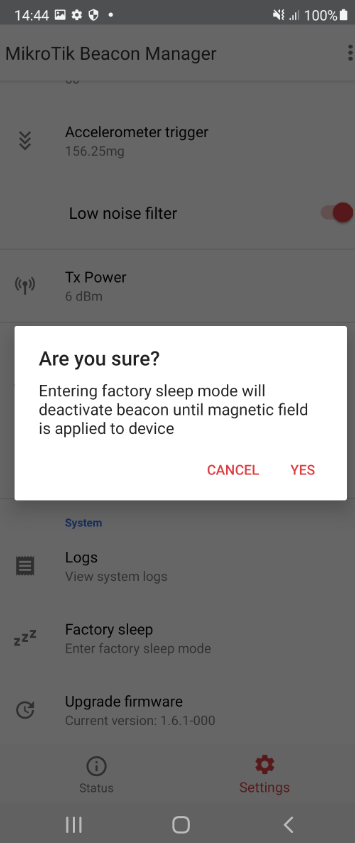
Factory sleep
This option can initiate factory sleep mode for the tag:
Upgrade Firmware
This menu allows you to upgrade the tag's firmware version:
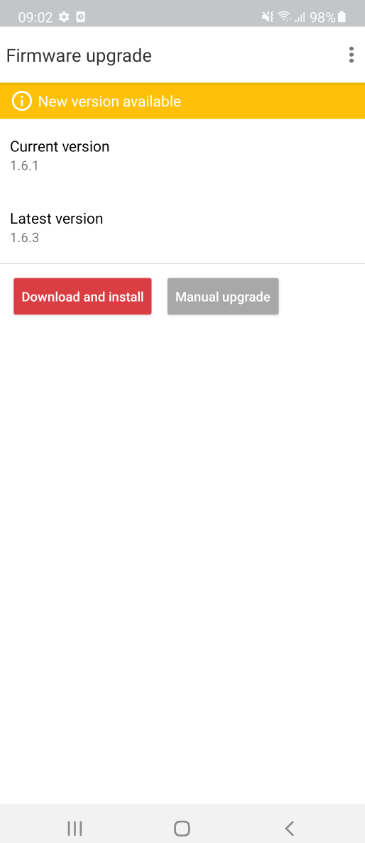
Automatic upgrade
Click "Download and install" and wait for the device to reboot.
Manual upgrade
...
2.3.1 1638358509
1326c554c18340a41e79fd88abbea193dc53b99931eddecd018e33cff577f6d3 bt-tag_HT_app_2.3.1-0rr.gbl
9dc21eb980e8bd36732ec4db8e4b03a8177885fccdbbd87122f7d9bf76410b8b bt-tag_HT_apploader_3.2.3-0rr.gbl
9e4f30d9006f24063ac96d0fb1181d135929d86d0e243d3b3985cc5e43d6b448 bt-tag_IN_app_2.3.1-0rr.gbl
e03fa2987b874463e9a5c686303f4d75fef0c0f8d89dde14f8c4b04be4838a93 bt-tag_IN_apploader_3.2.3-0rr.gbl
54e959dd9cc1da3a5408b5dc7c797c52ae1a1685122e14d966cbe433ec1d1b3c bt-tag_OUT_app_2.3.1-0rr.gbl
e0bc2e8a1a9de6a1974c201a48cfea2276465414e07efc07816400abca91aa14 bt-tag_OUT_apploader_3.2.3-0rr.gbl
5257a1b06cb8d57d06ae10ef2c87abf0df0a3ab8a9ac7f9229a9a421b8a0c0fc bt-tag_HT_app_2.3.1-000.gbl
caf3e333721852077945c8a766db32ee5e478f1e7844dcb3e0e3d700dbab009f bt-tag_HT_apploader_3.2.3-000.gbl
| Tilt detect (on/off) | Whether to send an advertisement when the tag detects a tilt trigger. When the tilt trigger is enabled and the device is tilted → the advertisement packet is broadcasted immediately. |
| Impact detect (on/off) | Whether to send an advertisement when the tag detects an impact/wake up trigger. When the impact trigger is enabled and the device is pushed/moved → the advertisement packet is sent. |
Encrypt (on/off) note: only available for MikroTik format | Whether to encrypt the broadcasted hex payload with an "AES" key. When the "Encrypt" parameter is enabled, the hex payload data (acceleration, temperature, uptime, trigger action, and battery percentage) is encrypted with a private key. This key is known only to the tag's owner (it is obtained with the purchase). |
Namespace note: only available for Eddystone-UID format | Set up a unique 10-byte long beacon Namespace ID. |
Instance note: only available for Eddystone-UID format | Set up a unique 6-byte long beacon Instance ID. |
UUID note: only available for iBeacon format | Set up a universally unique identifier (UUID) in the following format: xxxxxxxx-xxxx-xxxx-xxxx-xxxxxxxxxxxx |
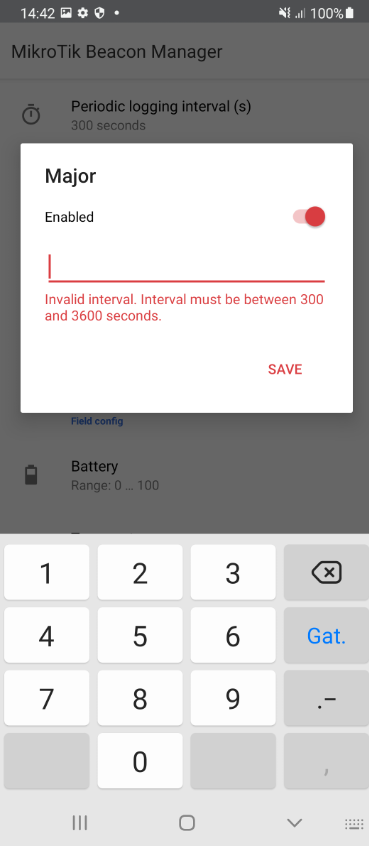
Major note: only available for iBeacon format | Set up a 16-bit integer secondary identifier, in the hex format or a decimal number (from 0 to 65 535). |
Minor note: only available for iBeacon format
| Set up a 16-bit integer secondary identifier, in the hex format or a decimal number (from 0 to 65 535). |
Estimated battery life
This section displays the estimated battery life:
Estimated battery life is heavily dependant on the number of advertising packets sent (configured to be sent). The app calculates how many packets are estimated to be broadcasted daily, for how long the tag will be active, and the estimate for the average daily power consumption.
Accelerometer settings
This section allows you to change the parameters shown in the screenshot below:
Mode and Data Rate
This menu allows you to choose between 2 modes: "Low power" and "High power". In "Low power" mode, you will get lower precision but also lower power consumption. In "High power" mode, you will get higher precision but also higher power consumption.
"Data Rate" setting represents the number of acceleration measurements during a 1-second window (measurement frequency). The fewer packets per second are sent → the lower the power consumption is.
Full Scale
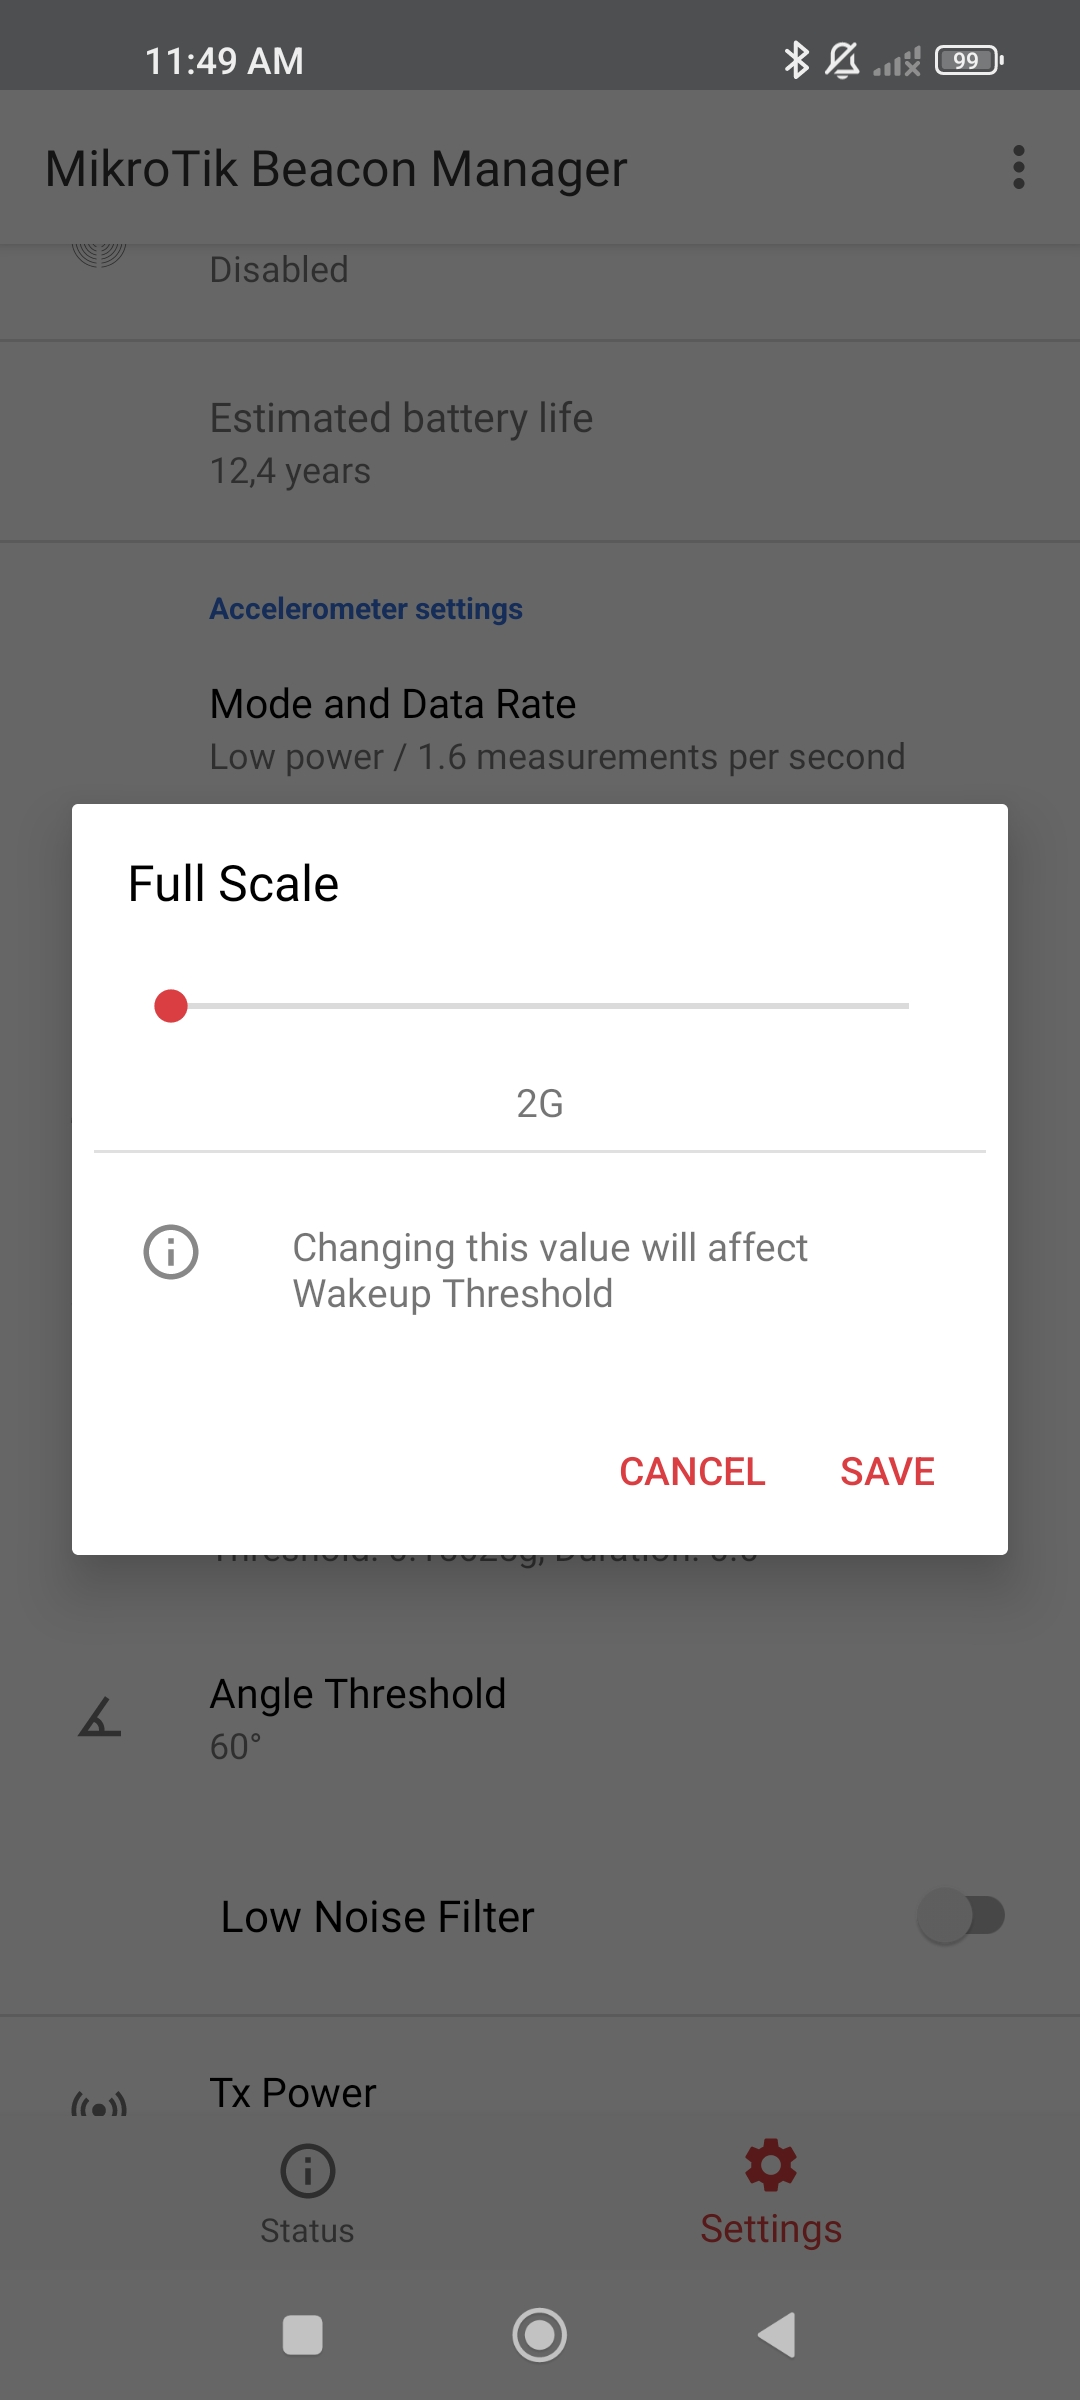
Can vary between (2g...16g). It is the measurement range that is used to calculate the wake-up threshold. Full scale defines the range of acceleration, that the accelerometer is capable of measuring (the bigger the range, the lower the accuracy of the measured acceleration).
Bandwith Filter
Is a digital filtering cutoff (a high pass filter bandwidth).
If the bandwidth = "x" Hz, then the tag will filter out changes to acceleration that happen less frequently than "x" times a second.
For example, if the device is laying on the table, the acceleration will show 0g (instead of 1g), even though the earth's gravity is present → (because the earth's gravity is constant - its frequency of change is 0 Hz, which is < "x" Hz) it gets filtered out.
Wakeup Threshold and Duration
The "Wakeup Threshold" defines a wakeup zone/acceleration range. The "Wakeup Duration" defines the time during which the acceleration is over the configured wakeup threshold. A wakeup event will be generated (a wakeup condition will be triggered) when the acceleration on any axis (X, Y, or Z) exceeds a threshold for the configured wakeup duration. To better understand what is meant by "acceleration on any axis (X, Y, or Z)", imagine a 3-D Cartesian coordinate system and in the origin point (common point) the tag's accelerometer or the tag itself:
For example, the wakeup threshold is set to 1.0g (it means that any acceleration between -1.0g to +1.0g falls under the configured threshold/acceleration range) and the wakeup duration is set to 0.12s. As a result, as soon as the device is pushed/thrown against any of the axis (the device begins moving in any direction) with the acceleration exceeding the configured threshold (acceleration> +1.0g or acceleration< -1.0g) for longer than 0.12s → wakeup condition is triggered.
Free Fall Threshold and Duration
The "Free Fall Threshold" defines a free-fall zone/acceleration range. The "Free Fall Duration" defines the time during which the acceleration is going to be within the configured free-fall threshold. The free-fall event will be generated (free-falling condition will be triggered) when the acceleration on all 3 axes (X, Y, and Z) is within the free-fall zone/threshold for the configured free-fall duration. To better understand what is meant by "acceleration on all axis (X, Y, and Z)", check the device photoes above in the "Wakeup Threshold and Duration" section.
For example, the freefall threshold is set to 156.25g (it means that any acceleration between -156.25g to +156.25g falls under the configured threshold/acceleration range) and the freefall duration is set to 0.2s. As a result, as soon as the device is in a freefalling state with acceleration on all axis within the configured threshold (-156.25g<acceleration<+156.25g) for longer than 0.2s → a freefalling condition is triggered.
Angle Threshold
Can vary between 50°...80°. It is the threshold for a tilt function. When the threshold is set to, for example, 60° and the device is tilted by that degree - the tilt action is triggered and the advertisement packet is sent.
Low noise filter
An option to enable or disable a low noise filter. A low noise filter is used to reduce noise density in the measurements. Enabling this feature will slightly increase power consumption.
Temperature Offset
note: TG-BT5-IN model does not have a temperature sensor
Can vary between -10°C...+10°C. Offset in centicelsius to apply to raw temperature measurements.
Tx Power
The transmit power level in decibel-milliwatts. Can vary between -28dBm...6dBm. Tx Power is simply used to increase/decrease transmit power of the tag.
Data logs
note: this section is available only for the TG-BT5-OUT model
This section allows you to configure/view logs (that are only accessible using the app):
Configure logging
In the "Configure logging" menu, you can set up logging settings:
You have an option to set up "Periodic logging interval (s)" (or you can disable it). When enabled, the data logs will automatically get saved every "x" seconds:
Another option is to enable "Log Triggers" (periodic logging and trigger logging can be used together). When log triggers are used - logs will be saved whenever the tilt, free fall, and/or impact action is detected.
For example, when a tilt trigger is enabled and is detected by the tag - the message is logged.
You can set up which parameters are going to be logged in the "Field config" section:
You have an option to log 3 parameters: 1) Battery level; 2) Temperature; 3) Acceleration.
You can disable each parameter if you are not interested in it and you can also set up the thresholds for them.
If you are not interested in logging battery level unless it is less than 40%, you can set up a threshold from minimum=0% to maximum=40%, and, as a result, the battery level (battery level percentage) is going to be displayed in the log only when it is in-between the configured range. The same principle applies to the other 2 parameters.
Data Logs
The logged messages will be displayed in the "Data Logs" tab:
You can export the log as a .csv file via "Export as .csv" button:
System
In the "System" tab you synchronize the time, view the system log, put the tag into a factory sleep mode, and upgrade the firmware:
Unix Time
Using this setting, you can synchronize the current time and date for the tag:
Logs
Menu, where you can view system log:
Factory sleep
This option can initiate factory sleep mode for the tag:
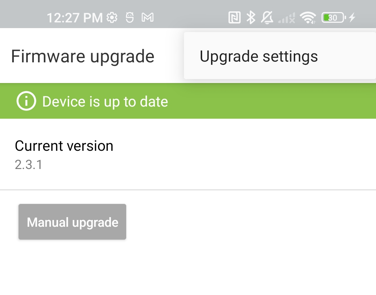
Upgrade Firmware
This menu allows you to upgrade the tag's firmware version:
Automatic upgrade
Click "Download and install" and wait for the device to reboot.
Manual upgrade
In order to manually download the tag's firmware file, navigate to https://download.mikrotik.com/firmware/bt-tag/latest. It will allow you to download the "latest" file which can be opened in a notepad or any other text editor. The content of the file will indicate the latest available TG-BT5-XX versions:
2.3.1 1638358509 1326c554c18340a41e79fd88abbea193dc53b99931eddecd018e33cff577f6d3 bt-tag_HT_app_2.3.1-0rr.gbl 9dc21eb980e8bd36732ec4db8e4b03a8177885fccdbbd87122f7d9bf76410b8b bt-tag_HT_apploader_3.2.3-0rr.gbl 9e4f30d9006f24063ac96d0fb1181d135929d86d0e243d3b3985cc5e43d6b448 bt-tag_IN_app_2.3.1-0rr.gbl e03fa2987b874463e9a5c686303f4d75fef0c0f8d89dde14f8c4b04be4838a93 bt-tag_IN_apploader_3.2.3-0rr.gbl 54e959dd9cc1da3a5408b5dc7c797c52ae1a1685122e14d966cbe433ec1d1b3c bt-tag_OUT_app_2.3.1-0rr.gbl e0bc2e8a1a9de6a1974c201a48cfea2276465414e07efc07816400abca91aa14 bt-tag_OUT_apploader_3.2.3-0rr.gbl 5257a1b06cb8d57d06ae10ef2c87abf0df0a3ab8a9ac7f9229a9a421b8a0c0fc bt-tag_HT_app_2.3.1-000.gbl caf3e333721852077945c8a766db32ee5e478f1e7844dcb3e0e3d700dbab009f bt-tag_HT_apploader_3.2.3-000.gbl 0f6603d97df5fc4b3f260b410628b3c62fb2562f26e85e44b6cdfdf1b58d04f8 bt-tag_IN_app_2.3.1-000.gbl caf3e333721852077945c8a766db32ee5e478f1e7844dcb3e0e3d700dbab009f bt-tag_IN_apploader_3.2.3-000.gbl 3235db7bb9a9cca0d5e59ae774c3cd004be4e58b44c1ae40e6e3bb84feb077a6 bt-tag_OUT_app_2.3.1-000.gbl caf3e333721852077945c8a766db32ee5e478f1e7844dcb3e0e3d700dbab009f bt-tag_OUT_apploader_3.2.3-000.gbl |
Double-check current tag's firwmare version using the app:
Knowing, that the tag, for example, is the TG-BT5-IN model and that the current version is 1.6.1-000, we can conclude that the latest release is "bt-tag_IN_app_2.3.1-000.gbl".
Please note, that for the majority of the tags, the firmware version will be 1.6.1-0rr (instead of 1.6.1-000). You will need to use the x.x.x-0rr file instead.
To download the actual firmware file, change the "latest" part of the link to "bt-tag_IN_app_2.3.1-000.gbl".
So, in case your current version is, for example, "1.6.1-000" (TG-BT5-IN tag), the firmware can be downloaded using the link:
https://download.mikrotik.com/firmware/bt-tag/bt
...
caf3e333721852077945c8a766db32ee5e478f1e7844dcb3e0e3d700dbab009f bt-tag_IN_apploader_3.2.3-000.gbl
In case your current version is, for example, "1.6.1-0rr" (TG-BT5-OUT tag), the firmware can be downloaded using the link:
https://download.mikrotik.com/firmware/bt-tag/bt
...
...
...
caf3e333721852077945c8a766db32ee5e478f1e7844dcb3e0e3d700dbab009f bt-tag_OUT_apploader_3.2.3-000.gbl
Upgrade settings
| Warning |
|---|
If you have issues with the tag's update, where the tag stays in the OTA/update mode → try enabling "Reliable write"! When the tag is "stuck" in the OTA/upgrade mode, there are two scenarios that can happen: a) The Beacon Manager tag list will still show the tag on the list but there will be no indication that the tag is "configurable". You are still able to click on the tag in the list (even without the "gear" icon present) and surf its settings without activating the magnetic switch; |
To enter the additional upgrade setting menu, click on the "Upgrade settings" button:
This will allow you to alter the "Reliable write" configuration:
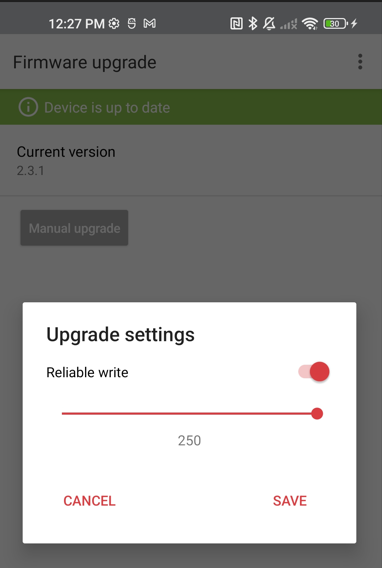
When enabled, the checkbox allows you to make the Bluetooth upgrade process "slower" but more "reliable" (where additional exchange and verification steps take place between the phone and the tag).
Double-check current tag's firwmare version using the app:
Knowing, that the tag, for example, is the TG-BT5-IN model and that the current version is 1.6.1-000, we can conclude that the latest release is "bt-tag_IN_app_2.3.1-000.gbl".
Please note, that for the majority of the tags, the firmware version will be 1.6.1-0rr (instead of 1.6.1-000). You will need to use the x.x.x-0rr file instead.
To download the actual firmware file, change the "latest" part of the link to "bt-tag_IN_app_2.3.1-000.gbl".
So, in case your current version is, for example, "1.6.1-000" (TG-BT5-IN tag), the firmware can be downloaded using the link:
https://download.mikrotik.com/firmware/bt-tag/bt-tag_IN_app_2.3.1-000.gbl
In case your current version is, for example, "1.6.1-0rr" (TG-BT5-OUT tag), the firmware can be downloaded using the link:
https://download.mikrotik.com/firmware/bt-tag/bt-tag_OUT_app_2.3.1-0rr.gbl
Import/Export
In the right upper corner of the screen, you have an option to import/export current settings:
...