...
Enable Traffic-Flow on the router:
| Code Block | ||
|---|---|---|
| ||
[admin@MikroTik] ip traffic-flow> set enabled=yes
[admin@MikroTik] ip traffic-flow> print
                enabled: yes
             interfaces: all
          cache-entries: 1k
    active-flow-timeout: 30m
  inactive-flow-timeout: 15s
[admin@MikroTik] ip traffic-flow> |
...
Specify IP address and port of the host, which will receive Traffic-Flow packets:
| Code Block | ||
|---|---|---|
| ||
[admin@MikroTik] ip traffic-flow target> add dst-address=192.168.0.2 port=2055 version=9
[admin@MikroTik] ip traffic-flow target> print
Flags: X - disabled
 #   SRC-ADDRESS       DST-ADDRESS        PORT     VERSION
 0   0.0.0.0           192.168.0.2        2055     9
[admin@MikroTik] ip traffic-flow target> |
...
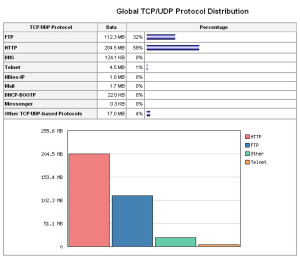
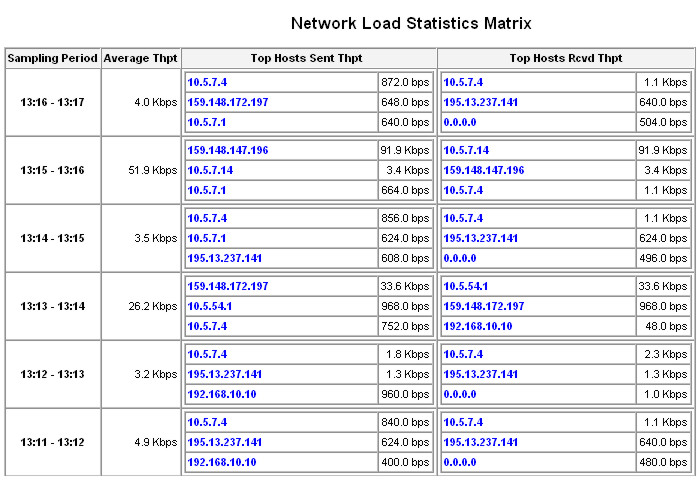
Now the router starts to send packets with Traffic-Flow information.Some screenshots from ntop program, which have gathered Traffic-Flow information from our router and displays it in nice graphs and statistics.
| Info | ||
|---|---|---|
| ||
To use ntop-ng with MikroTik you need to use Nprobe, which is paid software. |
...
See more
...