CRS317-1G-16S+RM 
Safety Warnings
 Before you work on any equipment, be aware of the hazards involved with electrical circuitry and be familiar with standard practices for preventing accidents.
Ultimate disposal of this product should be handled according to all national laws and regulations.
The Installation of the equipment must comply with local and national electrical codes.
Failure to use the correct hardware or to follow the correct procedures could result in a hazardous situation to for people and damage to the system.
Read the installation instructions before connecting the system to the power source.
...
- Mount unit in a rackmount cabinet or place on the flat surface (see "17956945Mounting").
- Connect two powering units to the AC source using power cords.
- The Initial connection has to be done via the Ethernet cable, using the MikroTik Winbox utility.
- Use Winbox to connect to the default IP address of 192.168.88.1 from any port, with the username admin and no password. In case the IP is not available please use Neighbors and connect with MAC.
- Update the device by clicking the "Check for updates" button to v6.46 or the latest RouterOS software to ensure the best performance and stability. The device needs to have an active internet connection.
- To manually update the device, go to our download page https://mikrotik.com/download
- Choose your architecture (ARM) and download the latest packages from any channel to your PC.
- Open Winbox and upload packages in the Files menu.
- Reboot the device.
- Updating software will ensure the latest security fixes and regulations set by local law.
- Set up your password to secure the device.
...
- Attach rack ears to both sides of the device and tighten four screws to secure them in place, as shown in the picture.
- Place the device in the rackmount enclosure and align with the holes so that the device fits conveniently.
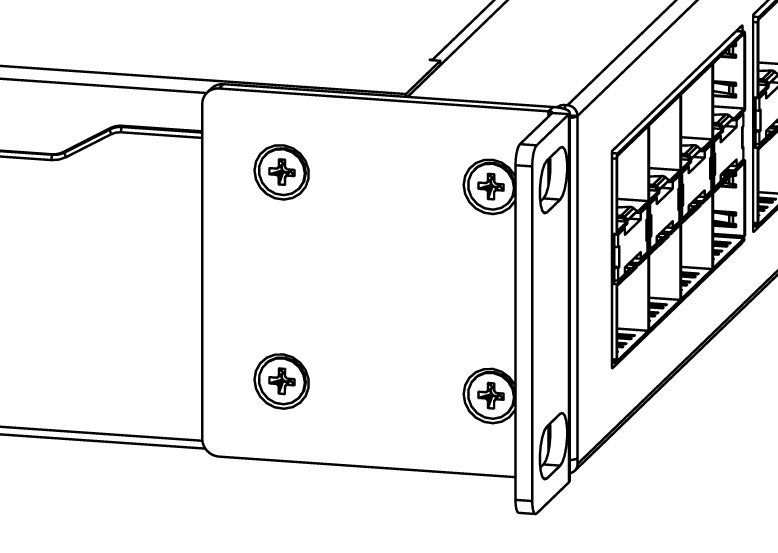
- Tighten screws to secure it in place.
The The IP rating scale for this device is IP0. The device has no protection from water contamination, please ensure the placement of the device in a dry and ventilated environment.
We recommend Cat6 cables for our devices.
Mounting The mounting and configuration of this device should be done by a qualified person.
...
The device accepts powering through two IEC C14 standard connectors and supports both AC 110/220 240 V ⏦. Only one PSU is active at the time, the second one is used for redundancy.
The PoE injector is not included. The power consumption of this device under maximum load is up to 44W.
...
Extension slots and ports
- One gigabit Ethernet ports port for management (With Auto MDI/X so you can use either straight or cross-over cables for connecting to other network devices). The Ethernet port (ETH/BOOT) can be used for network booting.
- 16 SFP+ cages, which accept both 1.25 Gb SFP and 10 Gb SFP+ modules.
- RJ45 serial port.
...