Introduction
One of the options, that you can use to monitor information that is broadcasted by the Bluetooth tags is cloud systems, like AWS (Amazon WEB Services). In this article, we will show how to configure both AWS and RouterOS to publish the data using the MQTT and HTTPS protocols. RouterOS, in this scenario, is going to act as a gateway and publish the data that is broadcasted by the BLEtag to the cloud (AWS). AWS, in this scenario, will act as an MQTT broker and MQTT subscriber (server, where data will be posted/shown).
...
In the Test section, you can use a build-in MQTT test client so you can test publishing and subscribe to topics. You have Subscribe to a topic and Publish to a topic tabs which allows you to check both processes. MQTT test client section can also display HTTPS posts.
AWS IoT configuration
note: the same AWS configuration applies to both HTTPS and MQTT scenarios.
Things
Step 1: Navigate to Manage>Things. This is the menu where configuration begins (Things menu is the representation of a device or logical entity).
...
There are two other menus that are important - Secure>Certificates and Secure>Policies.
Certificates
In the Certificates menu, you can create certificates, activate them and attach them to policies. The "Things" configuration should have already created the certificate. Just make sure that the certificate is "activated". To do that, select the certificate, click on "Actions" and click "Activate".

Policies

Step 1: Create a new policy. Click on "Create" and type in the name for the policy. In the "Create a policy" tab you have an option to set up "actions". We will be using 4 actions in this example (iot:Publish, iot:Receive, iot:Subscribe and iot:Connect). You can find more information on policies with examples following the link.
...
And with that, the AWS settings are done.
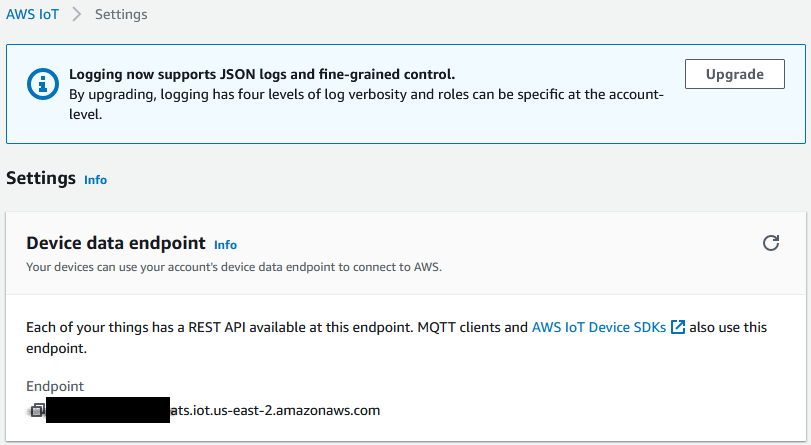
Endpoint Address (Broker's address)
You can find the Endpoint address in the "Settings" section (Settings>Device data endpoint). This address should be configured as the broker's IP/FQDN address in the RouterOS settings.
RouterOS configuration
note: In order to configure MQTT, make sure that iot package is installed beforehand.
In our example, we are using KNOT as a gateway and a script (created specifically for the KNOT) to publish the data. In your specific application scenario, you can use any RouterOS device (with iot package installed) to post any data that you need.
Certificates
Since AWS uses an SSL connection, we will require previously downloaded certificates and the key.
...
Make sure that both certificates are trusted (T) and that "xxxx.certificate.pem.crt" is with a private key (K).
MQTT Broker
Navigate to IoT>MQTT and add a new broker ("+" button).
...
Click on "Apply" and "OK" to finish setting up the broker.
MQTT Publish with a script
In order to publish data from the Bluetooth tag (in our example, TG-BT5-IN) to AWS, we will be using the script. Script example is shown below and can be downloaded using this link.
...
/system script run script1
HTTPS post with a script
Another protocol that can be used to post the data from the gateway to the cloud is - HTTPS. This can be achieved using the fetch tool. Until 7.1beta6 RouterOS version, fetch did not have an option to select a client certificate for the authentication (meaning HTTPS posting with client certificate was not supported) and in 7.1beta6 a new feature was added that enables this setting/support. HTTPS post examples using CURL and Python (as well as other useful information) are shown in the AWS HTTPS manual.
...
/system script run script2
Verification
To verify that AWS gets the data, go back to the AWS portal. Navigate to the Test page. Use Subscribe to a topic option. Type in the topic that was configured in the AWS policies (in our example, my/test/topic) in the Topic filter field and press Subscribe. Below, you should see the Subscriptions section where the data is going to be shown. Run the script (in RouterOS) and you should see the collected data in the "Subscriptions" tab.
...