...
- Unscrew the cover to reach the Ethernet port;
- Guide Ethernet cable trough through the opening;
- Plug into the Ethernet port and screw clockwise tightly, to ensure water protection;
- Connect the PoE injector into the computer;
- Connect the power adapter to the PoE injector;
- Download WinBox configuration tool https://mt.lv/winbox, or use Web browser;
- Default IP: 192.168.88.2 and 192.168.88.3, user name: admin, and please find the password on the sticker;
- By the default devices are configured as W60G Bridge;
- Once connected, configure the device, so it has an active Internet connection https://mt.lv/configuration, or proceed to the next step to upgrade software manually;
- Upgrade the RouterOS software to the latest version https://mt.lv/upgrade;
- Connect again and choose your Region, this can be done in the Wireless menu W60G tab;
- Double click on the W60G interface, go to the Wireless tab and choose your Region;
...
The device is designed to be used outdoors and mounted on the pole.
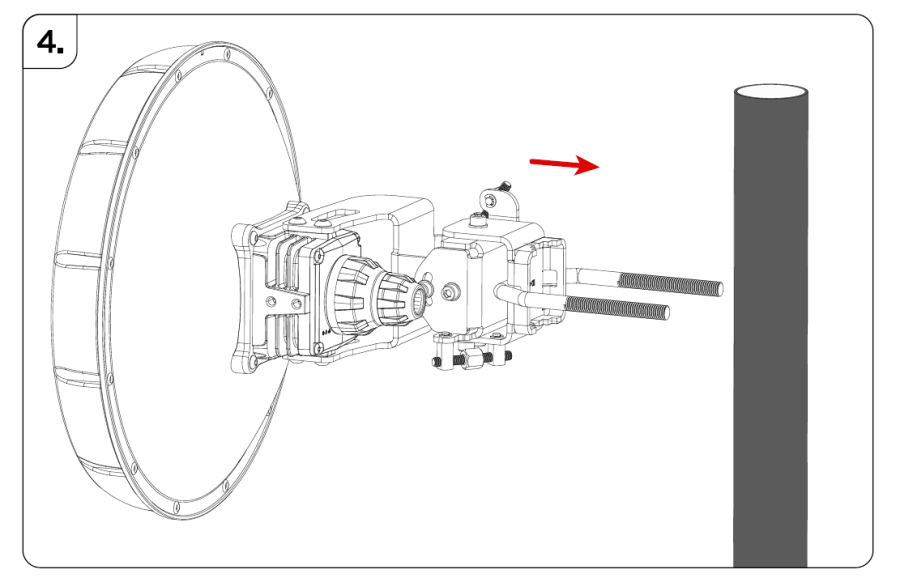
When mounting, please ensure that the cable feed is pointing downwards.
The IP rating scale of this device is IP54. We recommend using Cat6 shielded cables.
Warning! This equipment should be installed and operated with a minimum distance of 60 cm between the device and your body. Operation The operation of this equipment in the residential environment could cause radio interference.
Mounting and configuration of this device should be done by a qualified person.
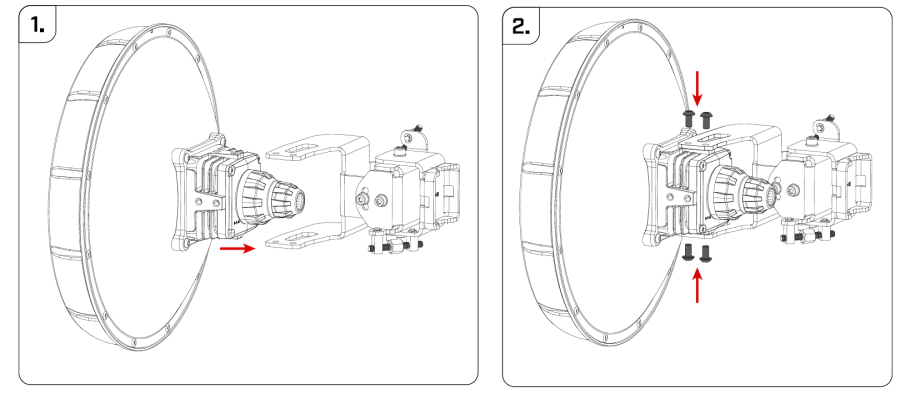
- Assemble the device with a mounting bracket.
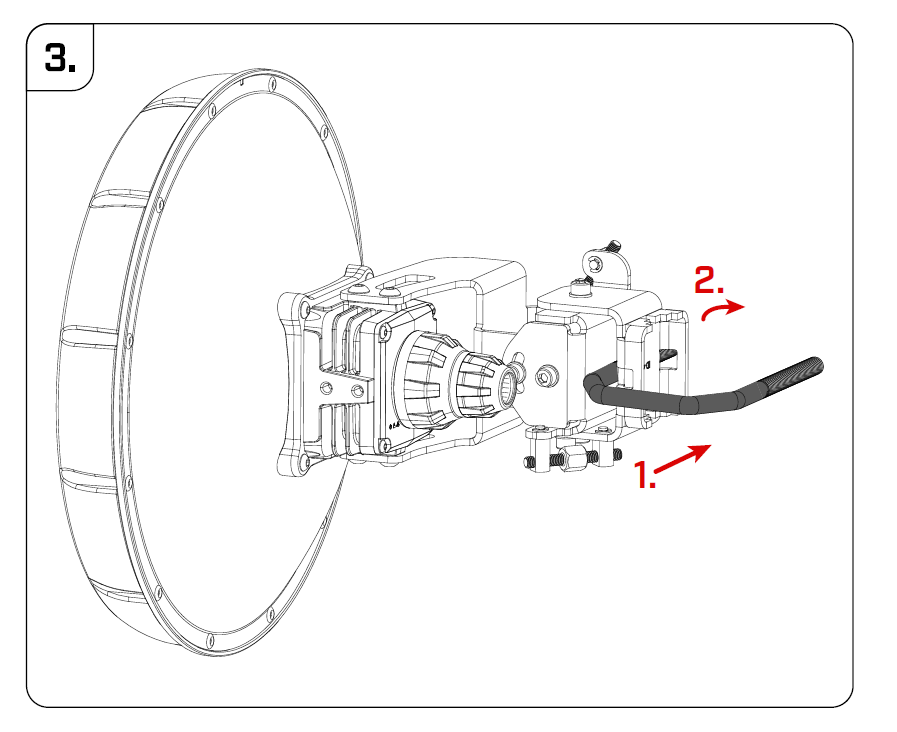
- Use M5 screws to fix the mounting bracket, tighten it with the HEX3 tool.
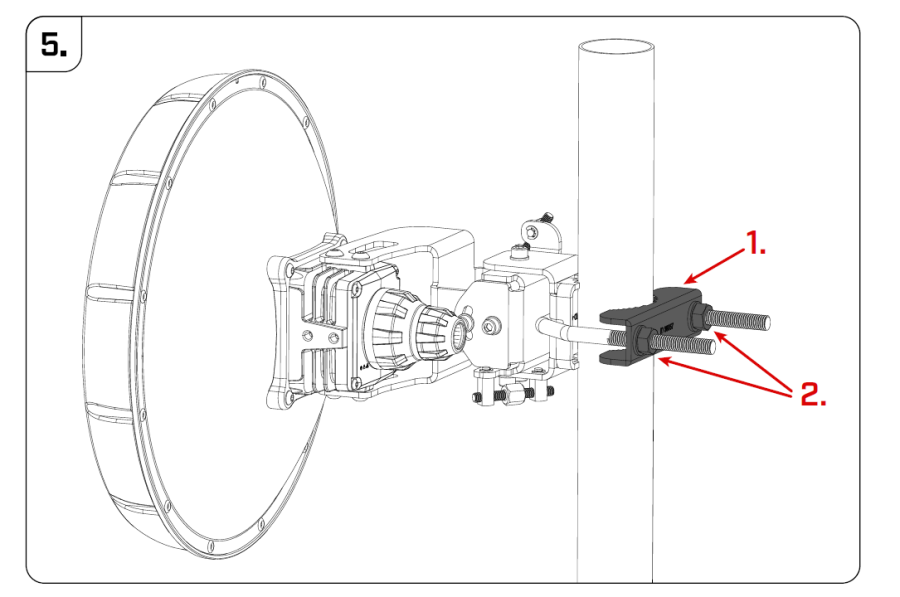
- Insert U bolt. In the sequence as it is shown in the picture.
- Attach the assembly to the pole.
- Add mount bracket and use two 13 mm nuts to secure the device.
Aim tool usage
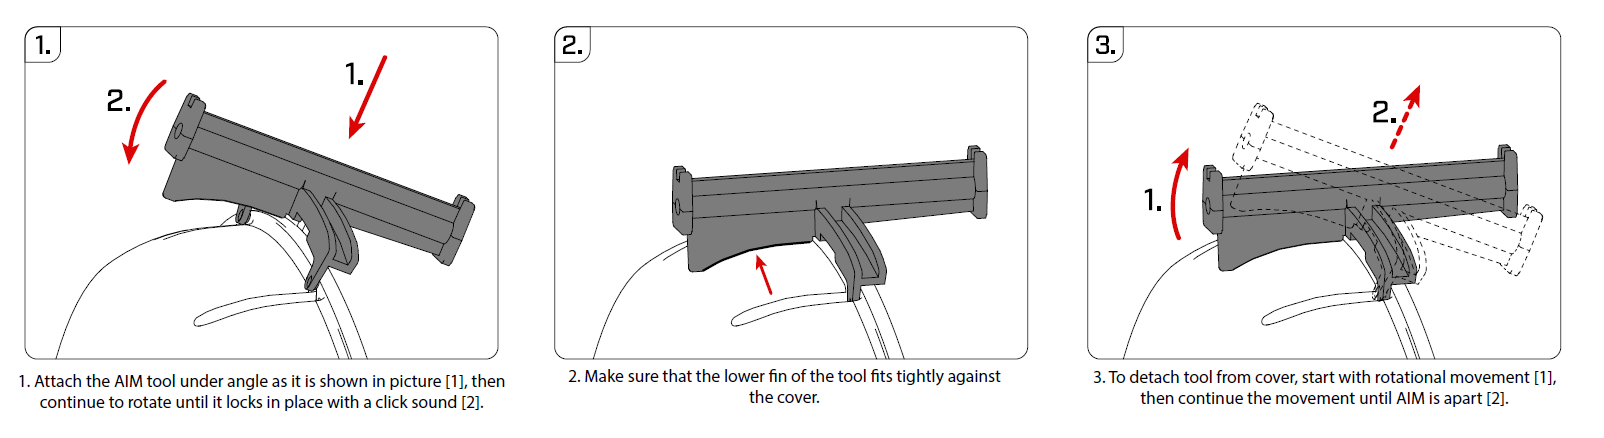
The device has led arrows on the back of the unit. Aim using the to reach precise alignment.
The arrows will light up and show the direction where to turn the unit. The goal is to reach the 0.4 - 0.8 degree range, where the signal is at its peak.
Grounding
The installation infrastructure (towers and masts), must be properly grounded.
Please secure all loose Ethernet cables and antenna cables to the pole or mast approximately 30cm from the device, so that the cable weight is not pulling the ports and connectors.
...
We recommend clicking the "Check for updates" button in the QuickSet menu, as updating your RouterOS software to the latest version ensures the best performance and stability. Please make sure you have selected the country where the device will be used, to conform with local regulations.
RouterOS includes many configuration options in addition to what is described in this document. We suggest starting here to get yourself accustomed to the possibilities: https://mt.lv/help. In case IP connection is not available, the Winbox tool (https://mt.lv/winbox) can be used to connect to the MAC address of the device from the LAN side (all access is blocked from the Internet port by default). Seek additional help from your local trainers or become a trainer of yourself. https://mikrotik.com/training/about
For recovery purposes, it is possible to boot the device for reinstallation, see section 28606618 Buttons and Jumpers.
Reset button
The reset button has three functions:
...