...
- Mount unit in a rackmount cabinet or place on the flat surface (see "17956984Mounting").
- Connect the device to the AC source using a power cord.
- Set the IP address of your PC to 192.168.88.3
- Use a Web browser to connect to the default IP address of 192.168.88.1 from any port, with the username admin and no password.
- If IP is not available to download Winbox from our webpage and use it to connect through MAC address.
- Update RouterOS software to the latest version, make sure that the device has an internet connection.
- If the device does not have an internet connection update software by downloading the latest version from our webpage https://mikrotik.com/download
- Find the latest (mipsbe) software and choose your packages.
- Download packages to the PC and upload them to the Winbox, Files menu, and reboot the device.
- Set up your password to secure the device.
...
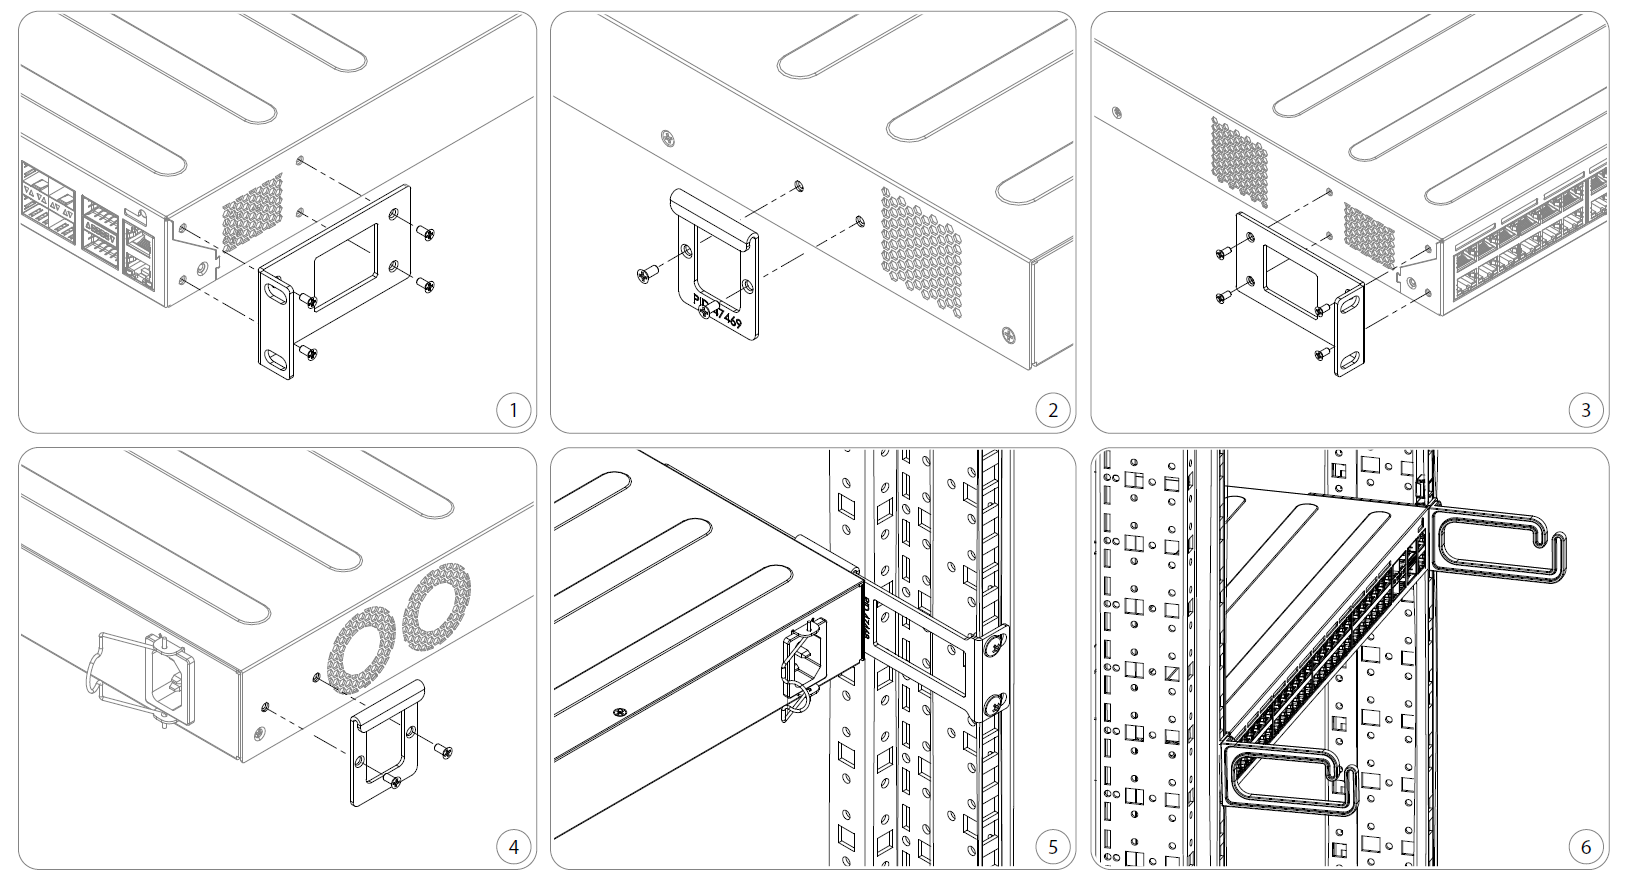
- Attach the bracket to the front right side.
- Attach the rear right bracket.
- Attach the bracket to the left front side.
- Attach the rear left bracket.
- Attach long brackets to the rackmount and install the device with the holes so that the device fits conveniently.
- If needed, install cable management brackets.
 The device has no protection from water contamination, please ensure the placement of the device in a dry and ventilated environment.
We recommend Cat6 cables for our devices.
Mounting and configuration of this device should be done by a qualified person.
...
RouterOS includes many configuration options in addition to what is described in this document. We suggest starting here to get yourself accustomed to the possibilities: https://mt.lv/help. In case the IP connection is not available, the Winbox tool (https://mt.lv/winbox) can be used to connect to the MAC address of the device from the LAN side. When using Winbox on login the default configuration settings will be shown.
CRS Router configuration manual https://wiki.mikrotik.com/wiki/Manual:CRS_Router
For recovery purposes, it is possible to boot the device for reinstallation, see a section 17956984 Reset button.
Reset button
The RouterBOOT reset button has the following functions. Press the button and apply the power, then:
...
- Before you work on any MikroTik equipment, be aware of the hazards involved with electrical circuitry, and be familiar with standard practices for preventing accidents. The installer should be familiar with network structures, terms, and concepts.
- Use only the power cable and accessories approved by the manufacturer, and which can be found in the original packaging of this product.
- This equipment is to be installed by trained and qualified personnel, as per these installation instructions. The installer is responsible for making sure, that the Installation of the equipment is compliant with local and national electrical codes. Do not attempt to disassemble, repair, or modify the device.
- This product is intended to be installed indoors. Keep this product away from water, fire, humidity, or hot environments.
- We cannot guarantee that no accidents or damage will occur due to the improper use of the device. Please use this product with care and operate at your own risk!
- In the case of device failure, please disconnect it from power. The fastest way to do so is by unplugging the power adapter from the power outlet.
...
This equipment has been tested and found to comply with the limits for a Class B digital device, pursuant to Part 15 of the FCC Rules. These limits are designed to provide reasonable protection against harmful interference in a residential installation.
This equipment generates, uses, and can radiate radio frequency energy and, if not installed and used in accordance with the instructions, may cause harmful interference to radio communications. However, there is no guarantee that interference will not occur in a particular installation. If this equipment does cause harmful interference to radio or television reception, which can be determined by turning the equipment off and on, the user is encouraged to try to correct the interference by one of the following measures:

- Reorient or relocate the receiving antenna.
- Increase the separation between the equipment and receiver.
- Connect the equipment into an outlet on a circuit different from that to which the receiver is connected.
- Consult the dealer or an experienced radio/TV technician for help.
...
This device complies with Industry Canada's licence-exempt RSS standard(s). Operation is subject to the following two conditions: (1) this device may not cause interference, and (2) this device must accept any interference, including interference that may cause undesired operation of the device.
Le présent appareil est conforme aux CNR d'Industrie Canada applicables aux appareils radio exempts de licence. L'exploitation est autorisée aux deux conditions suivantes: (1) l'appareil ne doit pas produire de brouillage, et (2) l'utilisateur de l'appareil doit accepter tout brouillage radioélectrique subi, même si le brouillage est susceptible d'en compromettre le fonctionnement.
...