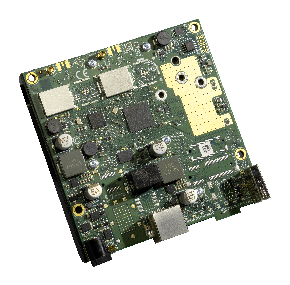
L11UG-5HaxD
Safety Warnings
Before you work on any MikroTik equipment, be aware of the hazards involved with electrical circuitry, and be familiar with standard practices for preventing accidents. The installer should be familiar with network structures, terms, and concepts.
Ultimate disposal of this product should be handled according to all national laws and regulations.
The product comes without enclosure and is meant to be installed into the enclosure by trained and qualified personnel. The installer is responsible for making sure, that the Installation of the equipment is compliant with local and national electrical codes. Do not attempt to disassemble, repair or modify the device.
Please read the mounting instructions carefully before beginning installation. Failure to use the correct hardware and configuration or to follow the correct procedures could result in a hazardous situation for people and damage to the system.
Keep this device away from water, fire, humidity, or hot environments.
Use a wrist grounding strap when unpacking and working with electrical components to avoid electrical discharge (ESD) damage. After unpacking, please place the router on the anti-static mat. When mounting the unit, make sure there are no objects that can damage or touch the PCB plate.
We cannot guarantee that no accidents or damage will occur due to the improper use of the device. Please use this product with care and operate at your own risk!
To avoid contamination of the environment, separate the device from household waste and dispose of it in a safe manner, for example, in designated areas. Become familiar with procedures for properly transporting the equipment to designated collection points in your area.
This is a Class A product. In a domestic environment, this product might cause radio interference in which case the user might be required to take adequate measures.
Exposure to Radio Frequency Radiation: This MikroTik equipment complies with the European Union radiation exposure limits set forth for an uncontrolled environment. This MikroTik device should be installed and operated no closer than 20 centimeters from your body, occupational user, or the general public.
Quickstart
Please follow these quick steps to set up your device:
- This product comes without enclosure and is designed to be installed into the users' end products or enclosures. Compatible with the CA411-711 and CA433U MikroTik enclosures.
- The device comes in ESD protective packaging. When handling electrical equipment, please observe the following safety precautions:
- Use a wrist grounding strap when unpacking and working with electrical components to avoid electrical discharge (ESD) damage;
- After unpacking, please place the router on the anti-static mat;
- When mounting the unit, make sure there are no objects that can damage or touch the PCB plate;
The device can be mounted in your desired location using the factory-provided holes in a PCB plate, located on each side of the device;
- Connect the device to the included PoE injector with an Ethernet cable to the data+power end;
- Connect the data end of the PoE injector to the computer;
- Connect the power adapter to the PoE injector;
- Configuration should be made using the WinBox configuration tool https://mt.lv/winbox;
- Download and open "WinBox", and choose the "Neighbors" tab to find the device;
- Click on the MAC address. The username is "admin" and there is no password (or, for some models, check user and wireless passwords on the sticker);
- For a manual update of the device, visit the products page at https://mikrotik.com/products to find your product. The required packages are accessible under the "Support&Downloads" menu;
- Upload downloaded packages to the "WinBox Files" menu and reboot the device;
- By upgrading your RouterOS software to the latest version, you can ensure optimal performance, stability, and security updates;
- In the "QuickSet" menu set up the "PTP Bridge AP" mode and choose your country, to apply country regulation settings;
- Set the antenna gain, depending on the antenna used;
- Set up your router password in the bottom field.
Powering
The device accepts power in the following ways:
- Direct-input power jack (5.5mm outside and 2mm inside, female, pin positive plug) accepts 12-28 V DC.
- Ethernet port accepts Passive PoE 18-28 V DC ⎓.
The power consumption under maximum load can reach 15 W.
Connecting to a PoE Adapter:
- Connect the device to the included PoE injector with an Ethernet cable to the data+power end;
- Connect the data end of the PoE injector to the computer;
- Connect the power adapter to the PoE injector.
Expansion slots and ports
- One gigabit Ethernet port; supports 18-28 V DC input via passive PoE injector.
- One USB port.
- 2 external MMCX antenna connectors.
- Integrated Wireless module operating at 5 GHz, 802.11a/n/ac/ax protocol.
Mounting
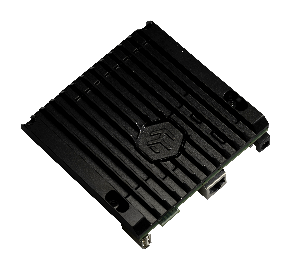
You can integrate L11UG-5HaxD in a variety of setups, such as vending machines, ATM’s, ticket stations, and more, but for a standalone build you might want to order one of our aluminum indoor cases.
The same ones you would use for RB411, 911, 912 and 922, so they are reusable.
Configuration
We recommend clicking the "Check for updates" button in the QuickSet menu, as updating your RouterOS software to the latest version ensures the best performance and stability. Please make sure you have selected the country where the device will be used, to conform to local regulations.
RouterOS includes many configuration options in addition to what is described in this document. We suggest starting here to get yourself accustomed to the possibilities: https://mt.lv/help. In case an IP connection is not available, the Winbox tool (https://mt.lv/winbox) can be used to connect to the MAC address of the device from the LAN side (all access is blocked from the Internet port by default). Seek additional help from your local trainers, or become a trainer of yourself https://mikrotik.com/training/about
Reset button
The reset button has three functions:
- Hold this button during boot time until the LED light starts flashing, release the button to reset RouterOS configuration (total 5 seconds).
- Keep holding for 5 more seconds, LED turns solid, release now to turn on CAP mode. The device will now look for a CAPsMAN server (total 10 seconds).
- Or Keep holding the button for 5 more seconds until LED turns off, then release it to make the RouterBOARD look for Netinstall servers (total 15 seconds).
Regardless of the above option used, the system will load the backup RouterBOOT loader if the button is pressed before power is applied to the device. Useful for RouterBOOT debugging and recovery.
Accessories
The package includes the following accessories that come with the device:
- EU Switching Power Supply 24 V DC ⎓, 1.2 A, 28.8 W.
- Gigabit POE injector cable with shielded connector (RBGPOE).
Antenna usage
Please connect and disconnect the antenna, when the device is turned off!
Wireless interface configuration information on the web: https://help.mikrotik.com/docs/display/ROS/Wireless+Interface
Compatible Enclosures
Compatible with the CA411-711 and CA433U MikroTik enclosures.
Specifications
For more information about this product, specifications, pictures, downloads please visit our web page: https://mikrotik.com/product/l11ug_5haxd
Operating system support
The device supports RouterOS software with version 7.13.2 or above, which is indicated in the RouterOS menu /system resource. Other operating systems have not been tested.

