Vultr has more than two dozen data center locations where you can choose to deploy MikroTik CHR for the best throughput and latency.
Follow these steps to install MikroTik CHR at Vultr.
Step 1: Deploy a server in rescue mode
In this step, you'll deploy a new server at Vultr with SystemRescue, a bootable Linux ISO.
- Deploy a new Cloud Compute instance.
- Choose the location with the best performance for your needs. You can use Vultr's network-looking glass to test the throughput and latency of any location.
- Select the ISO Library tab in the Server Image section.
- Choose SystemRescue x64.
- Choose a server size with enough bandwidth allowance for your requirements.
- Give the server a hostname, and a label, and then click Deploy Now.
When the server finishes deploying, proceed to the next step.
Step 2: Write the CHR image to the disk
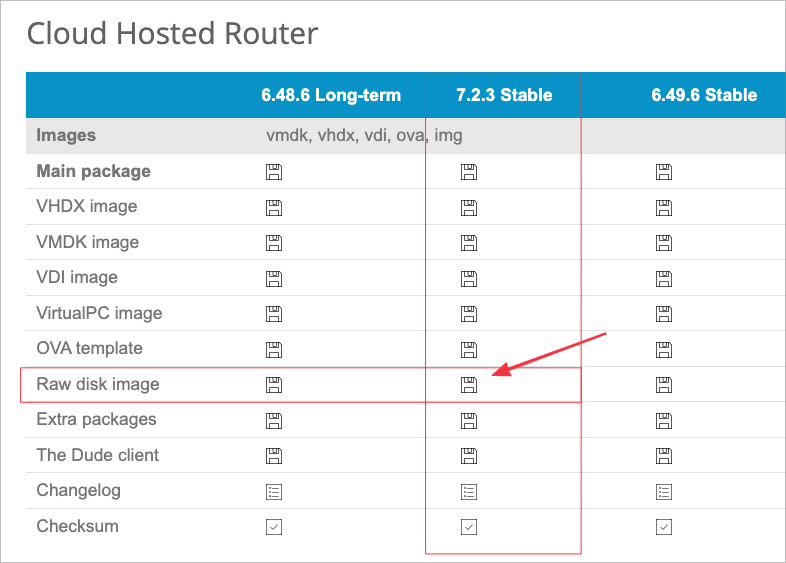
- In your web browser, navigate to the MikroTik download page.
- Locate the latest Stable RAW CHR disk image. Vultr requires version 7.2.3 Stable or later.
- Right-click the floppy disk icon to copy the URL. Don't download the image now, you'll download it to the server in a later step.
- Navigate to the server's information page in the Vultr customer portal.
- Connect to the web console.

- In the web console, download the CHR image to the server with "wget". If you copied the download URL to your clipboard, you can send it to the server through the web console.
Substitute your version for x.x.x in the examples that follow.
# wget https://download.mikrotik.com/routeros/x.x.x/chr-x.x.x.img.zip
Unzip the downloaded file.
# unzip chr-x.x.x.img.zip
Write the MikroTik CHR image to the server's disk with dd.
# dd if=chr-x.x.x.img of=/dev/vda
- if is the image that you unzipped in the previous step.
- of is the server's disk: /dev/vda.
This procedure takes a couple of minutes; proceed to the next step when complete.
Step 3: Connect to MikroTik CHR
- Navigate to the server's settings page.
- Choose the Custom ISO menu, then click Remove ISO. The server will reboot.
- Connect to the web console.
- Log in as admin. There is no password set, so press Enter at the prompt.
- View the software license, then choose a new, strong password.
- Close the web console, then open a terminal on your local computer.
SSH as admin to the server's IP address.
$ ssh admin@192.0.2.2
- Enter the strong password you set in the prior step.
This completes the basic installation. Please secure your MikroTik CHR router and consult the documentation to configure the server for production use. Visit Vultr site for configuration manual and for their firewall features.