This scenario will work starting with RouterOS version 7.14beta8.
Before we proceed with the settings, you need to create an account in the AWS system. You can find more information on how to do that following this link.
After you are logged-in, go to Services>IoT Core section on the portal.
AWS - Registering the gateway
The first step is to register the LoRaWAN gateway.
Navigate to the Gateways section (under LPWAN devices).
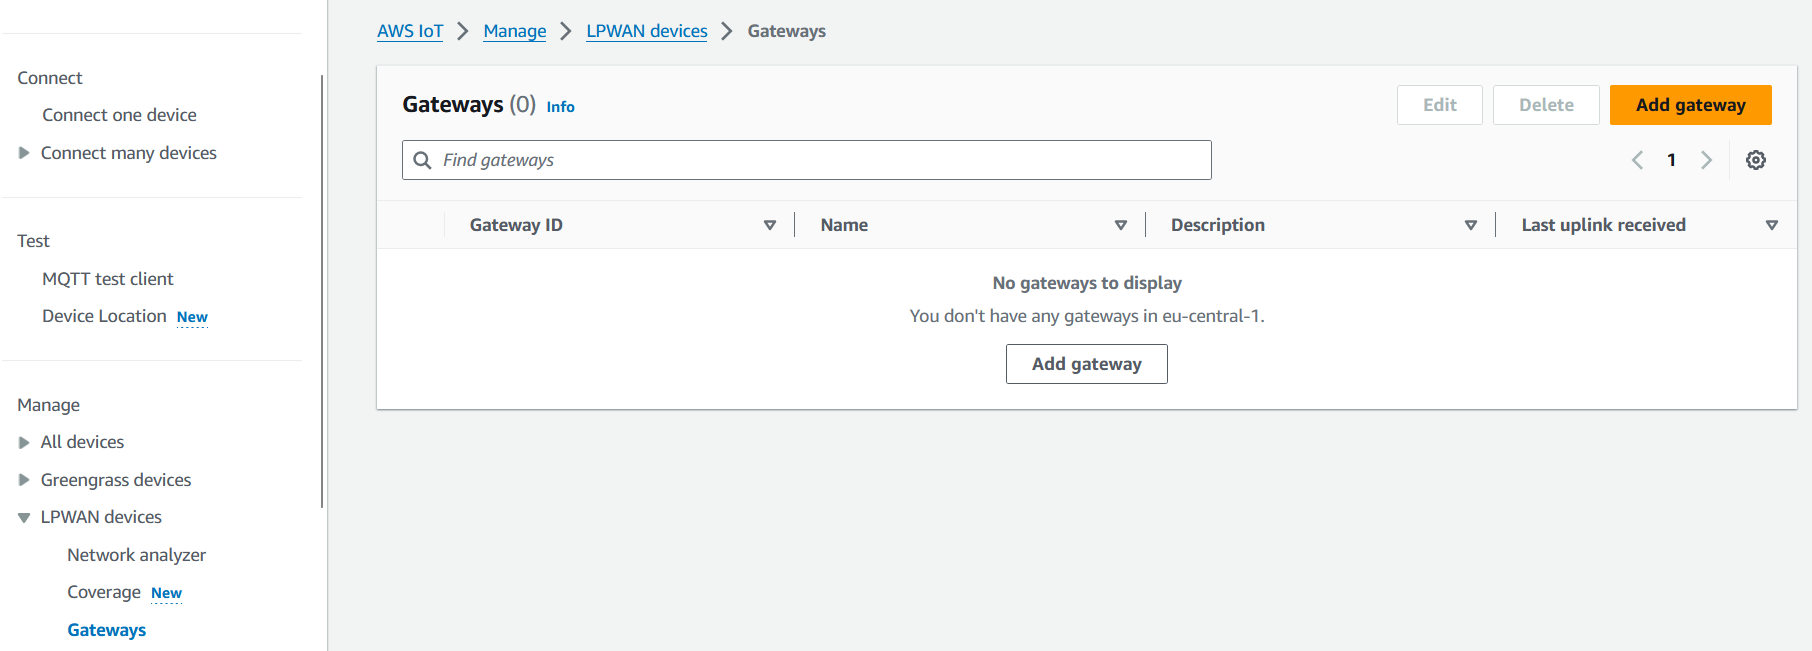
Click on the "Add gateway" button.
Step 1 - add gateway
- Input the gateway's EUI;
- Select device's frequency band;
- Configure optional fields if required;
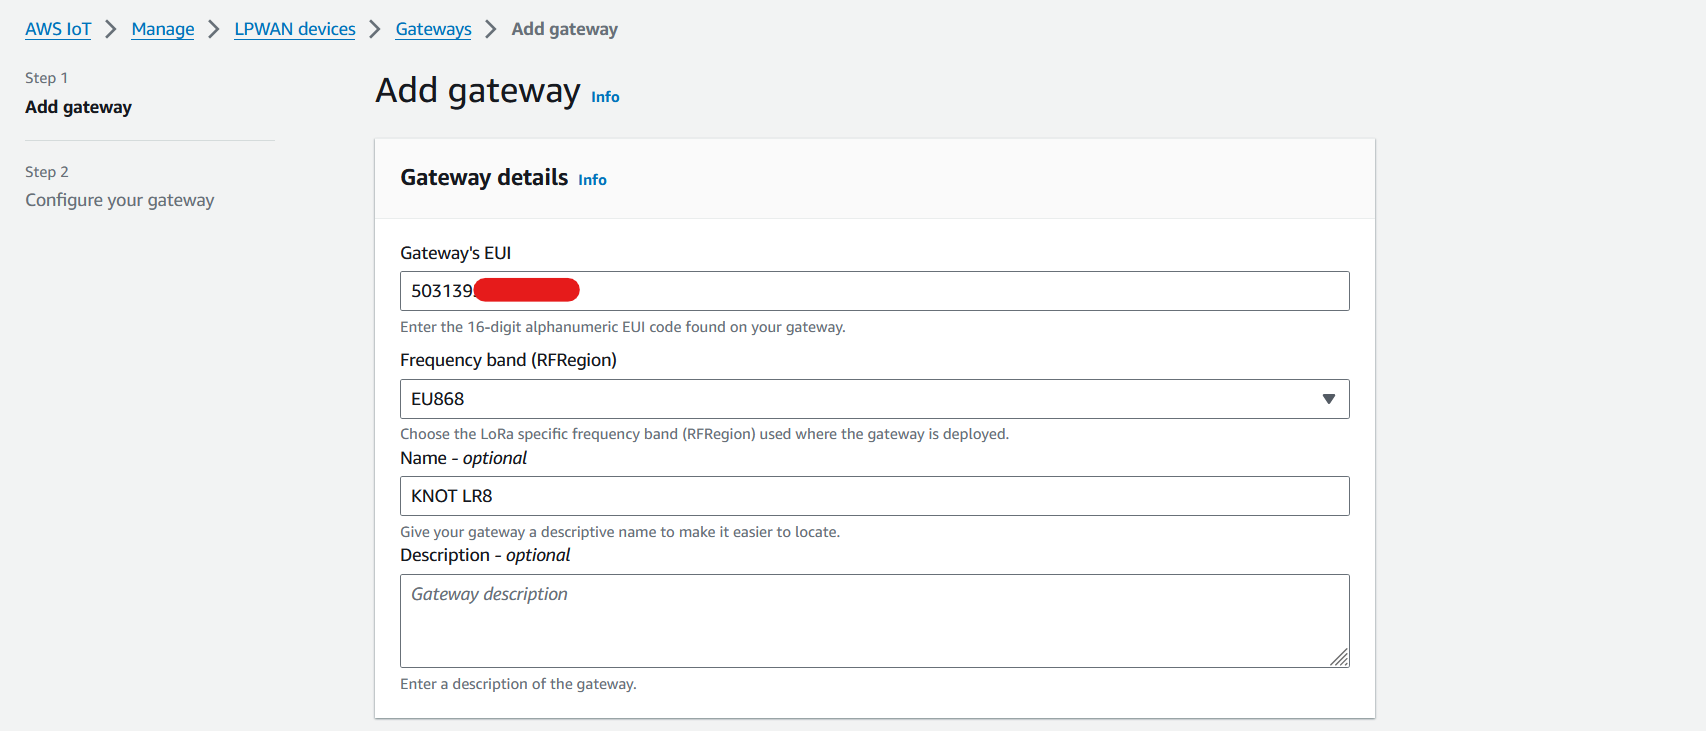
Finish the step by clicking on the "Add gateway" once again.
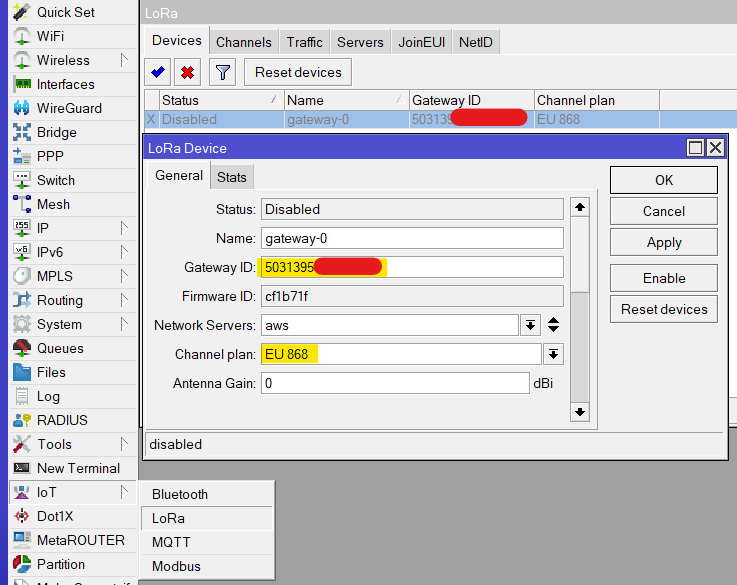
In RouterOS settings, gateway's EUI and frequency plan can be checked under IoT>LoRa>Devices tab:
Step 2 - configure your gateway
- Generate a gateway certificate ("Create certificate" button), and download the certificate file and private key files ("Download certificate files" button);
- Copy CUPS and LNS endpoints and download server trust certificates ("Download server trust certificates" button);
- Add suggested gateway permissions;
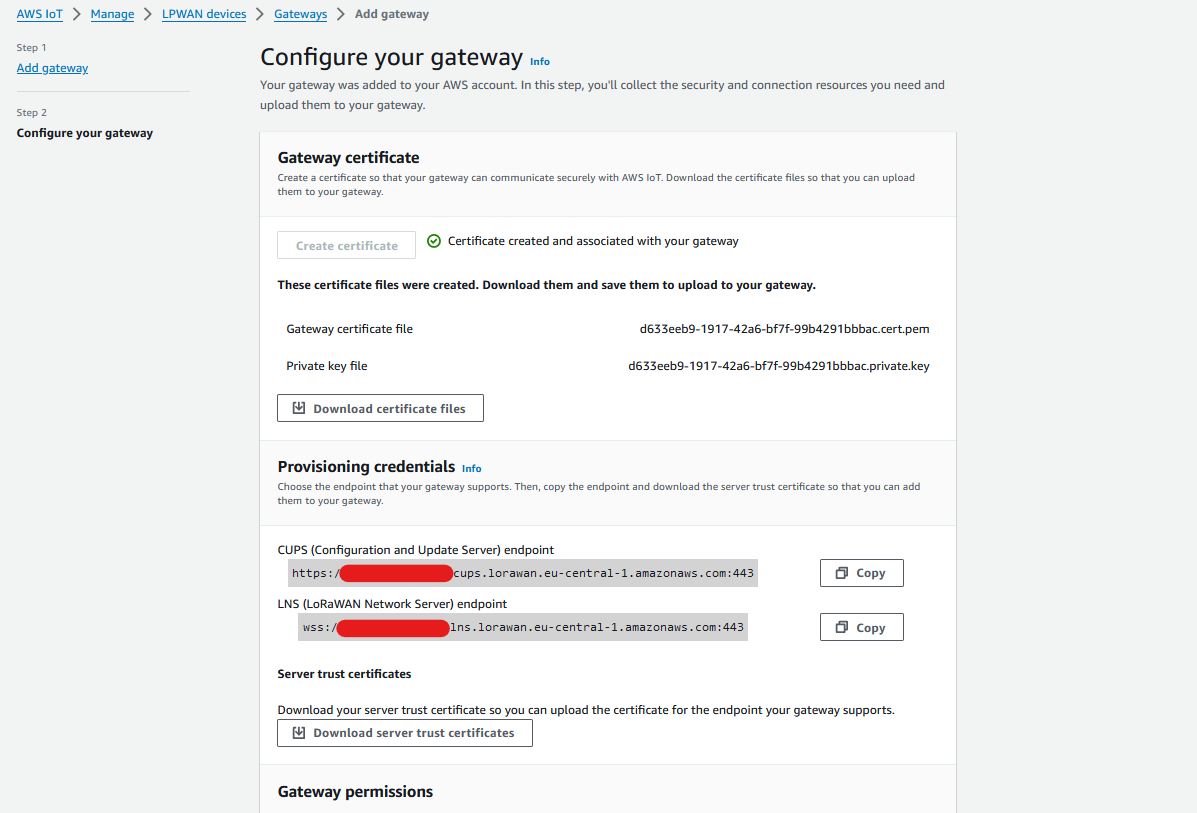
Finish the step by clicking on "Submit".
You will be redirected to the page where your newly created gateway should appear.
RouterOS - Connecting the gateway
Uploading and importing certificates
Before we proceed with the setup, you need to download Amazon Root CA and upload it, together with the gateway certificate file and its key, into the RouerOS file list menu:
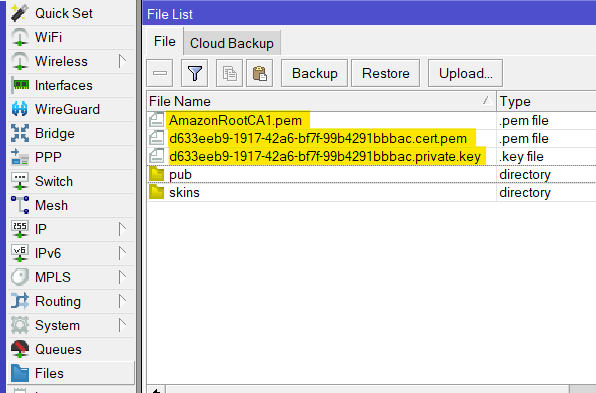
After the files were uploaded, import the certificates, one by one (under System>Certificates):

Make sure to upload the gateway certificate first and then its key (so that the gateway certificate has both K-key and T-trusted flags present). In the end, you should have all 3 file imported, like so:

Server configuration
LNS scenario
Navigate to the IoT>LoRa>Servers tab and add a new server:
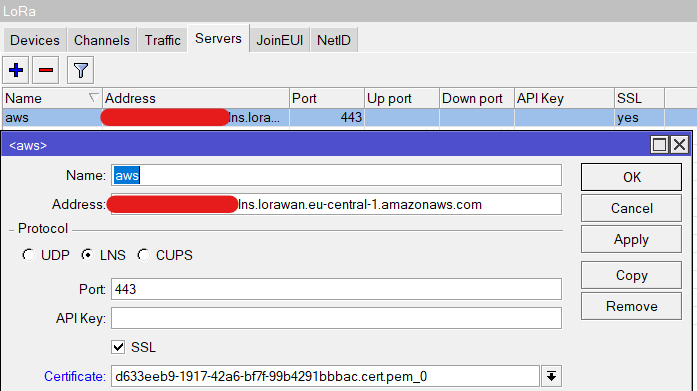
- Name the server;
- Input LNS endpoint address (without "
wss://" and ":443"); - Select LNS protocol;
- Change port to "443";
- Enable SSL checkbox;
- Select gateway certificate.
Make sure to apply newly configured server under IoT>LoRa>Devices tab:
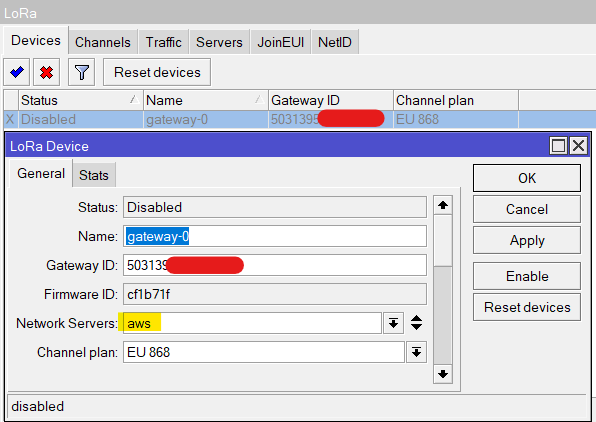
And then, enable the LoRa interface.
CUPS scenario
Navigate to the IoT>LoRa>Servers tab and add a new server:
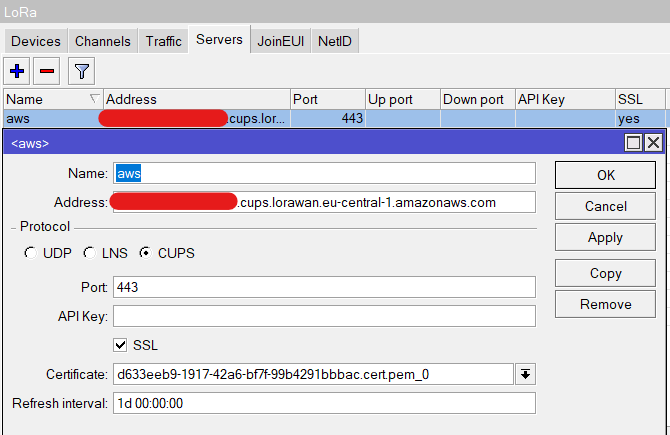
- Name the server;
- Input CUPS endpoint address (without "
https://" and ":443"); - Select CUPS protocol;
- Change port to "443";
- Enable SSL checkbox;
- Select gateway certificate.
Make sure to apply newly configured server under IoT>LoRa>Devices tab:

And then, enable the LoRa interface.
Connection verification
If everything is configured correctly, you should see "connected" status on the AWS portal:
