
Intercell 10 B38+B39
The intercell 10 B38+B39 is an outdoor TDD-LTE dual carriers base station with 2*(2*10W) output power (each carrier supports 2x2 MIMO with 10W output for each RF channel).
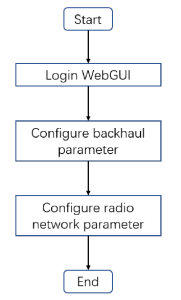
Please follow these quick steps to set up your device:
The device accepts power in the following way:
The power consumption under maximum load can reach 200 W.
If using an Ethernet cable add RBGESP to the setup, which comes with the package.

All configuration is necessary to carry out through the webGUI.
The configuration of this device should be done by a qualified person.

This topology shows typical Smallcell network architecture. HeNB works as LTE
the base station provides LTE service to UE;
NMS: HeNB management system (HeMS) is a virtualized solution that provides a full lifecycle
of small cell management functions. It supports TR-181 and TR-196 data models which are defined by Broadband.
HeNB-GW: HeNB Gateway is deployed between HeNB and MME, providing the
aggregation of control and user plane traffic and capabilities necessary to manage
large clusters of small cells. It plays functions of data aggregation and forwarding,
and S1/X2 proxy
HeNB can get the IP address by DHCP and Static assignment.
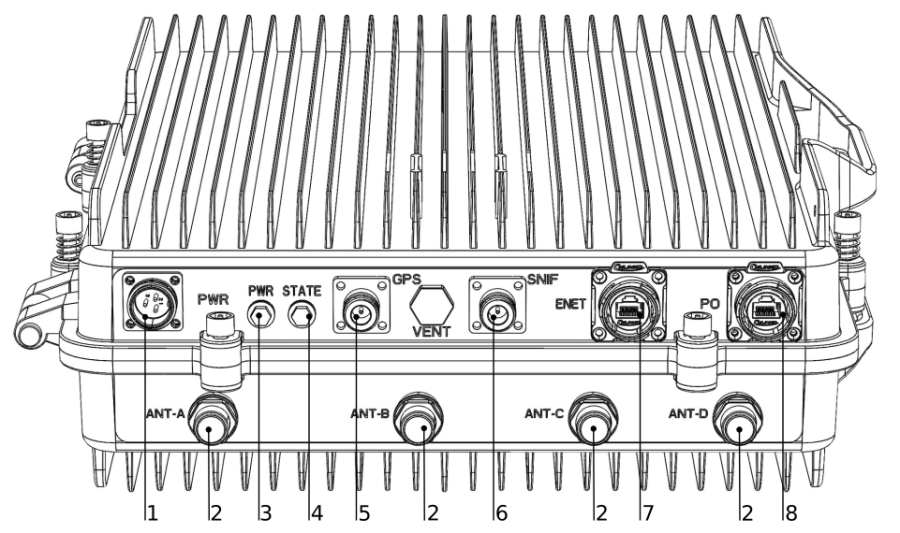
The WAN port is an SFP port and is named ID1 in the Network configuration.
LAN port is an Ethernet port and is named ID2 in the Network configuration.
In the DHCP method, can check the HeNB IP address by MAC Scan.
In the static assignment method, configuration procedures are as below:
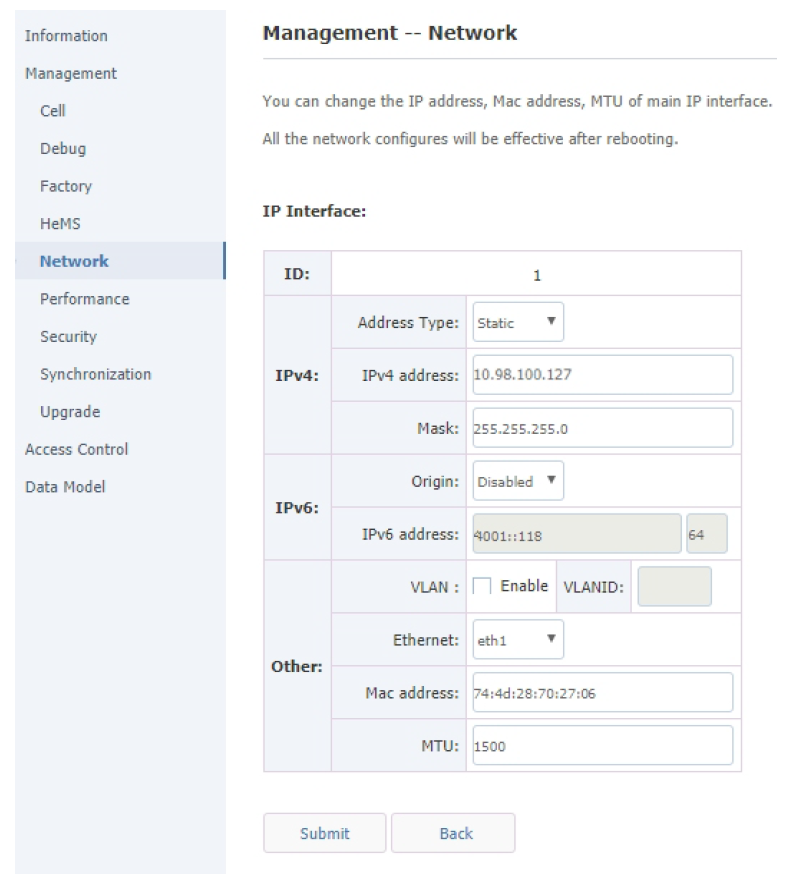
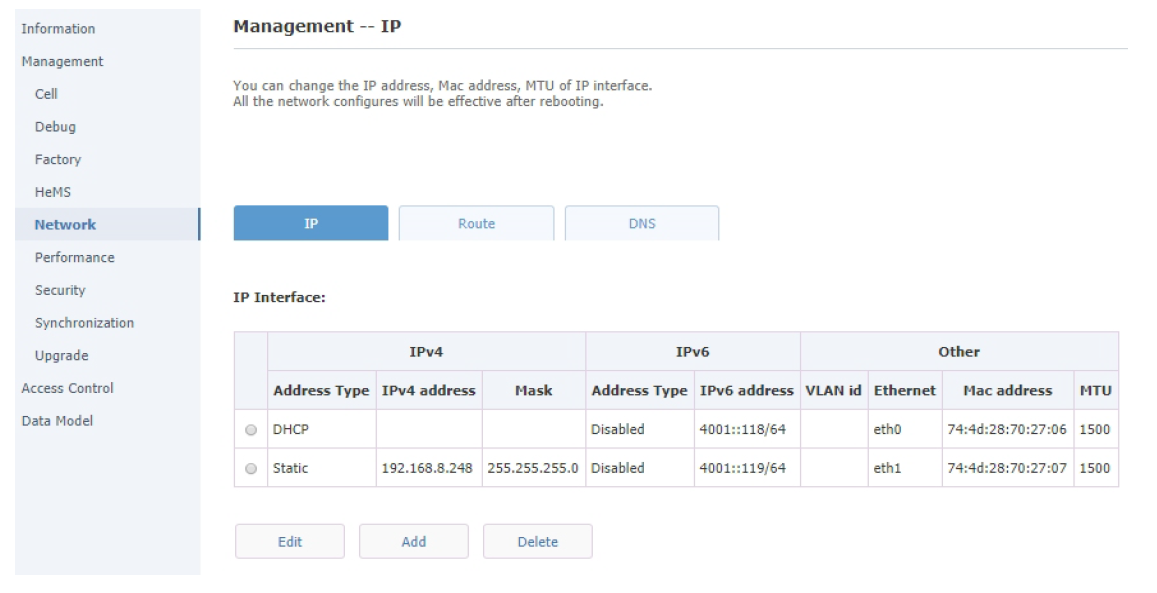
Login:
Login to WebGUI with HTTPS.
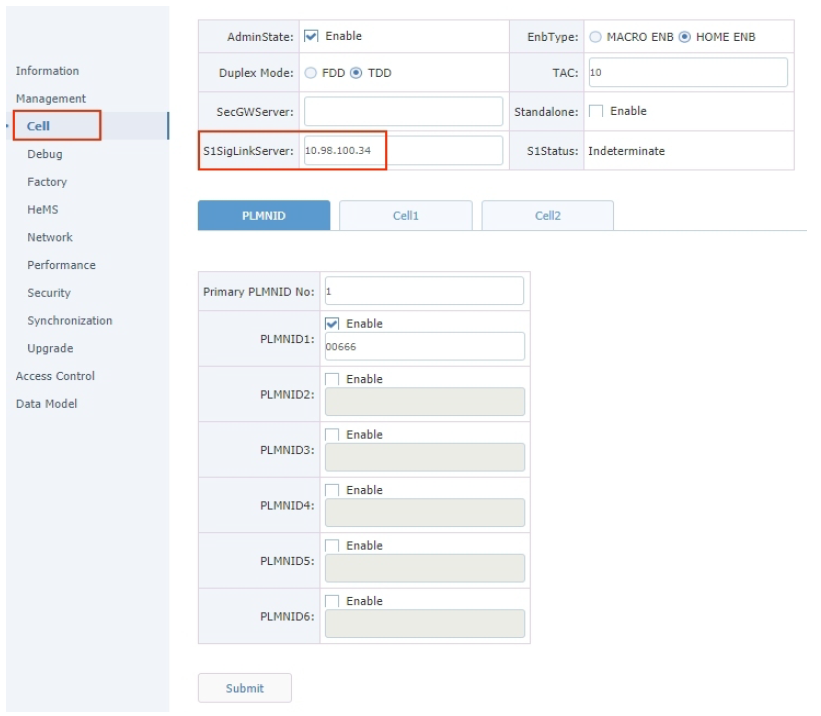
Configure the NME/HeNB-GW IP address:
Path: Management > Cell > S1SigLinkServer.
Please see the formula and table on how to determine output power:
Output power of each antenna = ReferenceSignalPower + Base(dBm)
Output power of 2 antennas = ReferenceSignalPower + Base + 3(dBm)
Band Width | Base |
1MHz | 19 |
3MHz | 23 |
5MHz | 25 |
10MHz | 28 |
15MHz | 30 |
20MHz | 31 |
Warning! The maximum Tx power is 40 dBm, please calculate the Tx power accordingly otherwise the power amplifier might be damaged! |
Configure common radio parameters:
Path: Management > Cell
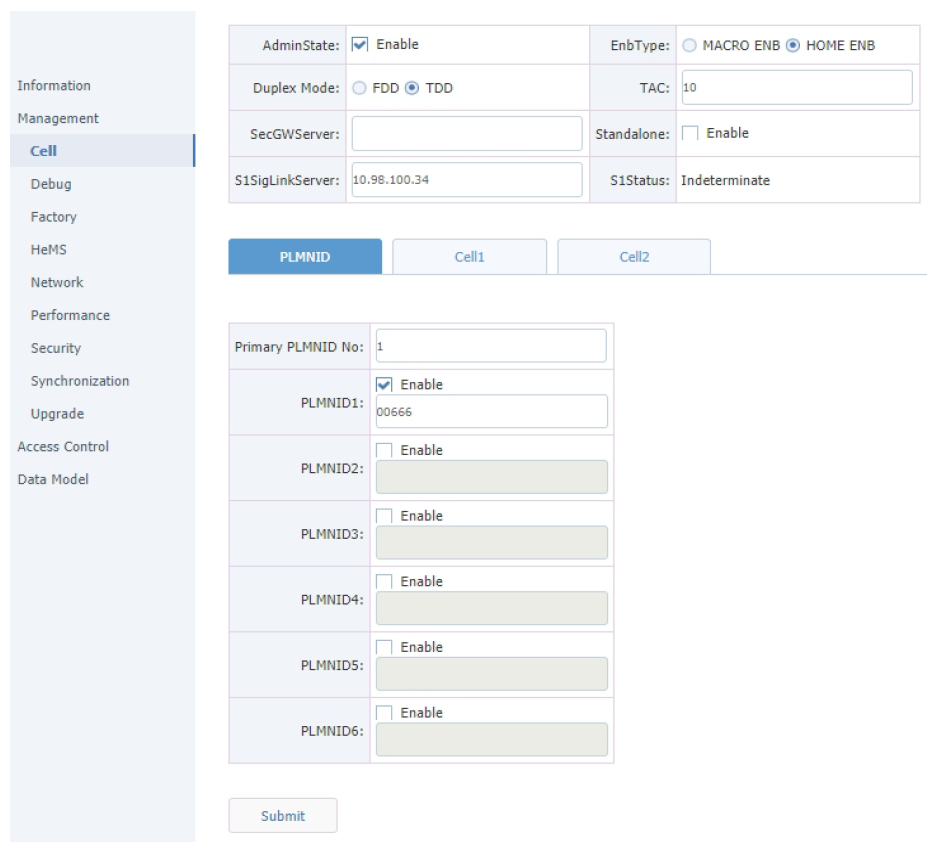
Note: EARFCN in Downlink, the Uplink EARFCN will be configured automatically by HeNB.
Note: Range from 0 to 503, HeNB will select PCI automatically.
Note: 20MHz ↔ 100, 15 MHz ↔ 75, 10MHz ↔ 50, 5MHz ↔ 25.
Note: Reference signal power, -14 means (-14+31) 17dBm, max value for the product is 9 which will be (9+31) 40dBm.
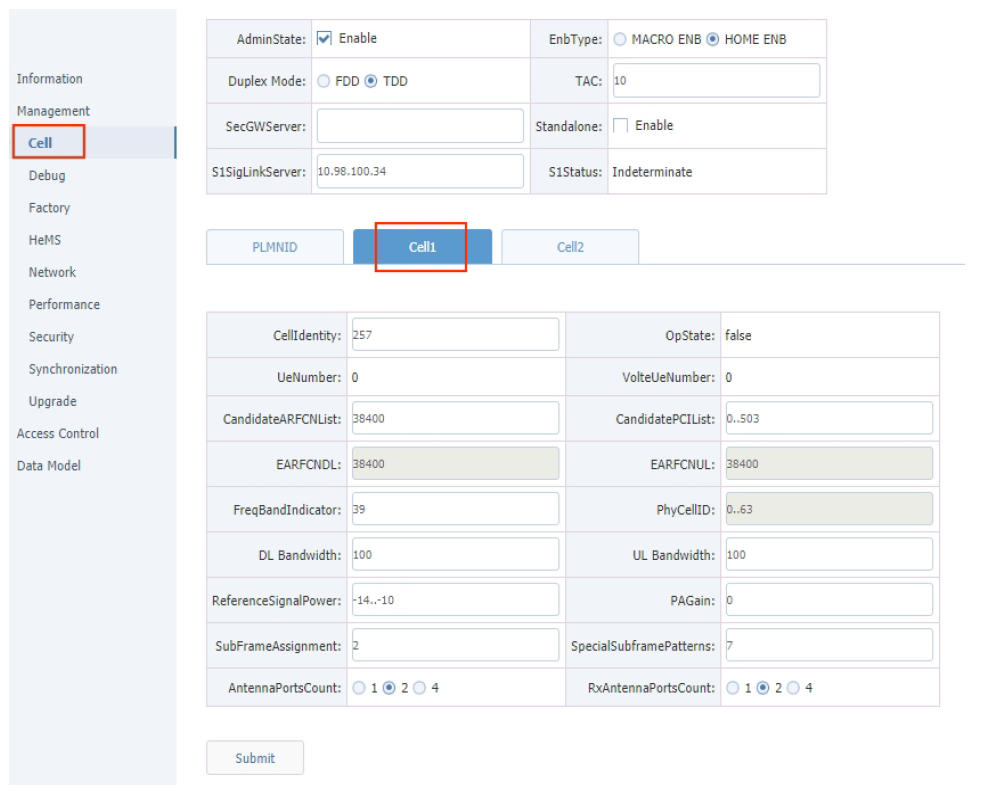
Note: EARFCN in Downlink, Uplink EARFCN will be configured automatically by HeNB.
Note: Range from 0 to 503, HeNB will select PCI automatically.
Note: 20MHz ↔ 100, 15 MHz ↔ 75, 10MHz ↔ 50, 5MHz ↔ 25.
Note: Reference signal power, -14 means (-14+31) 17dBm, max value for the product is 9 which will be (9+31) 40dBm.
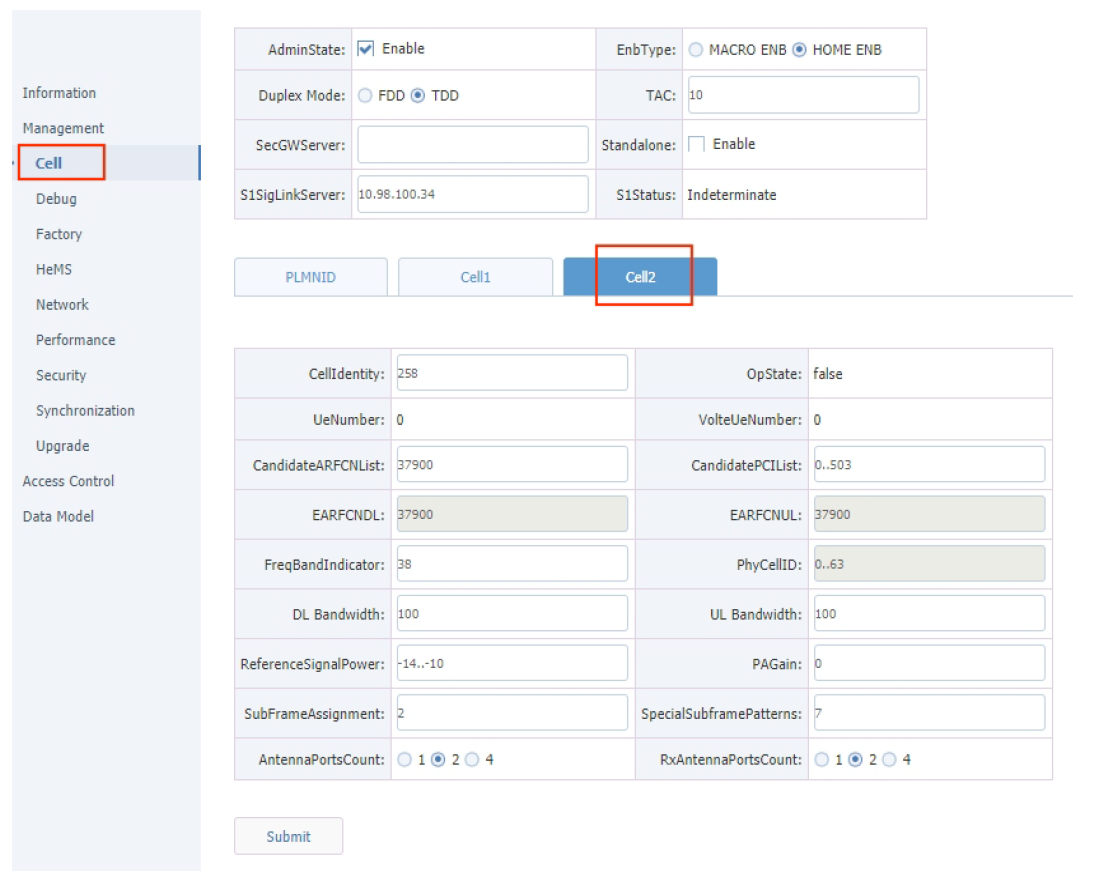
Select the "AdminState" when all the above parameters are well configured.
Note: This is the switch to control the RF function, select enable RF function when all parameters are well configured.
Press "Submit", then HeNB will reboot to take the configuration into effect.
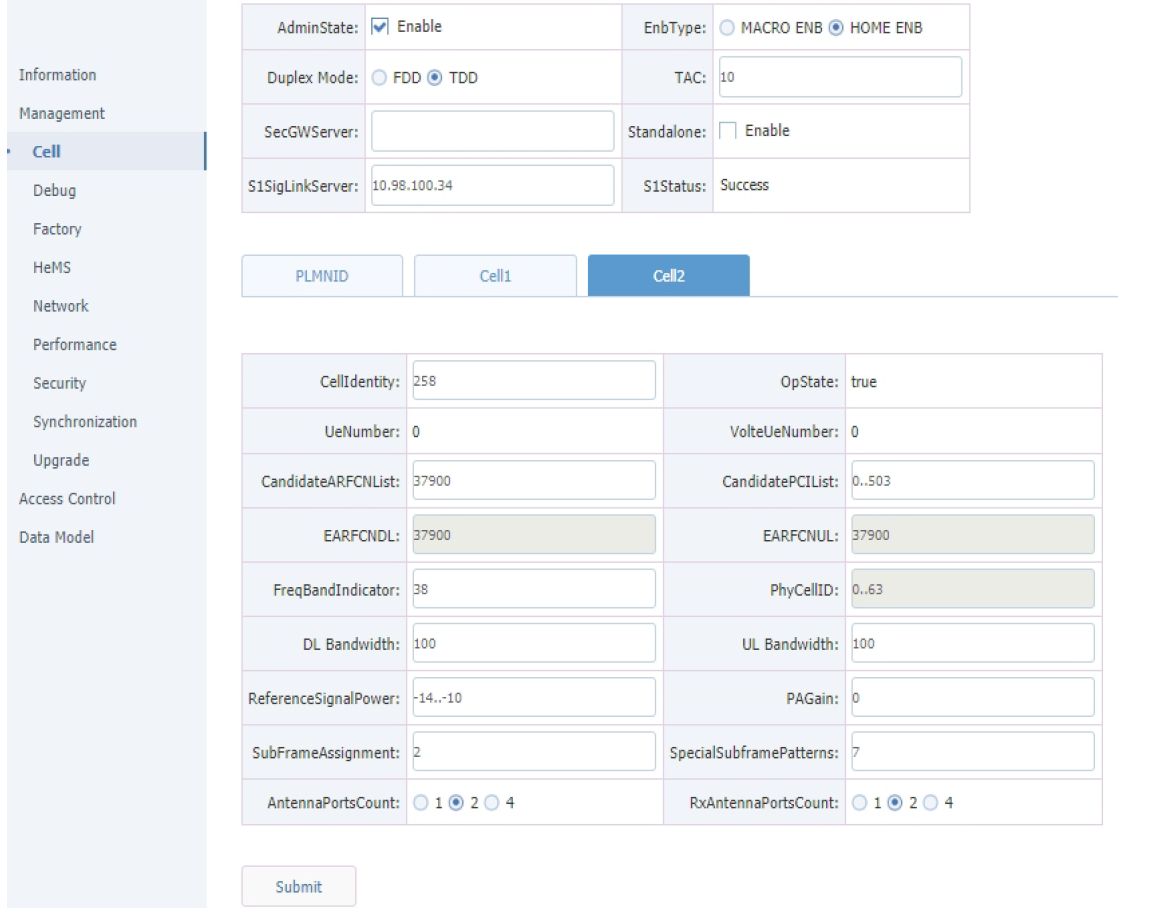
Path: Management > Cell > Cell1 > OpState, Management > Cell > Cell1 > OpState;
Note: "True" means the radio cell was established successfully.
The device is designed to be used outdoors.
When mounting on the wall or mast, please ensure that the cable feed is pointing downwards.
The IPX rating scale of this device is IP66. We recommend using Cat6 shielded cables.
Mounting and configuration of this device should be done by a qualified person.
The package includes mounting parts for pole or wall mounting. Acceptable pole diameter 50 – 120 mm.
Please note the weight of the device is 25kg!

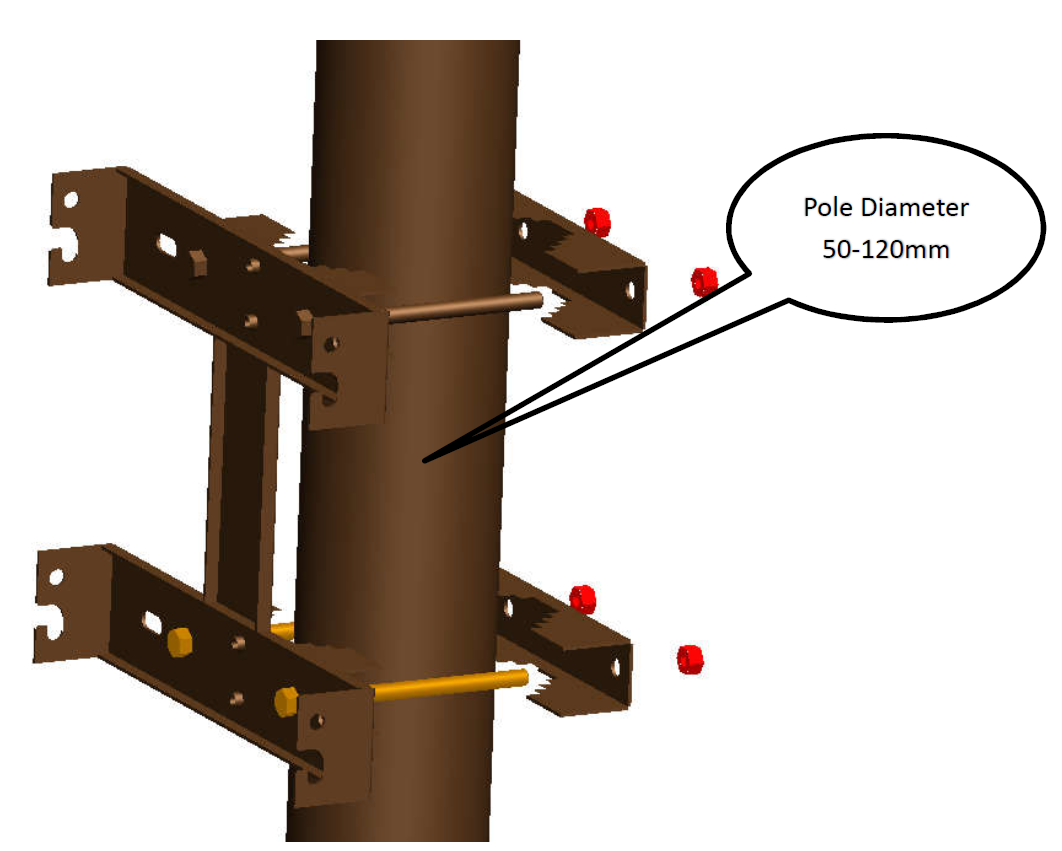
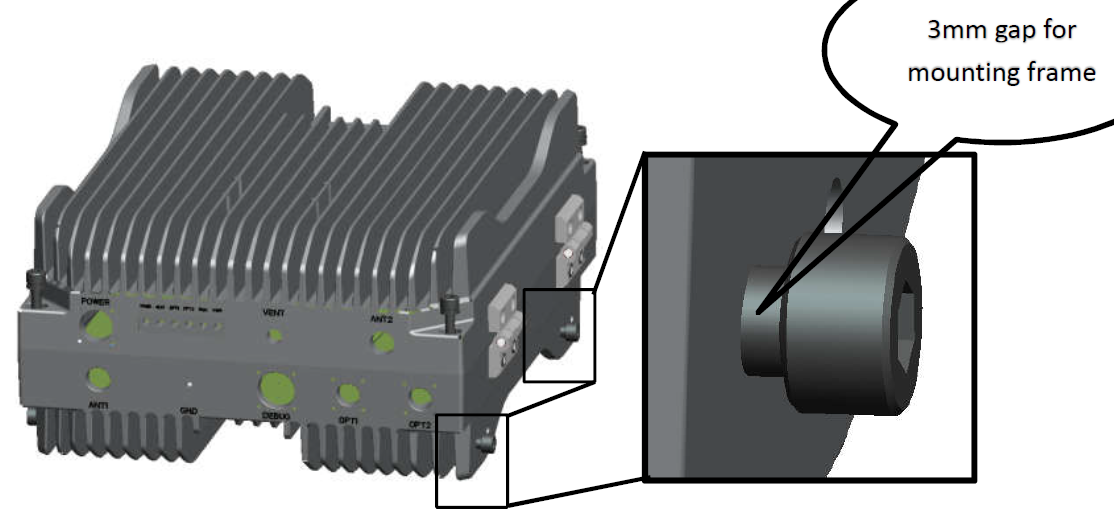
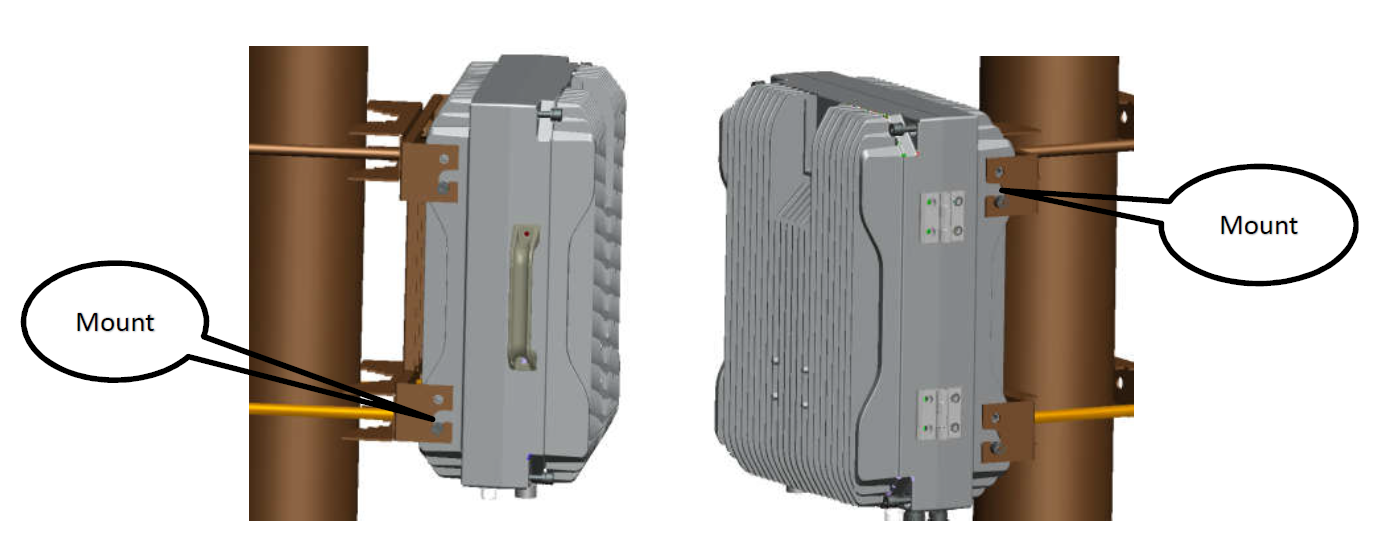
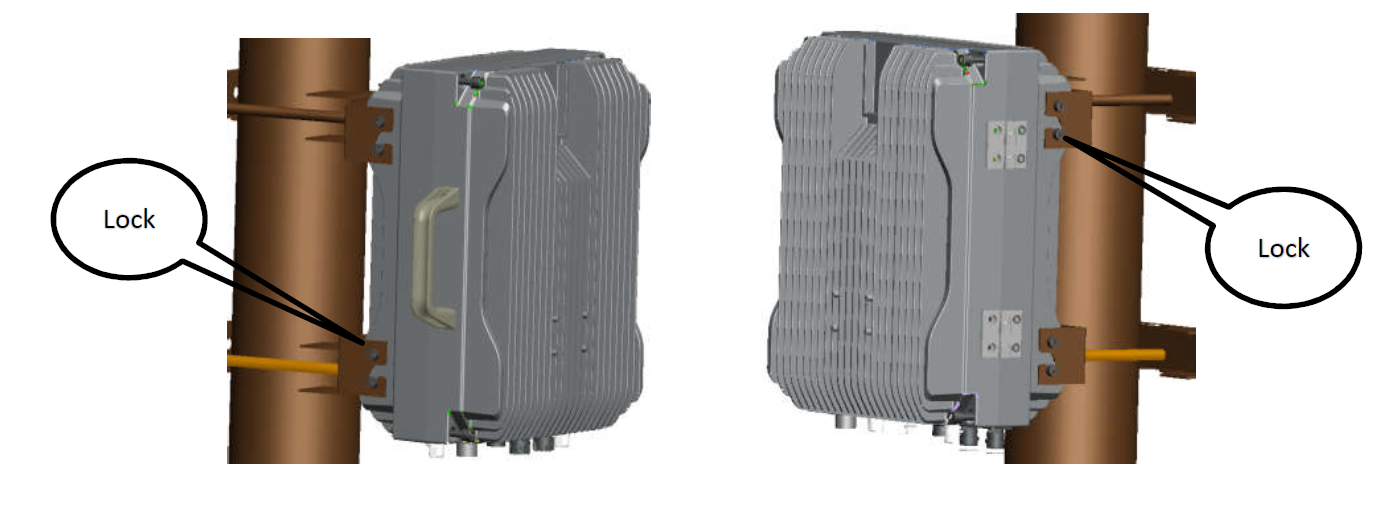
The installation infrastructure (towers and masts), as well as the router itself, must be properly grounded. Attach your grounding wire to the grounding screw, then attach the other end of the grounding wire to the grounded mast.
Power interface lightning protection – GB/T 17626.5, IEC61000-4-5.
-DL 140 Mbps (256QAM,SF2).
-UL 30Mbps (64QAM,SF1).
-DL 280 Mbps (256QAM,SF2).
-UL 60Mbps (64QAM,SF1).
Frequency Bands B38:2570MHz-2620MHz, B39:1880MHz-1920MHz, channel bandwidth 5/10/15/20 MHz.
The package includes the following accessories that come with the device:
Please visit wiki pages for the MikroTik SFP module compatibility table: https://wiki.mikrotik.com/wiki/MikroTik_SFP_module_compatibility_table
The device supports Intercell HeNB software. RouterOS are not supported.
| Note. The information contained here is subject to change. Please visit the product page on www.mikrotik.com for the most up-to-date version of this document. |