Introduction
Netinstall is a tool designed for Windows operating systems to reinstall MikroTik devices running RouterOS (except for non-MikroTik x86 devices). Netinstall re-formats the device's disk and copies over fresh files on to the system's disk, this can solve multiple issues when your device is not working properly. Always try using Netinstall if you suspect that your device is not working properly.
Netinstall re-formats the system's drive, all configuration and saved files will be lost. Netinstall does not erase the RouterOS license key, nor does it reset RouterBOOT related settings, for example, CPU frequency is not changed after reinstalling the device.
How To Use
- Download Netinstall from the downloads page. If you are not sure which version you need, then you can always select the version that is marked as Current (stable);
Download the RouterOS Main package from the downloads page;
You must choose a RouterOS version. You can always select the version that is marked as Current. You must also select the architecture (ARM, MIPS, SMIPS, TILE, etc...), but if you are not sure, then you can download the RouterOS package for ALL architectures, Netinstall will choose the right architecture for you.
Disconnect your computer from WiFi, Ethernet, LTE or any other type of connections! Netinstall will only work on one active interface on your computer, it is highly recommended that you disconnect any other network interfaces in order to be sure that Netinstall will select the right network interface.
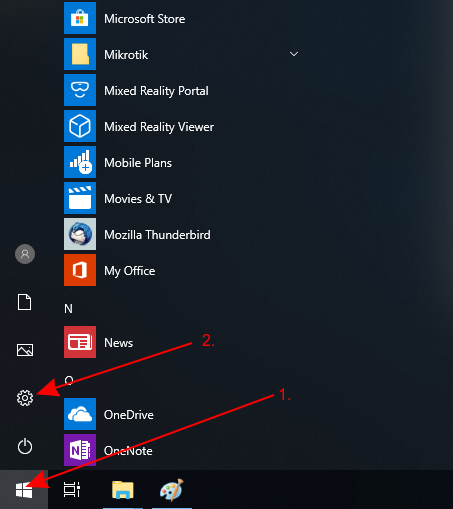
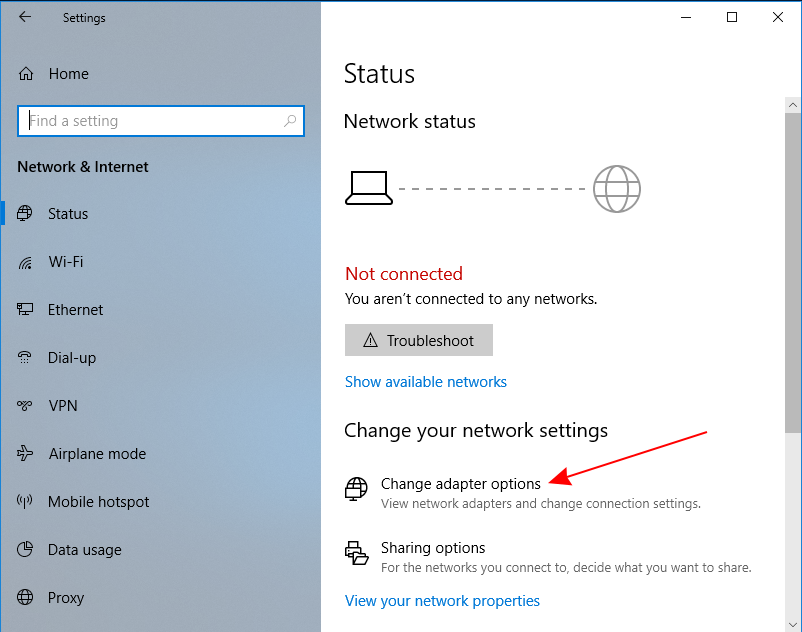
Configure a static IP address for your Ethernet interface, open Start and select Settings:
Netinstall can run also on a local network, in such case you could skip setting a static IP address, but it is highly recommended that you set a static IP address if you are not familiar with Netinstall.
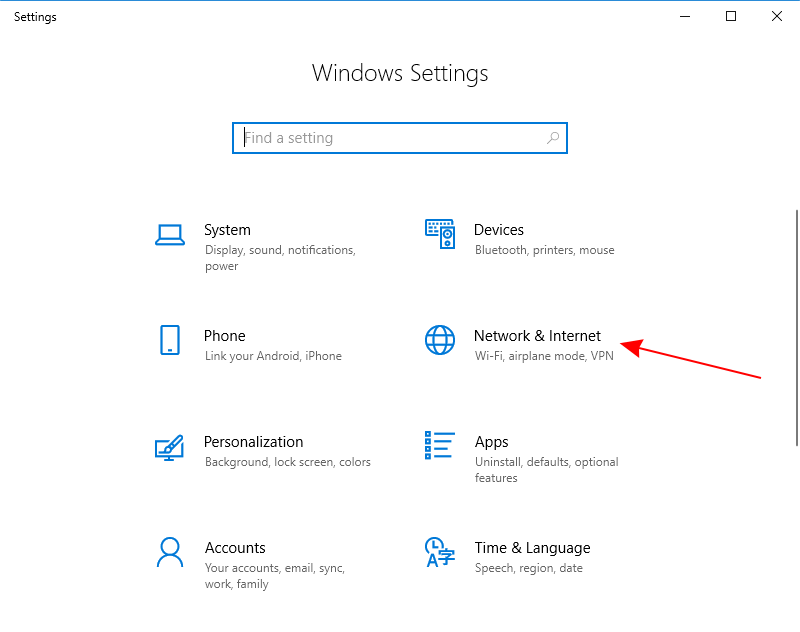
- Open Network & Internet and select Change adapter options
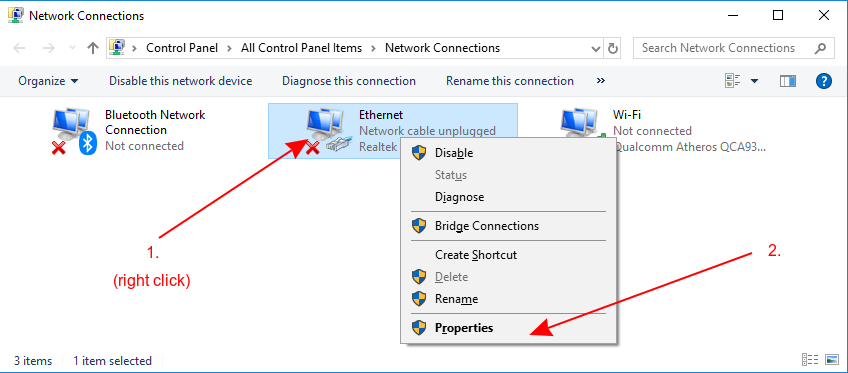
- Right-click on your Ethernet interface and select Properties
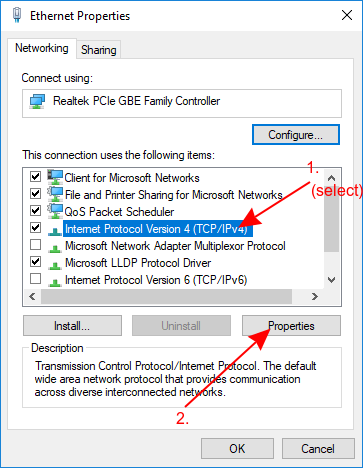
- Select Internet Protocol Version 4 (TCP/IPv4) and click Properties
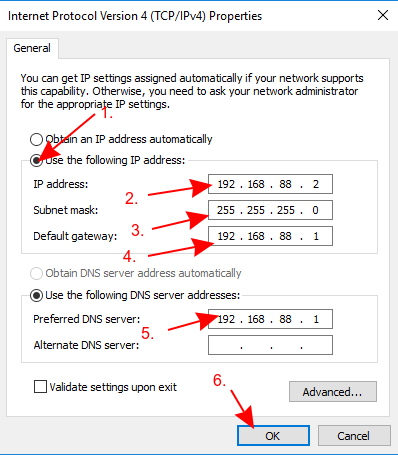
- Check Use the following IP address and fill out the fields as shown in the image below
If you have a working router, then you can use it and skip the setting up a static IP part of this tutorial, but it requires you to know your LAN address since you will need to specify an unused IP address in your network for the network boot server. For this reason it is recommended to apply a static IP address and follow this guide precisely, if you are not sure how to get these parameters out of your network.
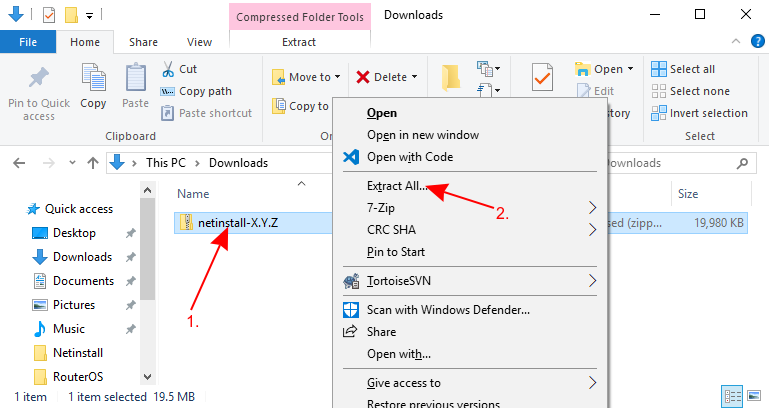
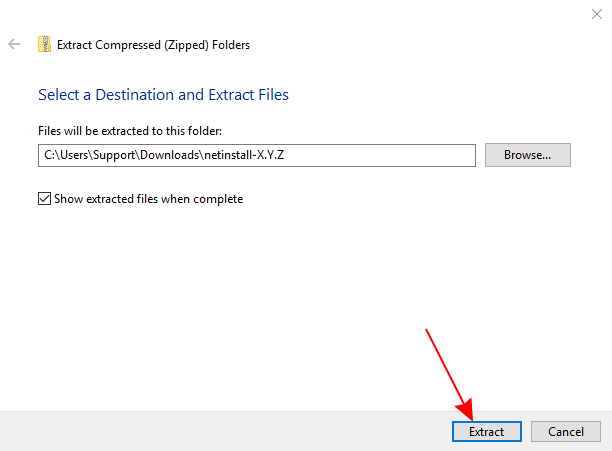
- Open your Downloads folder (or wherever you saved the downloaded files) and extract the Netinstall .zip file to a convenient place
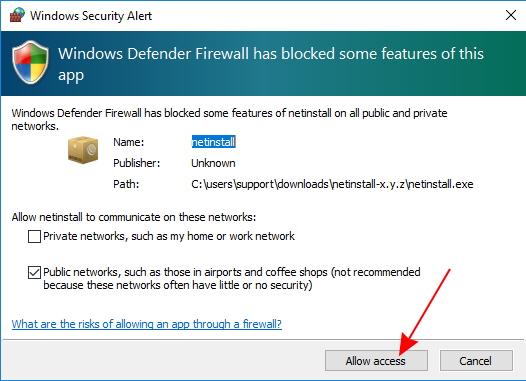
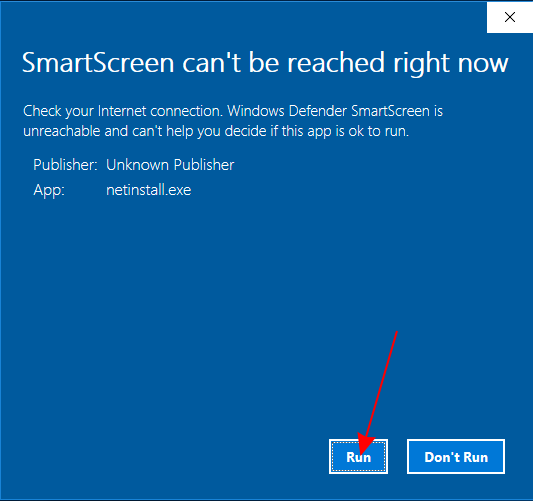
Run Netinstall.exe. If you followed the guide precisely, then you should not have any Internet connection on your computer, Windows 10 wants to verify all apps that it runs, but will not be able to do it since lack of the Internet connection, for this reason, a warning might pop up, you should click Run.
Netinstall requires administrator rights, there should be a window asking for permissions to run Netinstall, you must accept these permissions in order for Netinstall to work properly.
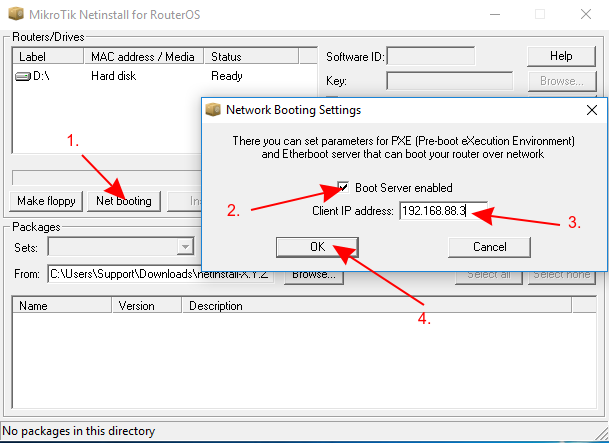
- Allow access for Netinstall in Public networks and configure Net booting settings and fill out the required fields as shown in the image below