CCR1072-1G-8S+
The CCR1072 is a high-performance multicore router with eight SFP+ cages. Ports are directly connected to a Tilera 72 core CPU and assisted by 16 GB of built-in ECC RAM.
Safety Warnings
Before you work on any equipment, be aware of the hazards involved with electrical circuitry, and be familiar with standard practices for preventing accidents.
Ultimate disposal of this product should be handled according to all national laws and regulations.
The Installation of the equipment must comply with local and national electrical codes.
This unit is intended to be installed in the rackmount. Please read the mounting instructions carefully before beginning installation. Failure to use the correct hardware or to follow the correct procedures could result in a hazardous situation to people and damage to the system.
Read the installation instructions before connecting the system to the power source.
It is the customer's responsibility to follow local country regulations, including operation within legal frequency channels, output power, cabling requirements, and Dynamic Frequency Selection (DFS) requirements. All Mikrotik radio devices must be professionally installed.
First use
The Ethernet port 1 (BOOT) has a default IP address for connecting: 192.168.88.1 username is admin and there is no password. Please connect with your web browser to this IP address and choose Webfig to configure it. The device doesn't have any other configuration applied by default, please connect to it, and set up WAN IP addresses, user password, firewall, etc. Please see the configuration section.
Mounting
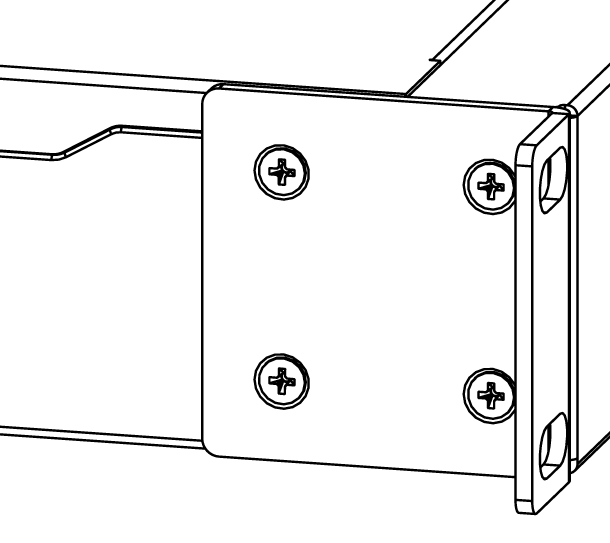
The device is designed to use indoors and it can be mounted in a rackmount enclosure using provided rack mounts, or it can be placed on the desktop. Use a Phillips screwdriver to attach rackmount ears on both sides of the device if designated use is for rackmount enclosure:
- Attach rack ears to both sides of the device and tighten four screws to secure them in place, as shown on the picture to the right;
- Place the device in rackmount enclosure and align with the holes so that the device fits conveniently;
- Tighten screws to secure it in place.
The device has no protection from water contamination, please ensure the placement of the device in a dry and ventilated environment. We recommend Cat6 cables for our devices.
Mounting and configuration of this device should be done by a qualified person.
Powering
The device has dual removable (hot-swap compatible) power supply units AC ⏦ 110-240V (2.5 A) with standard IEC compatible sockets with Maximum power consumption of 125 W.
Configuration
Once logged in, we recommend clicking the "Check for updates" button in the QuickSet menu, as updating your RouterOS software to the latest version ensures the best performance and stability. For wireless models, please make sure you have selected the country where the device will be used, to conform with local regulations.
RouterOS includes many configuration options in addition to what is described in this document. We suggest starting here to get yourself accustomed to the possibilities: https://mt.lv/help. In case IP connection is not available, the Winbox tool (https://mt.lv/winbox) can be used to connect to the MAC address of the device from the LAN side (all access is blocked from the Internet port by default).
For recovery purposes, it is possible to boot the device for reinstallation, see a section Reset button.
Extension Slots and Ports
- 2x M.2 slots, which accept 800mm Key-M x4 PCIe 2.0 modules. M.2 slots are located on the PCB board inside the device. In order to access them remove screws on the back of the router for upper cover and while lifting up and pulling towards cover slides off.
- microSD card slot.
- Smart Card slot for private key storage.
- 1 Gigabit Ethernet port.
- 8 SFP+ ports for 10 Gigabit connectivity.
- USB slot type A.
- microUSB slot type AB.
- Automatic fan speed control.
Reset button
The reset button has two functions:
- Hold this button during boot time until LED light starts flashing, release the button to reset RouterOS configuration.
- Or Keep holding the button for 5 more seconds until LED turns off, then release it to make the RouterBOARD look for Netinstall servers.
Regardless of the above option used, the system will load the backup RouterBOOT loader if the button is pressed before power is applied to the device. Useful for RouterBOOT debugging and recovery.
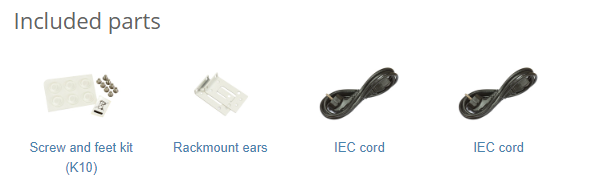
Accessories
Package includes the following accessories that come with the device:
- EU/US AC ⏦ power cord, D03+QT3 H05VV-F 3x0.75 mm 2 1.83 m RoHS.
- Fastening set for rackmount case K-10 R2.
- Rackmount Case x72 Side Bracket.
Please visit wiki pages for MikroTik SFP module compatibility table: https://wiki.mikrotik.com/wiki/MikroTik_SFP_module_compatibility_table
Specifications
For more information about this product, specification and pictures please visit our web page: https://mikrotik.com/product/CCR1072-1G-8Splus
Operating System Support
The device supports RouterOS software with the version number at or above what is indicated in the RouterOS menu /system resource. Other operating systems have not been tested.
 Safety Notice
Electric shock hazard. This equipment is to be serviced by trained personnel only. This is a class A device, operating it near residential radio equipment could cause radio interference.
Federal Communication Commission Interference Statement
![]() This equipment has been tested and found to comply with the limits for a Class A digital device, pursuant to Part 15 of the FCC Rules. These limits are designed to provide reasonable protection against harmful interference in a residential installation.
This equipment has been tested and found to comply with the limits for a Class A digital device, pursuant to Part 15 of the FCC Rules. These limits are designed to provide reasonable protection against harmful interference in a residential installation.
This equipment generates, uses and can radiate radio frequency energy and, if not installed and used in accordance with the instructions, may cause harmful interference to radio communications. However, there is no guarantee that interference will not occur in a particular installation. If this equipment does cause harmful interference to radio or television reception, which can be determined by turning the equipment off and on, the user is encouraged to try to correct the interference by one of the following measures:
- Reorient or relocate the receiving antenna.
- Increase the separation between the equipment and receiver.
- Connect the equipment into an outlet on a circuit different from that to which the receiver is connected.
- Consult the dealer or an experienced radio/TV technician for help.
FCC Caution: Any changes or modifications not expressly approved by the party responsible for compliance could void the user's authority to operate this equipment.
This device complies with Part 15 of the FCC Rules. Operation is subject to the following two conditions: (1) This device may not cause harmful interference, and (2) this device must accept any interference received, including interference that may cause undesired operation.
Note: This unit was tested with shielded cables on the peripheral devices. Shielded cables must be used with the unit to ensure compliance.
Innovation, Science and Economic Development Canada
This device complies with Industry Canada's license-exempt RSS standard(s). Operation is subject to the following two conditions: (1) this device may not cause interference, and (2) this device must accept any interference, including interference that may cause undesired operation of the device.
Le présent appareil est conforme aux CNR d'Industrie Canada applicables aux appareils radio exempts de licence. L'exploitation est autorisée aux deux conditions suivantes: (1) l'appareil ne doit pas produire de brouillage, et (2) l'utilisateur de l'appareil doit accepter tout brouillage radioélectrique subi, même si le brouillage est susceptible d'en compromettre le fonctionnement.
This Class A digital apparatus complies with Canadian ICES-003.
Cet appareil numérique de la classe [A] est conforme à la norme NMB-003 du Canada.
CAN ICES-003 (A) / NMB-003 (A)
UKCA marking

Eurasian Conformity Mark
Информация о дате изготовления устройства указана в конце серийного номера на его наклейке через дробь. Первая цифра означает номер года (последняя цифра года), две последующие означают номер недели.
Изготовитель: Mikrotikls SIA, Aizkraukles iela 23, Riga, LV-1006, Латвия, support@mikrotik.com. Сделано в Китае, Латвии или Литве. Cм. на упаковке.

Для получения подробных сведений о гарантийном обслуживании обратитесь к продавцу. Информация об импортерах продукции MikroTik в Российскую Федерацию: https://mikrotik.com/buy/europe/russia
Продукты MikroTik, которые поставляются в Евразийский таможенный союз, оцениваются с учетом соответствующих требований и помечены знаком EAC, как показано ниже:
Norma Oficial Mexicana
EFICIENCIA ENERGETICA CUMPLE CON LA NOM-029-ENER-2017.
La operacion de este equipo esta sujeta a las siguientes dos condiciones:
- Es posible que este equipo o dispositivo no cause interferencia perjudicial y.
- Este equipo debe aceptar cualquier interferencia, incluyendo la que pueda causar su operacion no deseada.
Fabricante: Mikrotikls SIA, Brivibas gatve 214i, Riga, LV-1039, Latvia.
País De Origen: Letonia; Lituania; China (Republica Popular); Estados Unidos De America; Mexico.
Por favor contacte a su distribuidor local para preguntas regionales específicas. La lista de importadores se puede encontrar en nuestra página de inicio – https://mikrotik.com/buy/latinamerica/mexico.
CE Declaration of Conformity
Manufacturer: Mikrotikls SIA, Brivibas gatve 214i Riga, Latvia, LV1039.
The full text of the EU Declaration of Conformity is available at the following internet address: https://mikrotik.com/products![]()