...
The Woobm is a WiFi-to-serial bridge. This device enables wireless access to RouterBOARD devices which have a USB port but do not have wireless interfaces. The device operates in 2GHz 802.11b/g/n wireless mode and supports both client and access point modes, which can be protected with a WPA wireless password (for some models, check user and wireless passwords on the sticker).
Powering
The device accepts power from the USB port of the RouterBOARD device.
Setup
...
First startup
Connect your Woobm-USB to the USB port
...
, open a wireless network with SSID: WoobmAP will be created. Connect to device and open device IP address in a web browser.
...
| Warning |
|---|
Default Woobm-USB IP is |
192.168.4.1 |
...
| Info |
|---|
On the host device, you must set a USB port, for Terminal access through Woobm, system/console/add port=usb1 disabled=no |
Configuration
The Woobm runs a special operating system where you can configure its basic functionality, the configuration is accessible through a web interface. To connect to the RouterBOARD device, the following methods are available:
- Click on "Terminal" in the Woobm web configuration interface.
- Open a Telnet connection to the Woobm device from your computer, you will be directly connected to the RouterBOARD device.
For more detailed instructions, please see full Woobm software documentation on https://mt.lv/help
Buttons and jumpers
The Woobm has one button, which has the following functions:
...
A device running RouterOS will automatically mount as a serial USB device and provide access after successful login.
WEB interface
WEB interface allows access to the serial port from devices equipped with an 802.11b/g/n 2.4GHz wireless module.
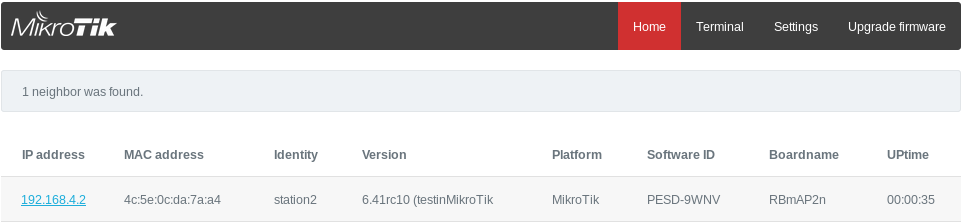
Web interface default page is "Home" From the home page, it is possible to connect and configure RouterOS neighbor devices (MikroTik devices in the same network) Press on a device IP address to establish a connection:
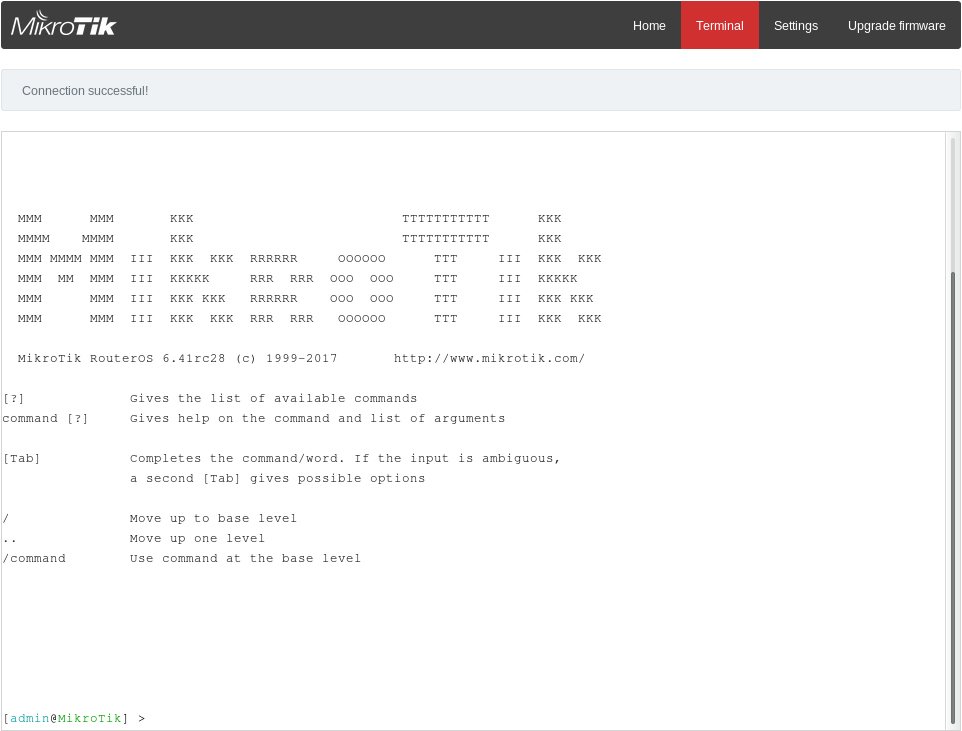
By opening the Terminal tab, Woobm-USB will try to emulate the USB serial interface. On a successful attempt "Connection successful! " message will appear above the terminal window. You can enter commands from the keyboard or use key buttons to send out commands through the USB serial interface.
Show keyboard will bring up the keyboard on mobile devices. Extra buttons provide missing keyboard keys for mobile devices.
| Note |
|---|
By opening the Terminal tab, Woobm-USB will try to emulate the USB serial interface. On a successful attempt "Connection successful! " message will appear above the terminal window. You can enter commands from the keyboard or use key buttons to send out commands through the USB serial interface. Show keyboard will bring up the keyboard on mobile devices. Extra buttons provide missing keyboard keys for mobile devices. |
Settings
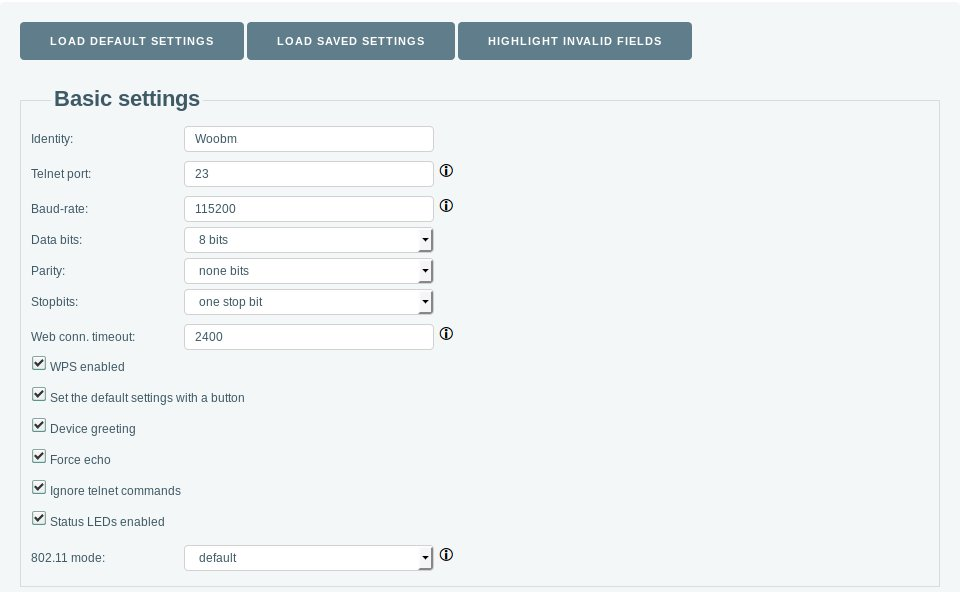
Settings tab provides basic configuration for Woobm-USB device. The basic settings part provide serial port, button, LED, and wireless general settings
Properties
| Property | Description |
|---|---|
| Identity (string; Default: Mikrotik) | Device identity is used for the DHCP client as the 'hostname' parameter when reporting it to the DHCP server and for neighbor discovery. |
| Telnet port (integer; Default: 23) | Port used for incoming telnet requests |
| Baud-rate (integer; Default: 115200) | Baud rate used for serial communication. Should match a host device. |
| Data bits (; Default: 8) | |
| Parity (; Default: None bits) | |
| Stopbits (integer; Default: 1) | |
| Web conn. timeout (integer; Default: 2400) | |
| WPS enabled (On/off; Default: On) | |
| Set the default settings with a button (On/off; Default: On) | |
| Device greeting (On/off; Default: On) | |
| Force echo (On/off; Default: On) | |
| Ignore telnet commands (On/off; Default: On) | |
| Status LEDs enabled (On/off; Default: On) | |
| 802.11 mode (; Default: default) |
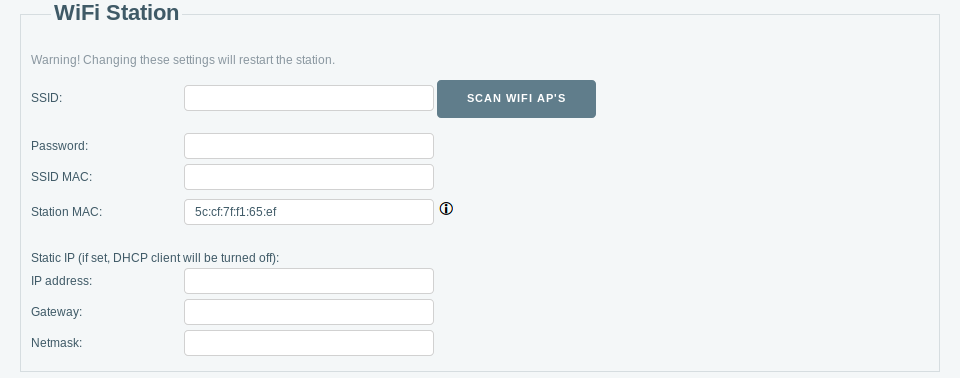
WiFi Station settings part provides settings wireless for Woobm-USB in client mode.
| Property | Description |
|---|---|
| SSID (string; Default: ) | Provide SSID of nearby Access Point, or use scan function. |
| Password (string; Default: ) | WPA-PSK and WPA2-PSK |
| SSID MAC (MAC; Default: ) | |
| Station MAC (MAC; Default: ) | |
| IP address (IP; Default: ) | |
| Gateway (IP; Default: ) | |
| Netmask (IP; Default: ) |
WiFi AP settings part provides wireless settings for Woobm-USB in Access Point mode.
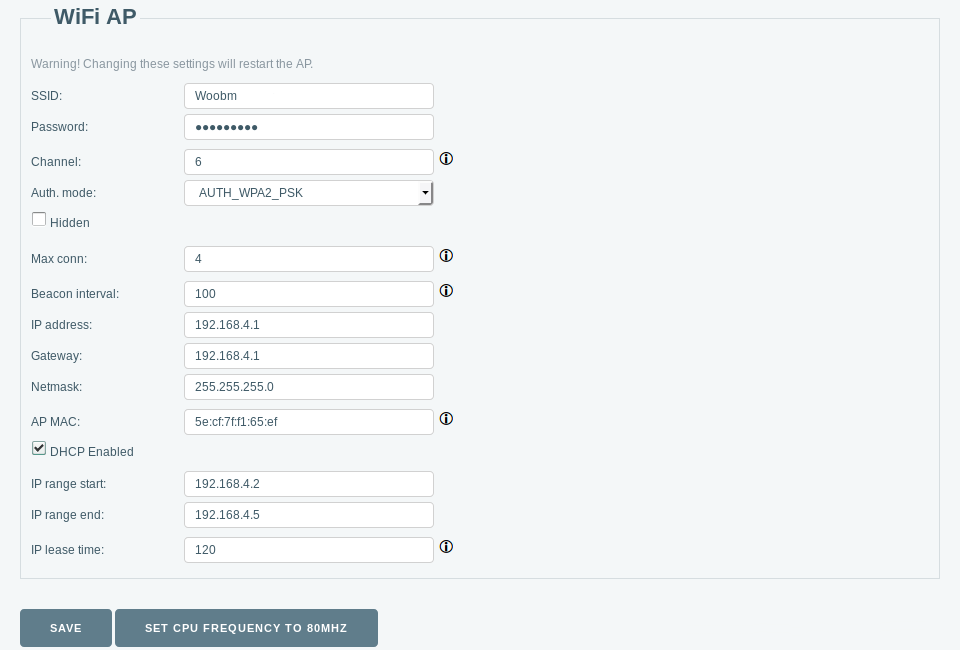
| Property | Description |
|---|---|
| SSID (string; Default: ) | SSID of Woobm-USB Access Point |
| Password (string; Default: ) | WPA-PSK and WPA2-PSK |
| Channel (; Default: 6) | Wireless channel used for AP |
| Auth. mode (; Default: ) | |
| Hidden (On/Off; Default: Off) | |
| Max conn (1 to 4; Default: 4) | Maximum allowed clients to Access Point. |
| Beacon interval (100 to 60000; Default: 100) | How often Access point broadcasts AP information. |
| IP address (IP; Default: 192.168.4.1) | |
| Gateway (IP; Default: ) | |
| Netmask (IP; Default: ) | |
| AP MAC (MAC; Default: ) | |
| DHCP Enabled (On/Off; Default: On) | Enable/disable DHCP server |
| IP range start (IP; Default: 192.168.4.2) | |
| IP range end (IP; Default: 192.168.4.5) | |
| IP lease time (; Default: 120) |
Upgrade firmware
Use the upgrade firmware tab for manual firmware upgrade. Firmware is available in the Product Support & Download section on our web page.
Telnet access
It's possible to use Telnet clients to access the serial port. For Telnet access open Woobm-USB address in telnet client. Woobm-USB forwards serial port to telnet client.
| Note |
|---|
Only one instance of the serial port bridge may be emulated. |
Button functionality
Button provides functionality for enabling WPS, reset configuration and send out a neighbor message (MNDP).
WPS mode
If a button is pressed for less than 5 seconds - WPS mode is enabled. If a connection is made to the Access point - the Woobm station configuration is saved and old data is overwritten.
Reset configuration
To reset configuration:
1) Woobm should be unplugged (removed from the USB port);
2) Press and hold the button;
3) Attach Woobm to the USB port while holding the button;
4) Wait till the red LED light starts blinking;
5) Release button;
The device will reset be reset to the default configuration.
Neighbor message
The neighbor message is sent out automatically every minute. To send a message out manually hold the button for at least 5 seconds until the LED light stops blinking
...
.
Operating system support
The device supports Woobm software only. It can be updated, by uploading a newer.BIN file through the web configuration page.
...